
Being a Quality Analyst could get us into a loop of testing an application at every iteration again and again. Repeating the same thing and figuring out ways to make the process efficient, it’s an endless quest. So, for good progress, what do you think will make the process efficient? Obviously yes! Automating the testing process is one good option that reduces repetition time. And choosing the right option decides how seamlessly a Quality Analyst could make things happen! So, in this blog post, let’s explore one such choice automation testing using Selenium with Python! Let’s start our knowledge journey from here, stay awake, folks! We have a long journey to fall into. Let’s start our knowledge journey from here, stay awake folks we have a long way to go.
About Selenium & Python:
Selenium:
Selenium is an open-source tool to automate and test web browsers. It supports programming languages like Ruby, Java, NodeJS, PHP, Perl, Python, and C# to write test scripts. However, Selenium aims to make the testing of dynamic web applications effortless, which is the best use of it. Since Selenium requires programming languages, the run time of testing is made much more feasible.
Some reasons for selenium’s growing popularity as an automation tool include,
1. The processing of test scripts could be performed in several operation systems- Windows, Mac, or Linux.
2. Several browsers for processing the test scripts includes Mozilla Firefox, Internet Explorer, Google Chrome, Safari, and Opera.
3. TestNG can be integrated into Selenium, and for managing test cases and generating reports: JUnit gets used.
4. Continuous testing is achieved through Maven, Jenkins, and Docker.
Selenium Tools:
Selenium Tools:
Selenium also has heights of growth based on its use and need for automation.
It has four components:
1. Selenium Integrated Development Environment (IDE)
2. Selenium Remote Control (RC)
3. Selenium WebDriver
4. Selenium Grid
Python
Python is an interpreted, interactive, and object-oriented scripting language compared to other programming languages. It is highly readable and uses English keywords frequently. It has few syntax formats, but other languages use punctuation and high syntax formats for code constructions.
1. Compilation before execution is unnecessary because it processes at runtime by the interpreter.
2. Interaction with an interpreter to write programs in the Python prompt is easy.
3. It supports object-oriented programming that encapsulates programs seamlessly with the objects.
4. For beginners, it helps them to gain knowledge or develop codes into applications. So it is highly considered a beginner-friendly language.
Why selenium in Python?
Even though Selenium has multiple programming languages, Python programming in Selenium has different approaches. Based on the common understanding, Python programming is programmer-friendly and works efficiently in Selenium. Compiling the syntax to test the scripts are easy in Selenium. Testing web & mobile applications, GUI, and gaming applications using the Selenium Python combination has benevolent effects and advantages.
1. The run time of the script and the execution time is minimized.
2. Understanding the code flow of Python is simple because it uses indentation instead of braces in the initiation and end blocks.
3. Using simple English words to construct a program reduces the code weight.
4. Selenium with Python is easy to read and dynamically typed.
5. Python’s API utilization connects the browser easily through Selenium.
6. In Selenium Python programming, the compilation gets neglected before running the code.
Let’s get started with the installation process
Installation of Python and Pycharm:
Python Installation:
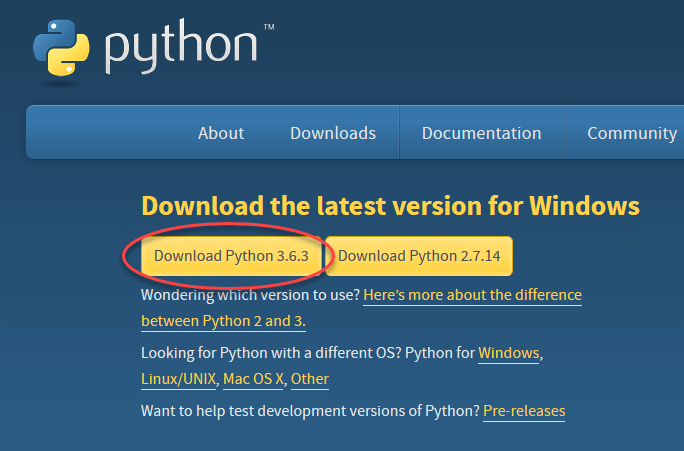
Step 1) Visit the official website to download the latest version of Python.
Step 2) To install the Python run the downloaded .exe file.
Click ‘Install Now.’
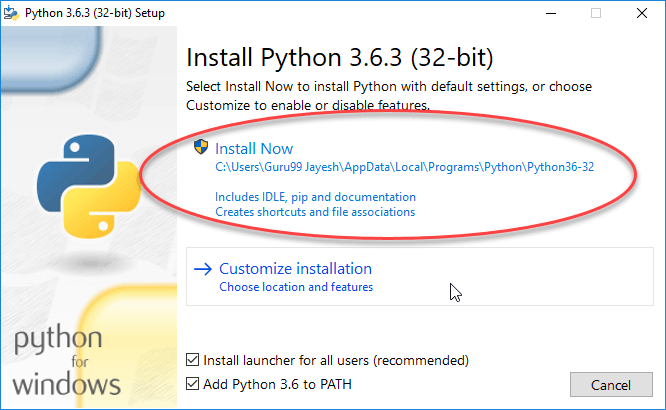
Step 3) After installing Python, a confirmation message that the “Setup was successful” will be displayed on the screen.
Click the Cancel button at the bottom right to close the screen.

Pycharm Installation:
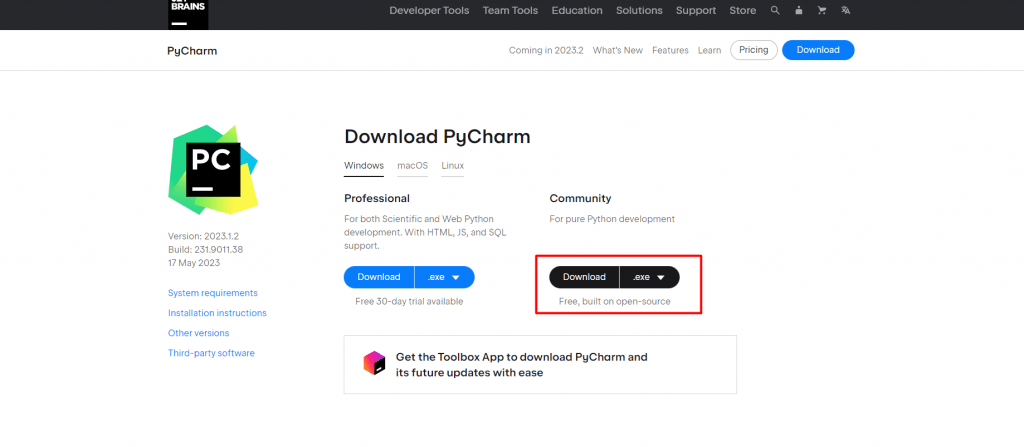
Step 1) Visit the official website to download the latest version of PyCharm.
Click the Download button below the community section.
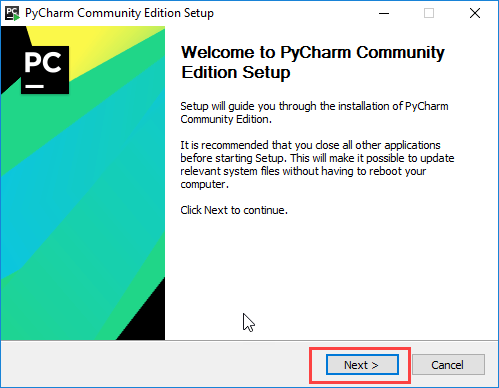
Step 2) Run the .exe file to install PyCharm. Once the download is complete,
Click Next.
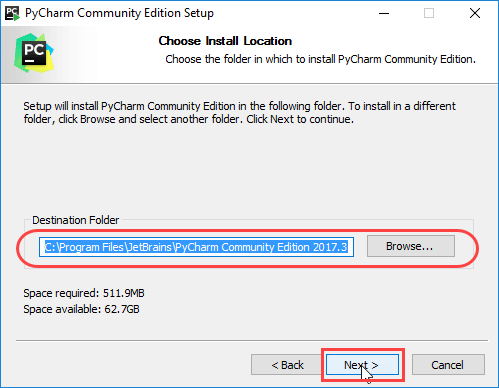
Step 3) If necessary, change the installation path and click Next.
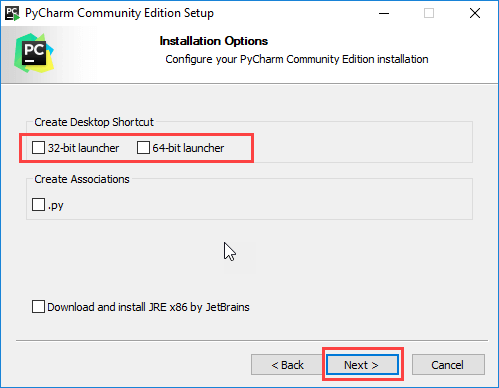
Step 4) If a desktop shortcut is required, click the 32-bit launcher checkbox or 64-bit launcher checkbox and click Next.
Step 5) Choose the start menu folder. Keep selecting JetBrains and clicking on Install.

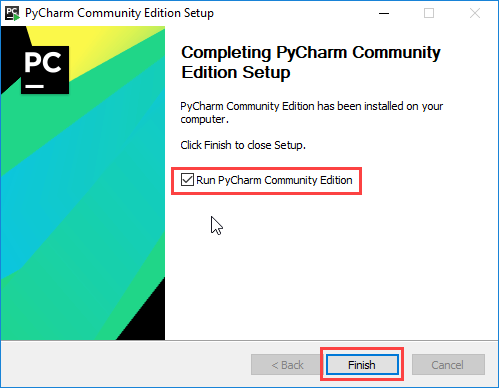
Step 6) After completion of installation, check the ‘Run PyCharm Community Edition’ checkbox and click Finish.
Selenium Package Installation in Pycharm
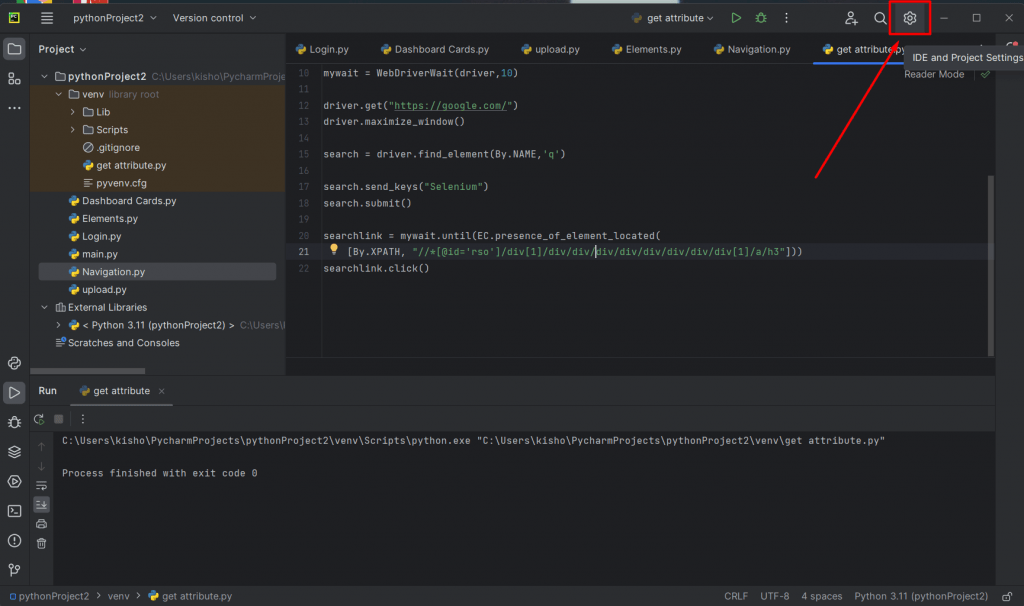
Step 1) Click the ‘Settings’ icon at the top right or the hamburger icon – File – Settings.
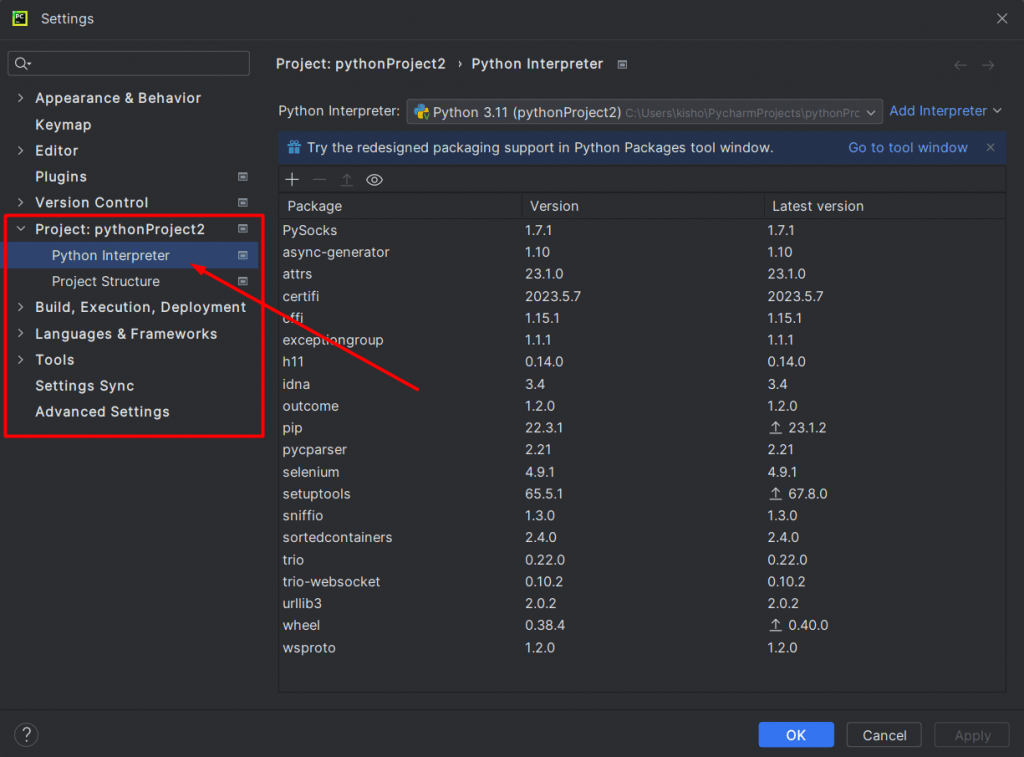
Step 2) Click ‘Python Interpreter’ at the left.
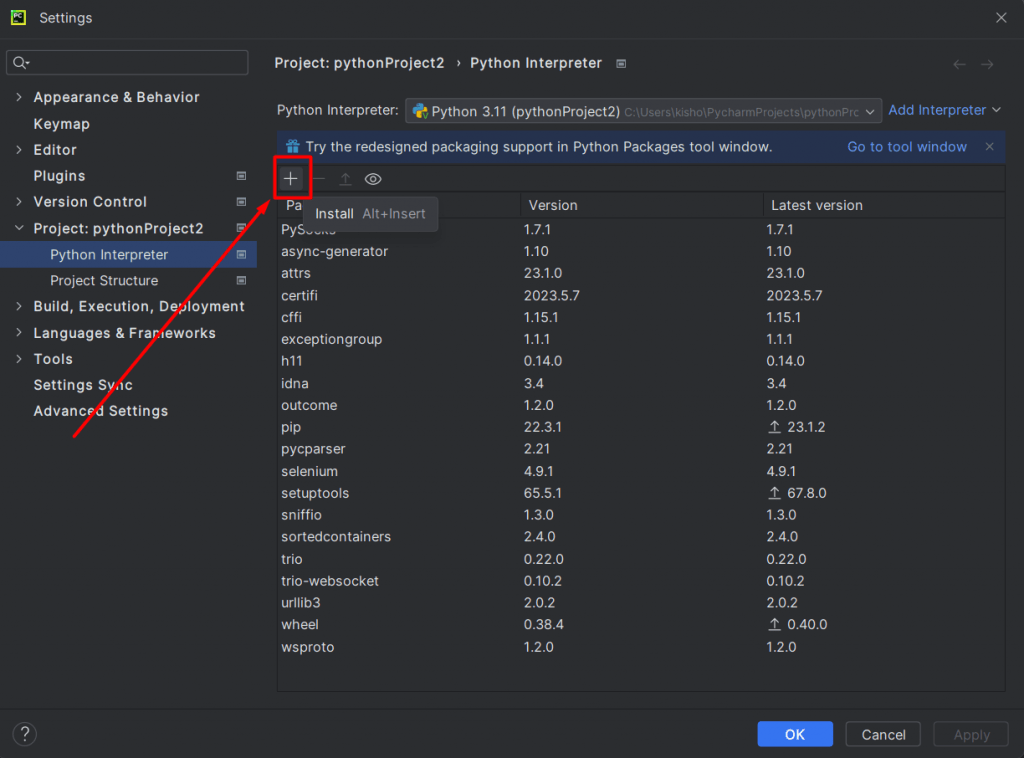
Step 3) Click the + icon above the package list.
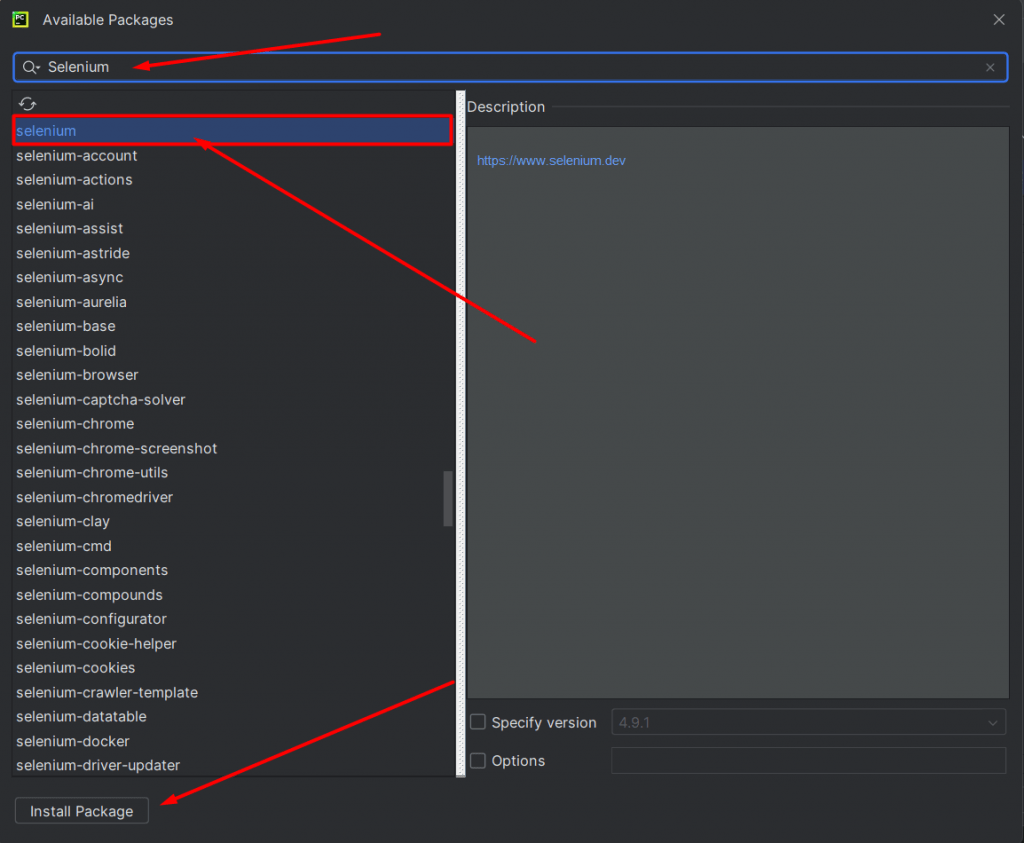
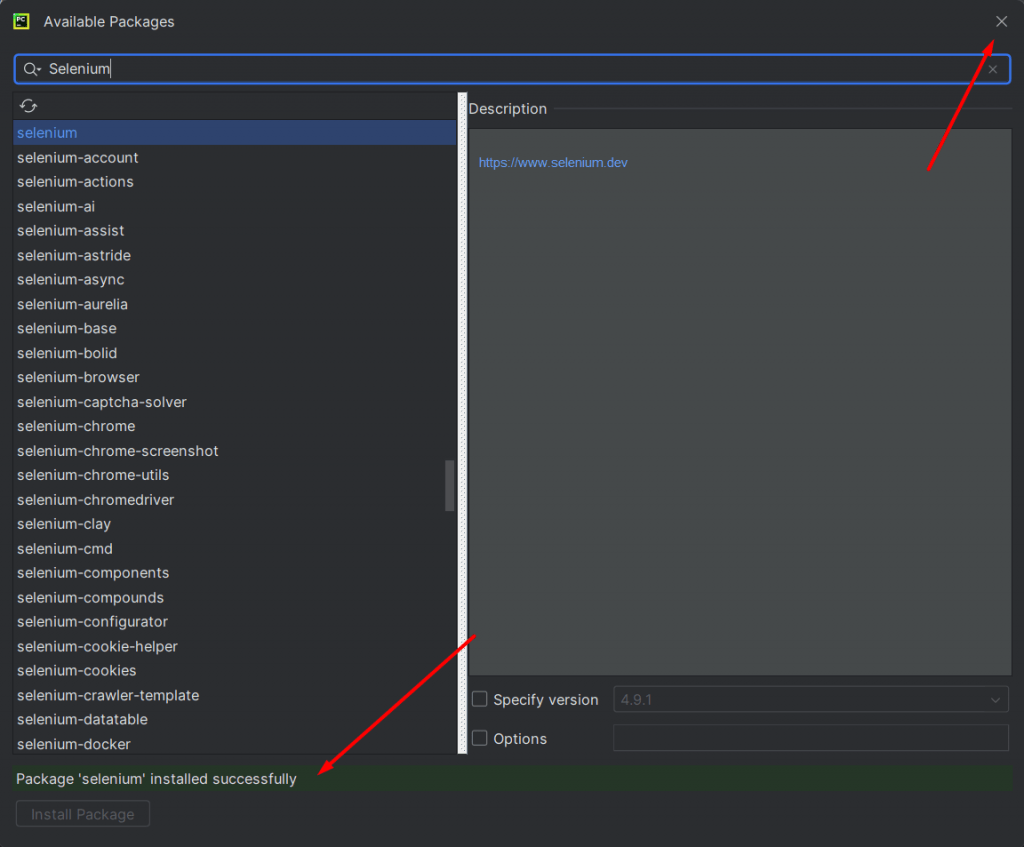
Step 4) Search “Selenium” in the search field, select the package in the list and click the ‘Install Package’ button at the bottom.
Step 5) If the success message gets displayed at the bottom for the package installed, click the close icon at the top right.
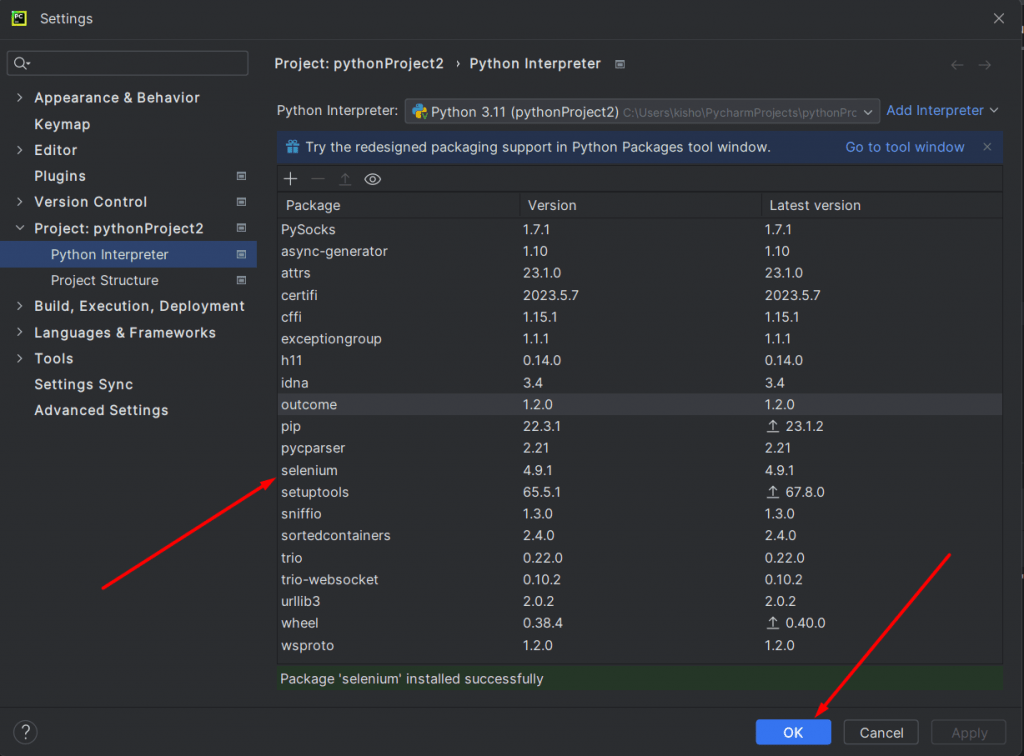
Step 6) Once the package gets installed, it will be displayed in the list.
Once verified the package installation, click the OK button at the bottom of the screen
Conclusion
Here we have seen the pre-setup of selenium automation testing using Python programming. In the next blog, we will be delving deep into the same. Until then, keep working and keep looking for ways to learn more! Learning always paves the way for growth! And I am happy to share my budding knowledge of Automation testing using Selenium on Python.