
Welcome to my very first Blog.
Being a beginner in learning Ruby on Rails, I find Devise as a flexible authentication solution based on the Rails Engine. Devise will always allow you to have multiple models so that they are signed in at the same time.
Implementing Devise gem.
We will be implementing Devise Gem to a Patients Login app.
Step1: Create a new Rails app by running the following:
$ rails new hospital_management
Step2: Open Gemfile in the root of the project folder and add the following to the file.
gem 'devise'

Step3: Run
$ bundle install
in the terminal.
Step4: Next you need to run the Generator.
$ rails generate devise:install
Step5: Up next we should Generate a model by running the following command. here the Model is for Patients
$ rails generate devise PATIENT

The above command will create a Migration file in the db/migrate. to run the migration file: run
$ rails db:migrate
This will create the table in the database for the Patients.
Step6: Add before_action :authenticate_patient! to app/controllers/application_controller.rb, so that each Patient is Authenticated.

Step7: Add the following lines to app/views/layouts/application.html.erb. As a result, you will get alerts and notifications.
-
<%= notice %>
-
<%= alert %>

Step8: Push your code to a git Repository.
These kinds of Patients Database can be used in Healthcare, Clinics, etc.
Hosting in Heroku
Heroku is a container-based cloud Platform as a Service (PaaS). Developers use Heroku to deploy, manage, and scale modern Web Applications. Heroku supports several languages
Note: Heroku does not support SQLite Database. Make sure you don’t have Sqlite in Production Group in Gemfile. Add
gem 'pg' #postgreSQL Database

Make sure you have an account in Heroku.
Step1: Firstly, Go to Heroku Dashboard and click the button with the text “New” at the top right corner of the dashboard and then click “Create new app“,
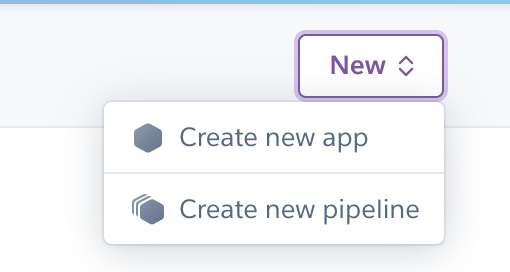
This will redirect you to a page as shown below.

Step2: Give your app a Name and select a region as per your preference and click Create app which will redirect to a page as below:

I consider Heroku git as a preferable way for Deployment.
Step3: Install Heroku CLI.
Step4: Run
$ heroku login
to log in to your Heroku account.
Step5: Run,
$ heroku git:remote -a PROJECT_NAME
, to set Heroku as a remote to your project.
Step6: After that, run the following commands.
$ git add .
$ git commit -m "A meaning full commit message"
$ git push heroku BRANCH_NAME
and will see your URL and “deployed to Heroku” message.
And that’s how you use Devise Gem for authentication and Host an application in Heroku.
Bye.