
Learning new things is quite common for developers. Now its time to learn an interesting topic which is evolving around RoR developers. A concept that provides models, collections, views and connects all existing API over RESTful JSON interface which is Backbone.js
Now let see how to perform basic CRUD operation using backbone.js in rails.
First let create a sample app named “Inspection”
[source language=”ruby”]
rails new Inspection
[/source]
In your Gemfile, add this line
[source language=”ruby”]
gem “rails-backbone”, ‘0.9.10’
[/source]
rails-backbone gem makes our task easier to use backbone in our rails application
Run the following commands from terminal
[source language=”ruby”]
bundle install
rails g backbone:install
[/source]
This command creates the basic structure for our backbone files
Now lets create a scaffold for Checklist
[source language=”ruby”]
rails g scaffold Checklist title:string comments:string
rake db:migrate
[/source]
The above usually generates rails server side crud scaffolding.
We can generate backbone.js crud scaffolding to perform simple single page crud operation using
[source language=”ruby”]
rails g backbone:scaffold Checklist title:string comments:string
[/source]
Now finally we have to edit app/views/posts/index.html.erb with following
[source language=”ruby”]
[/source]
This creates a new instance of our Router which will handle the whole CRUD.
Now starting our server, we can access fully functioning single page crud app for Checklist models. The interesting part is to deal with file uploads. File upload in rails can be done easily with paperclip gem
But if in case we are dealing with backbone.js, we have to approach another way to send attachment to server. In that case we can use jquery-fileupload-rails gem.
To achieve file-upload in our backbone rails application, some additional steps are
Add below lines to your Gemfile
[source language=”ruby”]
gem ‘jquery-fileupload-rails’,’0.3.0′
gem ‘paperclip’,’3.4.1′
[/source]
and run
[source language=”ruby”]
bundle install
[/source]
Now In order to upload images to our model,we will run Paperclip generator command to save our images.
[source language=”ruby”]
rails generate paperclip Checklist photo
[/source]
Add below line to application.js
[source language=”ruby”]
//= require jqueryfileuploadbackbone
[/source]
Add below lines to Checklist.rb file
[source language=”ruby”]
attr_accessible :photo
has_attached_file :photo
[/source]
Edit your new.jst.ejs template as
[source language=”ruby”]
[/source]
Edit your new_view.js.coffee file to attach file using fileupload gem as
[source language=”ruby”]
save: (e) ->
@$el.fileupload
add: (e, data) ->
data.submit()
done: (e, data) =>
window.location = “/”
[/source]
Now in the checklist_controller.rb file, change the params in create method the following way
[source language=”ruby”]
@checklist = Checklist.new(:photo=> params[“photo”],:title => params[“title”],:comments => params[“comments”])
@checklist.save
[/source]
Now the image will be saved in public folder. In general, paperclip uses helper(Model.attribute.url) to get the full path of image but it will not work in backbone.js view
We will modify the index action to get the full path of the image. Replace the following line in index action
[source language=”ruby”]
@checklists = Checklist.find(:all)
@checklists.map{|k,v| k.photo_file_name = k.photo.url }
[/source]
In above, we are replacing the photo_file_name with full path.
Finally, we have done with all necessary changes needed to upload an image to rails backbone using paperclip and jquery fileupload gem.
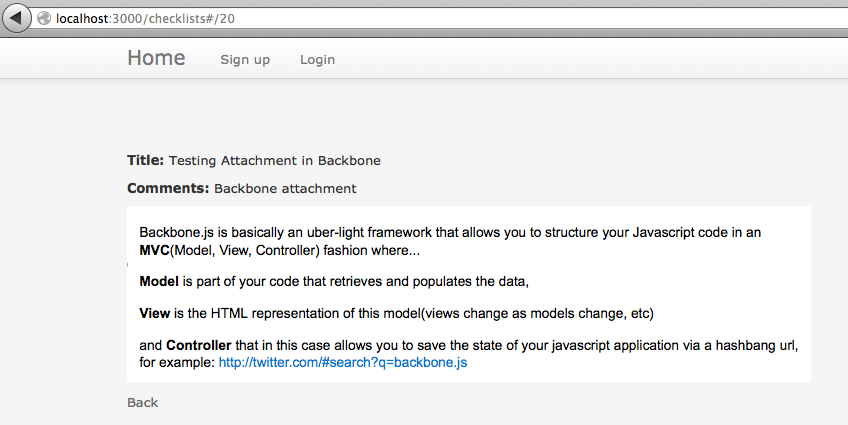
The output of Inspection application looks like this

I hope this blog will be helpful for understanding backbone fileuplaod concept. Source code of inspection application is available at https://github.com/Dhepthi/inspection. Please feel free to improve and send me a pull request. Any suggestion or comments are welcome.