
Maintaining test cases is a big work for testers. Here my folks I would like to share with you one of the best ideas for test case management.
Throughout my career I’ve had lots of struggles with maintaining test cases. Test cases were usually maintained in spreadsheets which would be either in MS Excel or Google Docs which has to be either shared or sent for others to view. Another thing is we should take a copy of the file for tracking daily status or else add a column for each day. I faced a lot of difficulties doing these stuff on a daily basis.
Then one day I got to know about Zephyr, a test case management tool which is connected with Jira. Testing people would have come across this word quite frequently. Yes it is indeed Jira the bug tracking tool!
What makes Zephyr?
Creation of a new test case:
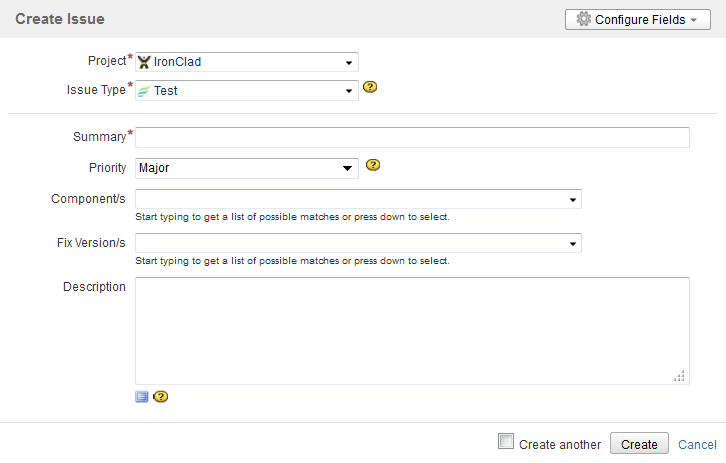
- Do one of the following to open the Create Issue dialog:
- Keyboard shortcut: ‘c’.
- At the top right corner of the screen, click the Create Issue link.
- While browsing a project, you can click on the test icon.
- In the displayed Create Issue dialog, enter the details for the test.
- Optional: If you want to create a series of test cases with similar details, you can select the Create Another check box.
When you select this option, a new issue dialog will appear right after your test is created, automatically per-populated with your previous test details, while leaving the ‘Summary’ field blank. - Finally click the Create button to create the test.
Creation of Test Description:
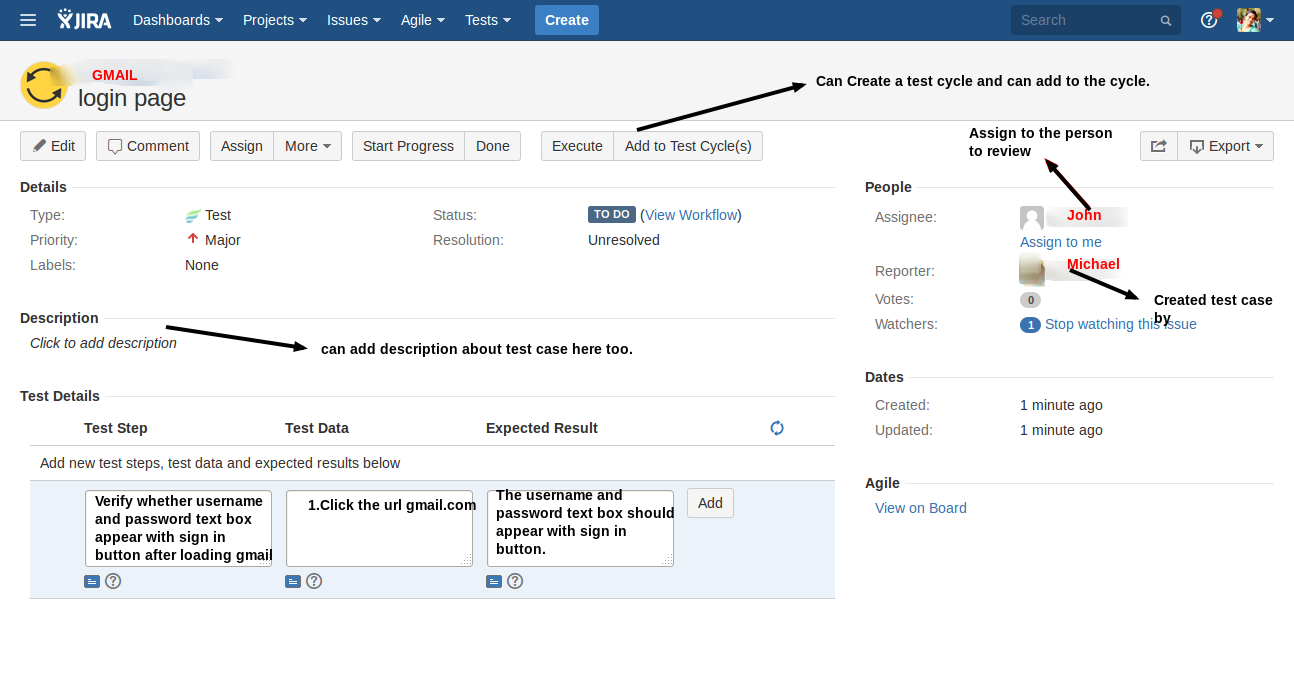
- After creating a test case, a unique test case ID will be generated and on clicking the unique ID, the above shown page will be displayed.
- The whole detailed procedure of the test case is recorded here.
- The test cases in the page gets saved automatically.
- The new test procedure can be added by clicking the “Add” Button near the “Expected Result”.
- After writing test case it can be assigned to a person, who needs to execute it.
Execution of Test cases:
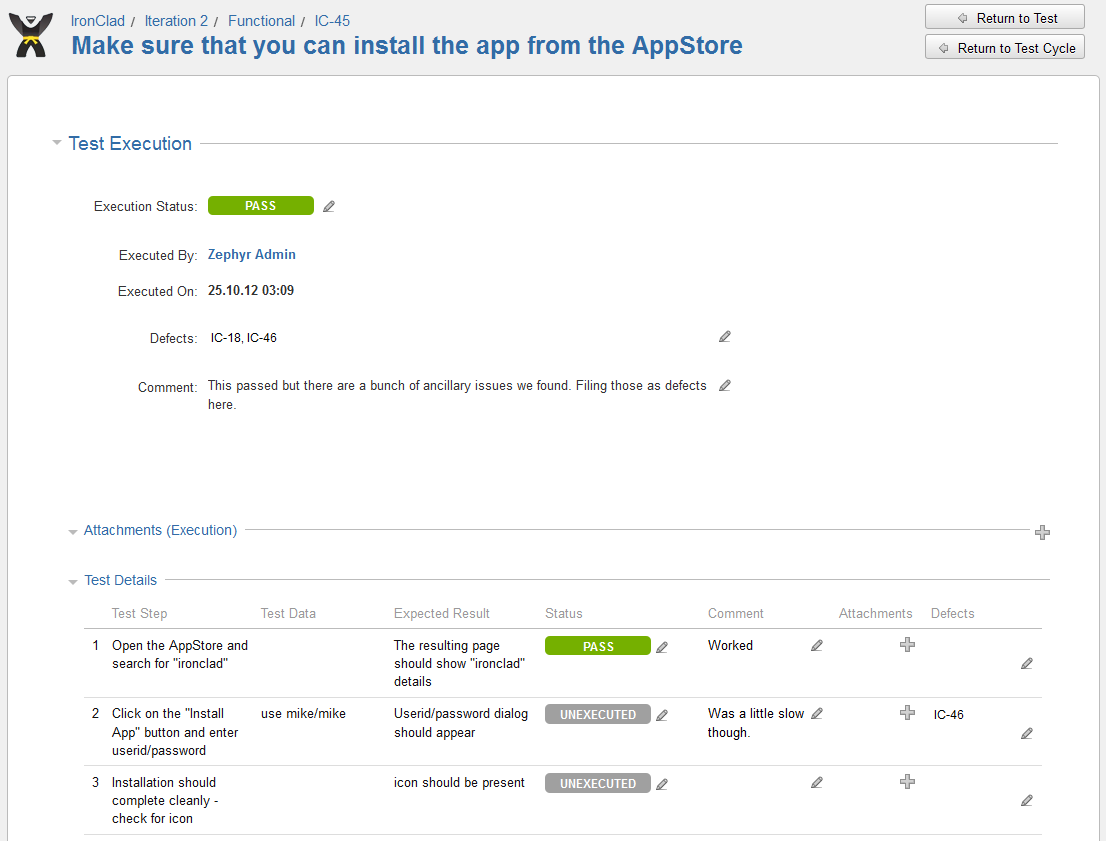
- On clicking the “Execute” button in the “Test Description” page it navigates to “Test execution”.
- The status of the whole Test case can be given in “Execution Status”, the execution status can be – Executed, Un-executed or Work in Progress.
- Executed by and Executed time will be automatically generated by the system as per the logged user who is executing the test case.
- The defects for the test case can be given in the defects text area.
- Comments regarding the test case and the build tested can be given in the “Comments” Text area.
- The status for the individual test case can be given, the status may be Pass, Fail or Work in Progress and the default status is Unexpected.
- If the particular test case fails, then the defect ID can be mapped directly to the individual test case also.
- Comments for the individual test case can also be given.
Execution status of the Test Case:

- The overall Execution status of the test case can be viewed below the Test case in the “Test Description Page”.
- The Details consist of Test case ID, Execution Status, Executed by, Executed Time.
Hope this blog gives you brief idea about Test Case Management using Zephyr. Please do place your comments below if you have newer test case management ideas and suggestions.
This is more like Atlissan JIRA… If i am not wrong.. Is there any additional features added in this tool?
Thank you so much Vignesh. Yeah it is a plugin available with Atlissan like Jira.The additional features of this tool is you can link the test cases to the story bug you created in Jira. You can clone the test cases multiple times. You can see the above two mentioned options in the “More” Link in the test case page.