
Hey everyone! As people working in software development, we all know that the design or UI plays an essential role in every application development. With Power Apps in place, one can opt for the design first approach which helps you focus more on getting all the design elements prior to development.
Power Apps are used to construct our software design requirement as actual software where an application carries different UI sections such as image, video, context, etc. Building UI for an application using Power Apps is much more comfortable in the low code development process.
In this blog, we will be looking at how we can easily customize the UI of an application in Power apps which does not require much coding knowledge or background and to be more precise does not require coding skills. Even a non-techy person can build their own application using Power Apps.
Check out our blog on How Power Apps will be the future of low-code development platforms & the impact it has on the Developer’s community.
Now let us all look into the customization process!
Customizing the application to our all requirements is a challenging one, but the power apps rectify all those struggles with low code. We will be looking in detail and the step-by-step process of the below topics,
- Background Image Setup
- Adding Thumbnail Image
- Page Navigation
- Video setup
- Scroll Navigation
- Publish and Share the application
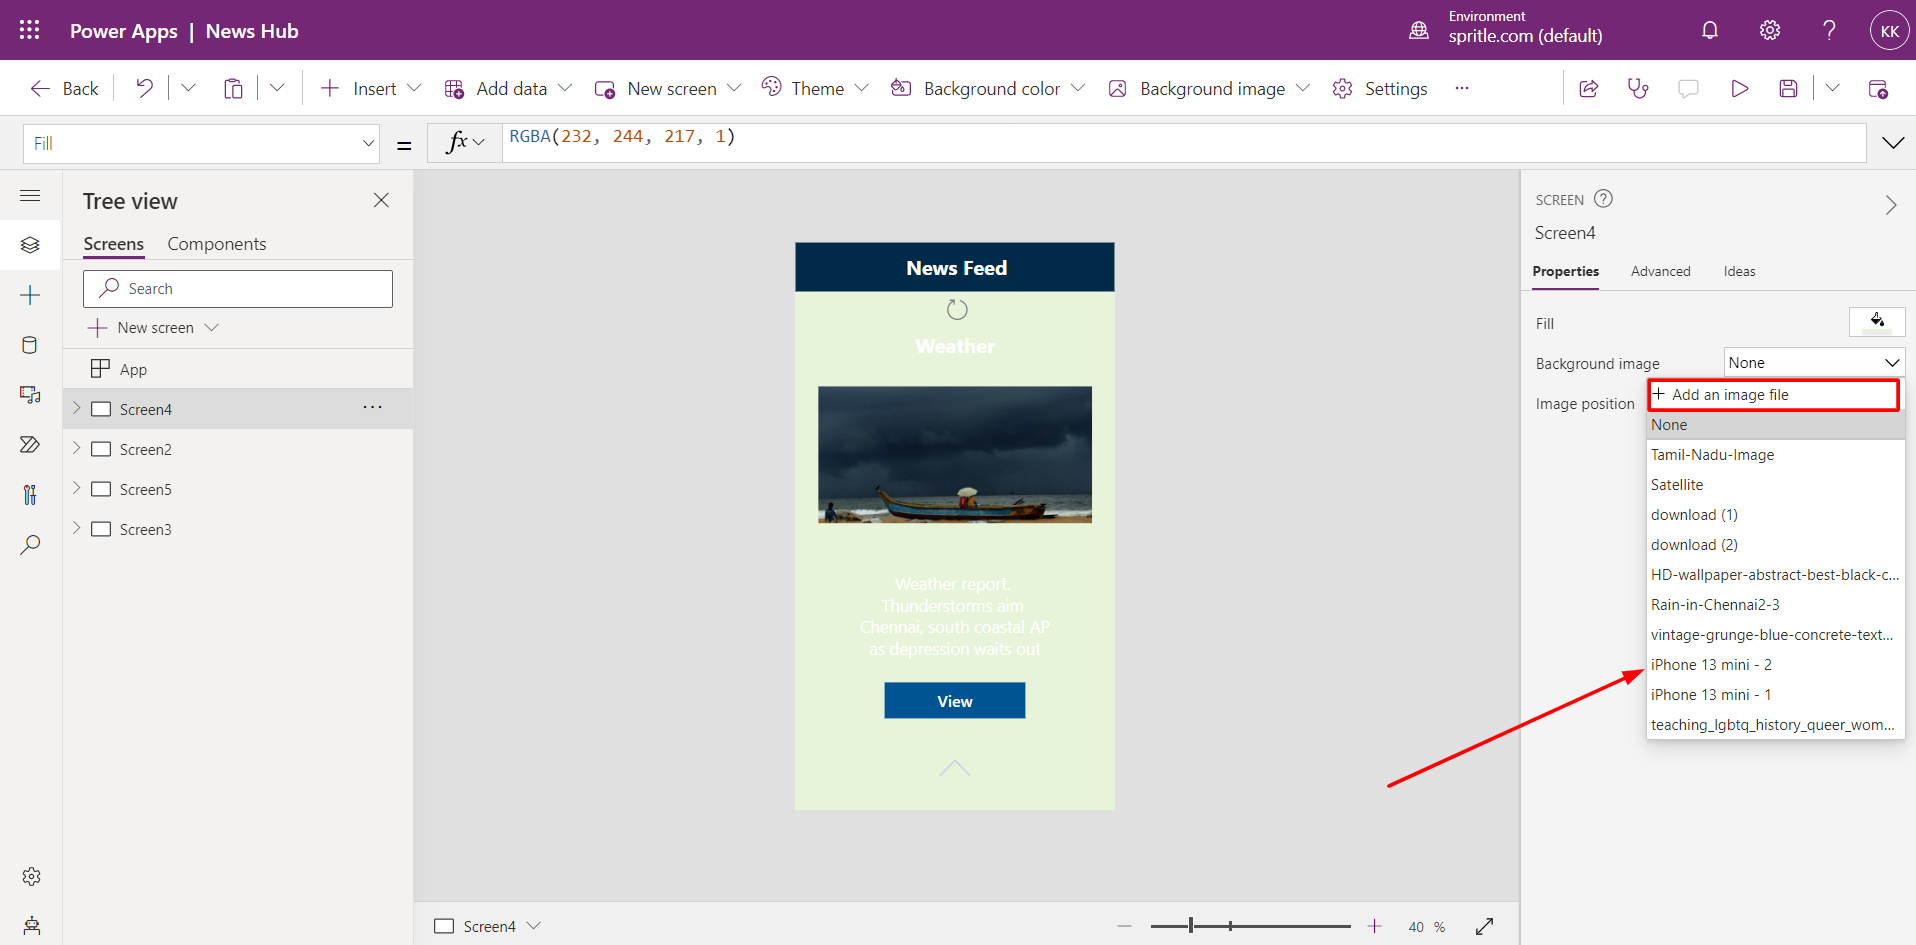
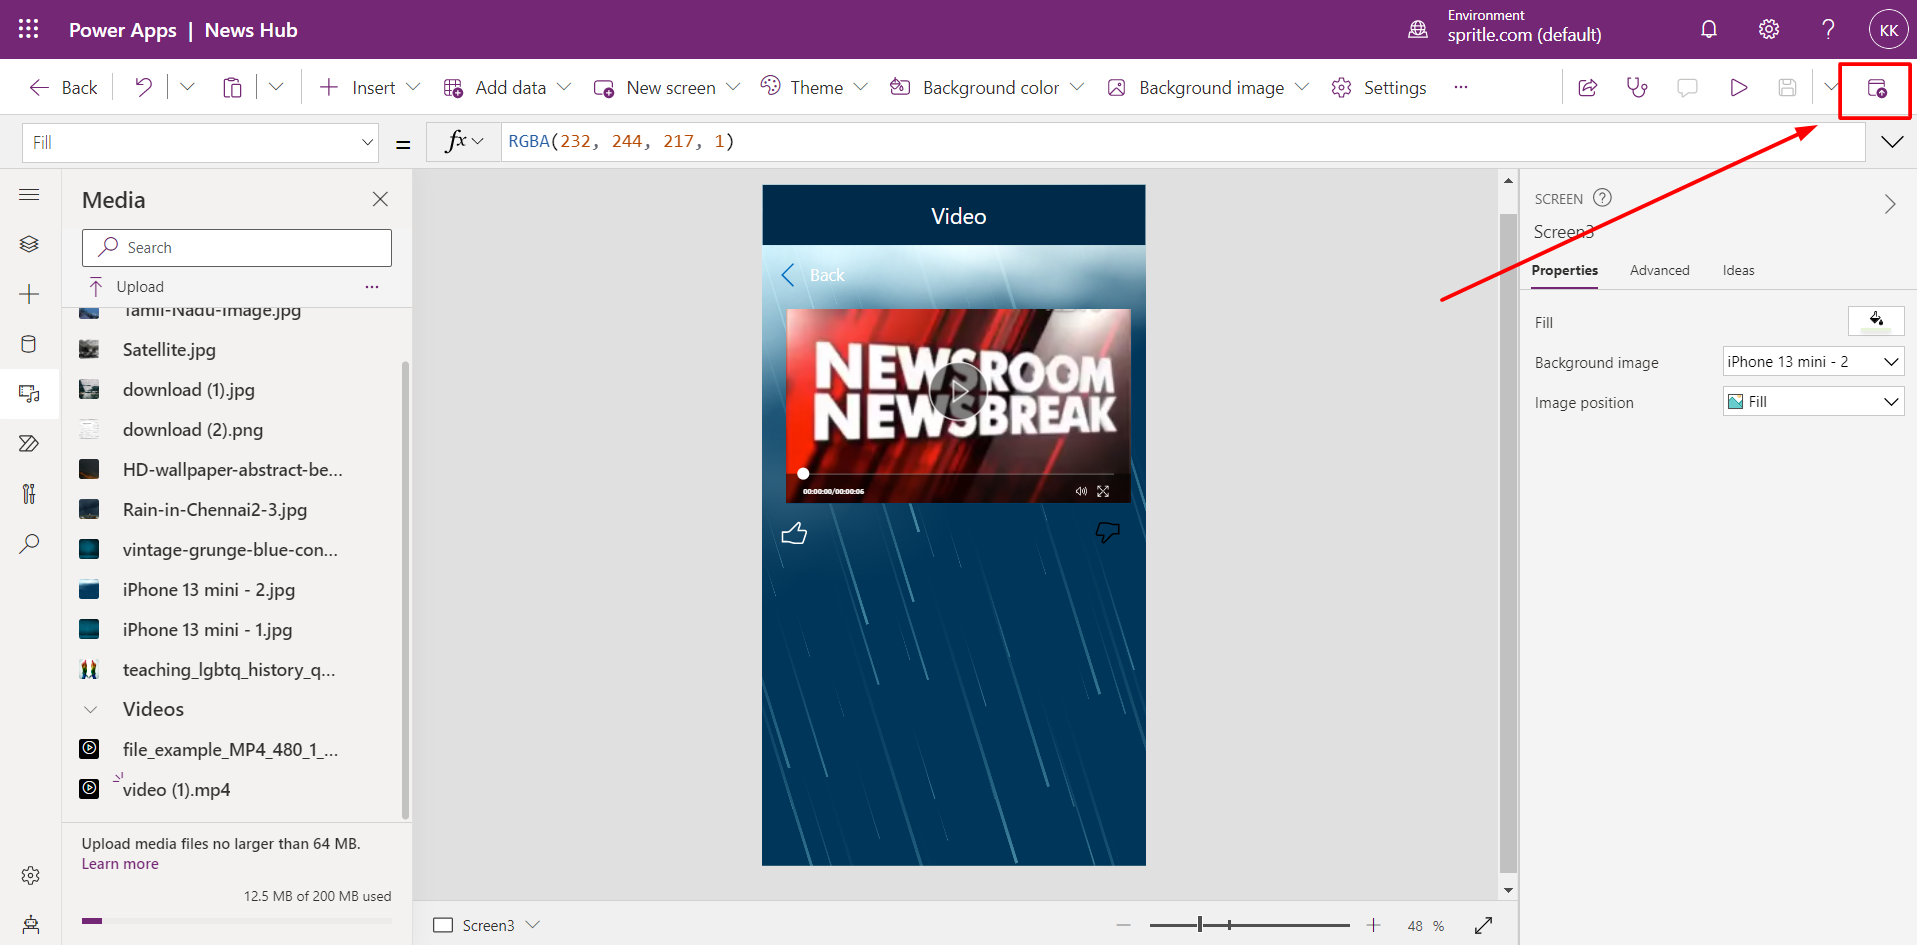
Background Image Setup- Add a background image for the screen.
STEP 1: Click the background image option field on the right side component. Choose ‘+ Add an image file’ from the dropdown.
STEP 2: Upload an image from the local machine and the uploaded image will be listed in the background image field.
STEP 3: Choose the image to be set as the background on the screen.
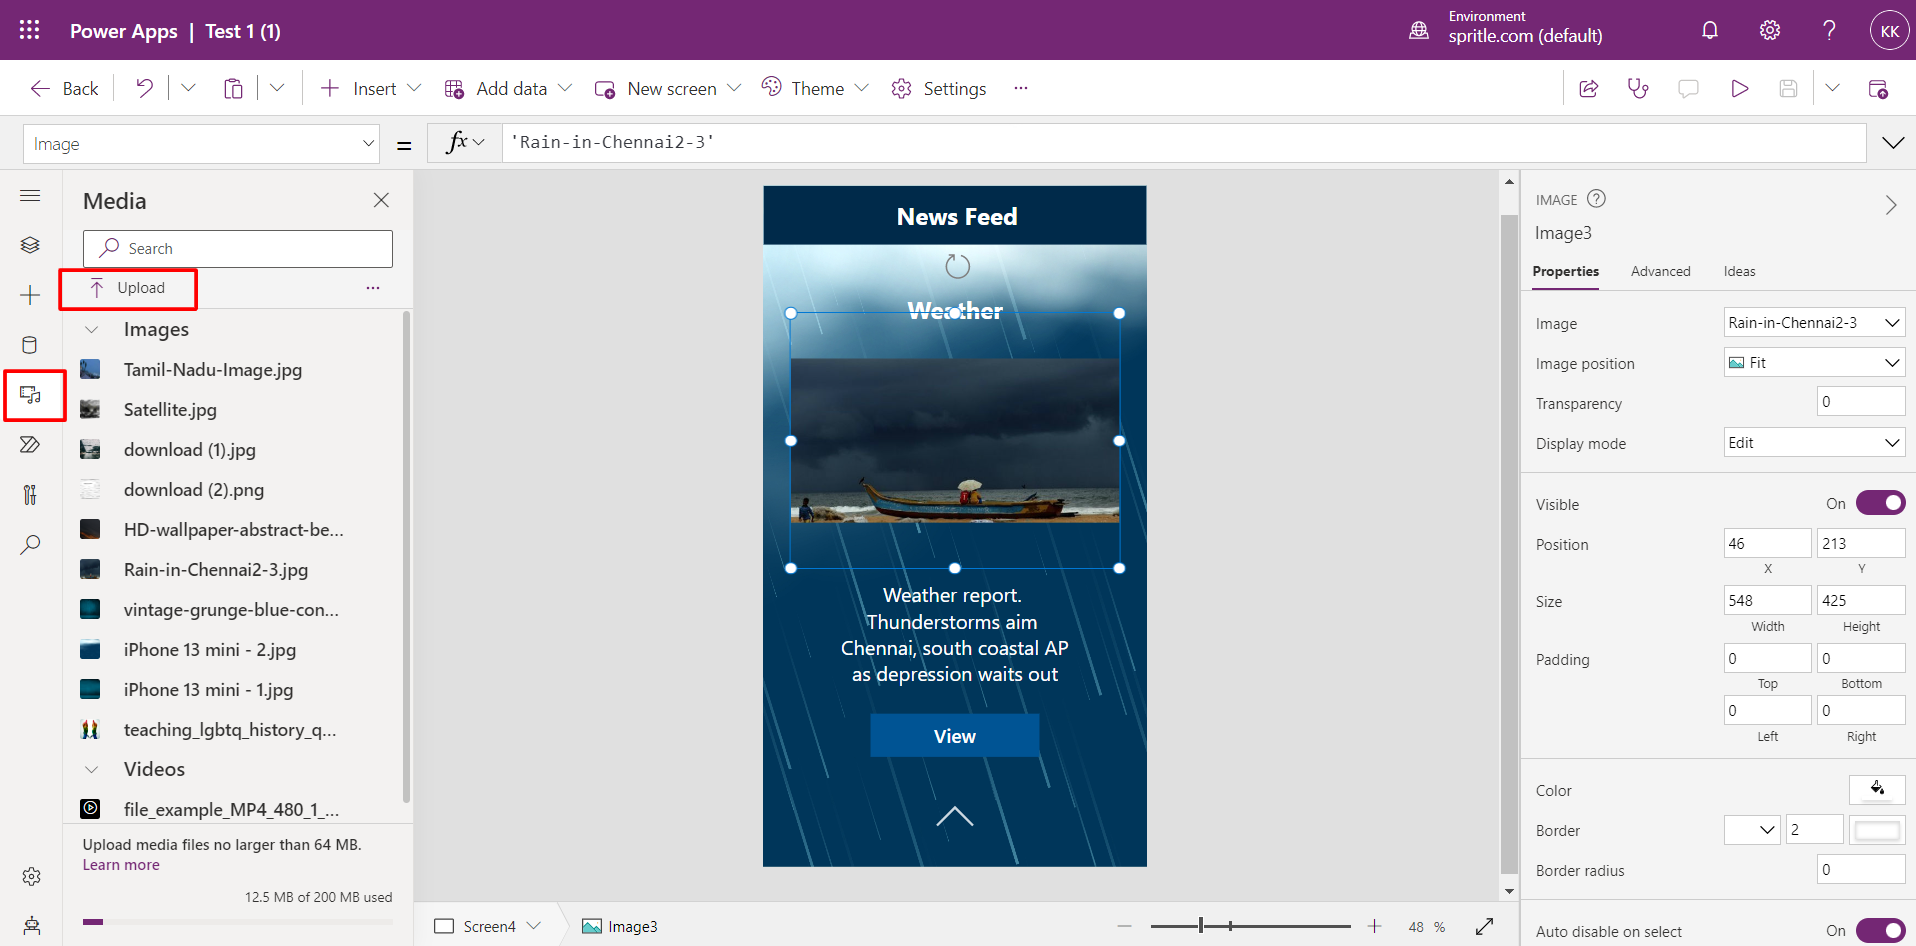
Adding Thumbnail Image- Add a thumbnail image for the news feed.
STEP 1: Click the media icon in the left side menu and choose the ‘Upload’ component.
STEP 2: Choose an image to upload from the local machine and click ‘Open’.
STEP 3: The uploaded image name will be listed on the left side component. Click on the image in the list to set it on the screen.
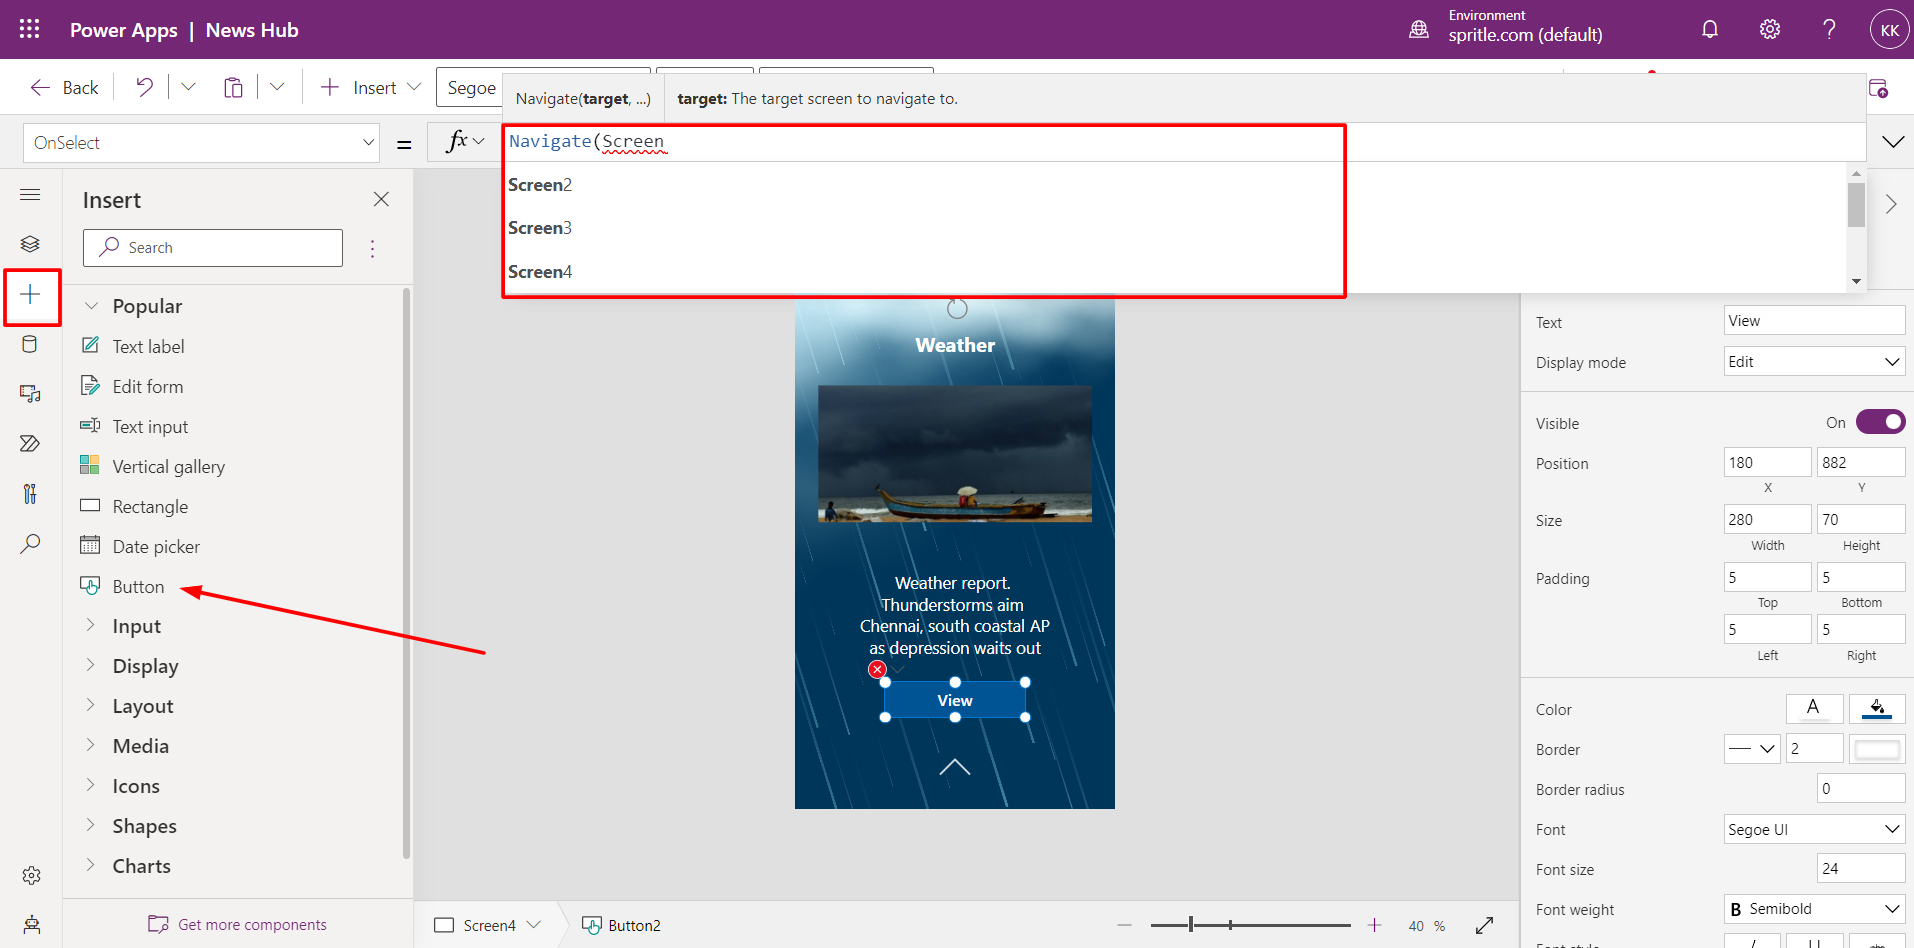
Page Navigation- Add the ‘View’ button and navigate it to the descriptive news page.
STEP 1: Click the ‘+’ icon in the left side menu and choose the button option. The chosen button will BE displayed on the screen.
STEP 2: Click the ‘View’ button on the news feed page. On the top write the function “Navigate (Screen Name)”
(Note: Add a screen before writing the function).
STEP 3: Add an image for a description and summary of the news.
STEP 4: Follow step 2 for the description image upload.
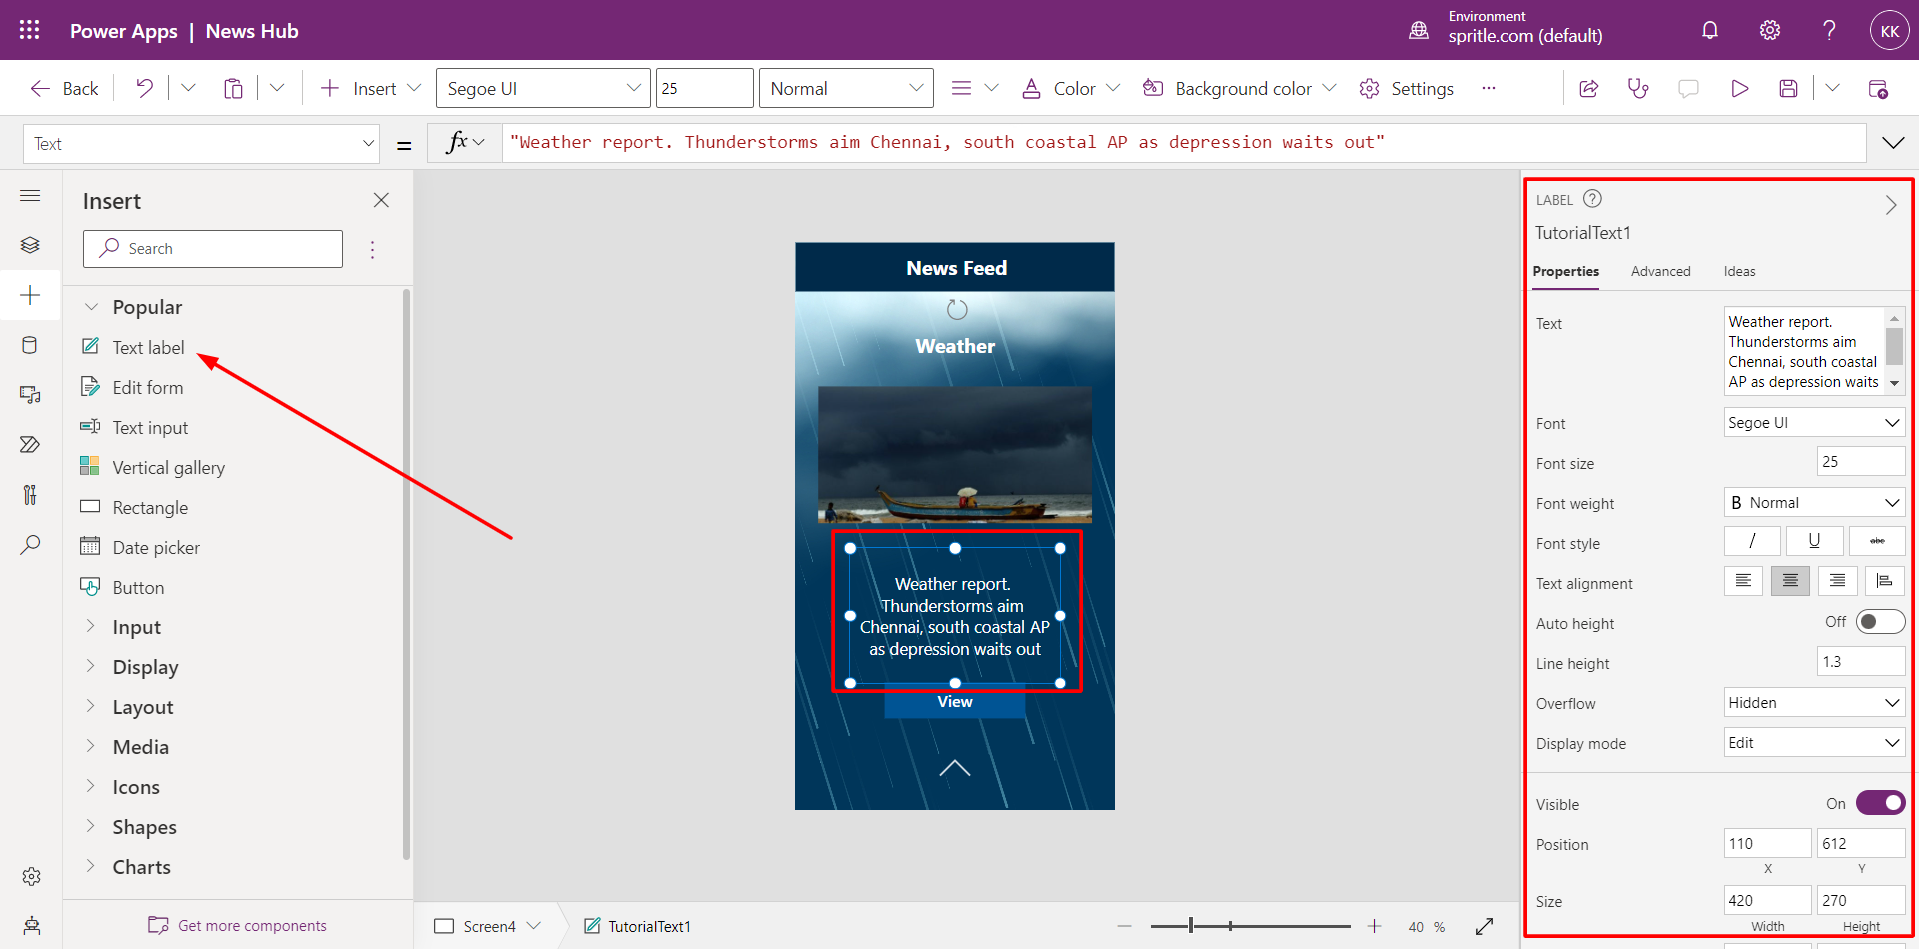
STEP 5: Click the ‘ + ‘ icon on the left side hamburger menu and click the ‘Text Label’ option. Edit the description at the right corner of the page.
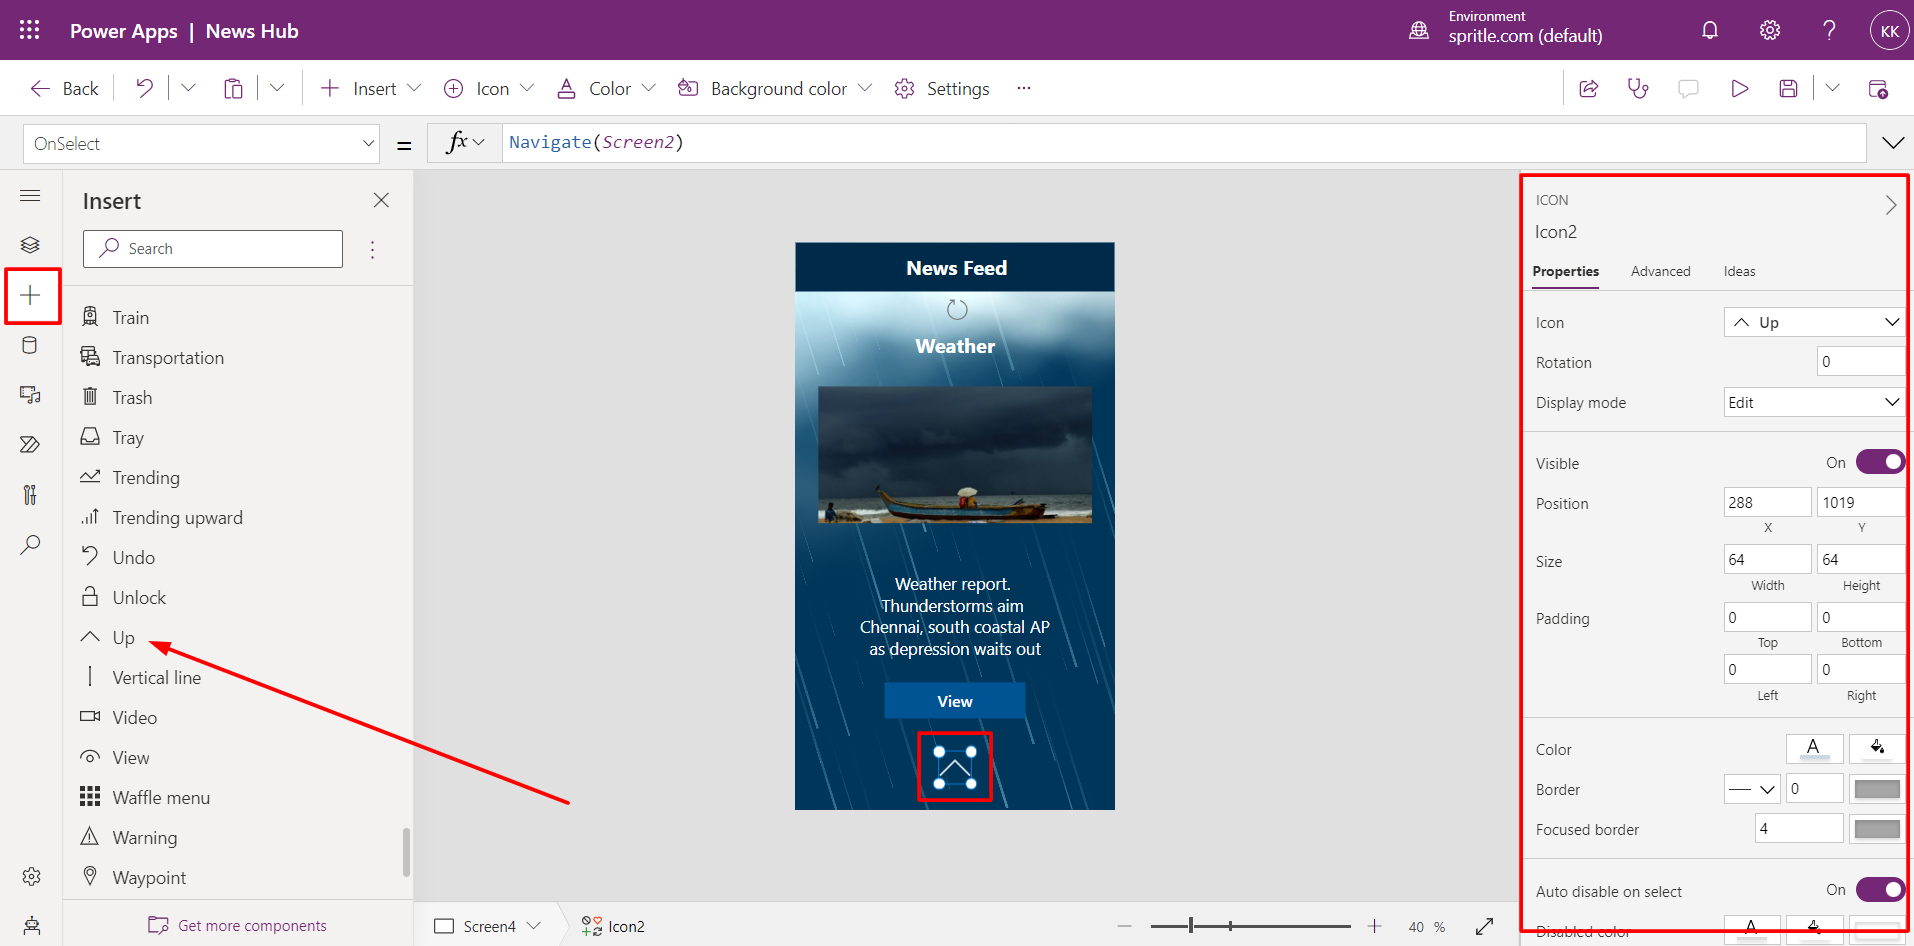
Step 6: Add the scroll-up icon on the screen and navigate it to the next news feed.
STEP 7: Click the ‘+’ icon in the hamburger menu at the left of the page and choose the Up icon under the icons list. Edit the icon added at the right side of the page.
STEP 8: Write the function “Navigation(Screen Name)” for the up arrow icon at the top.
(Note: Create a screen before writing the function).
Video Setup & Scroll Navigation- ‘Link Here’ button to view the news video page.
(NOTE: Follow step 7 of Page Navigation for the ‘Link Here’ button navigation).
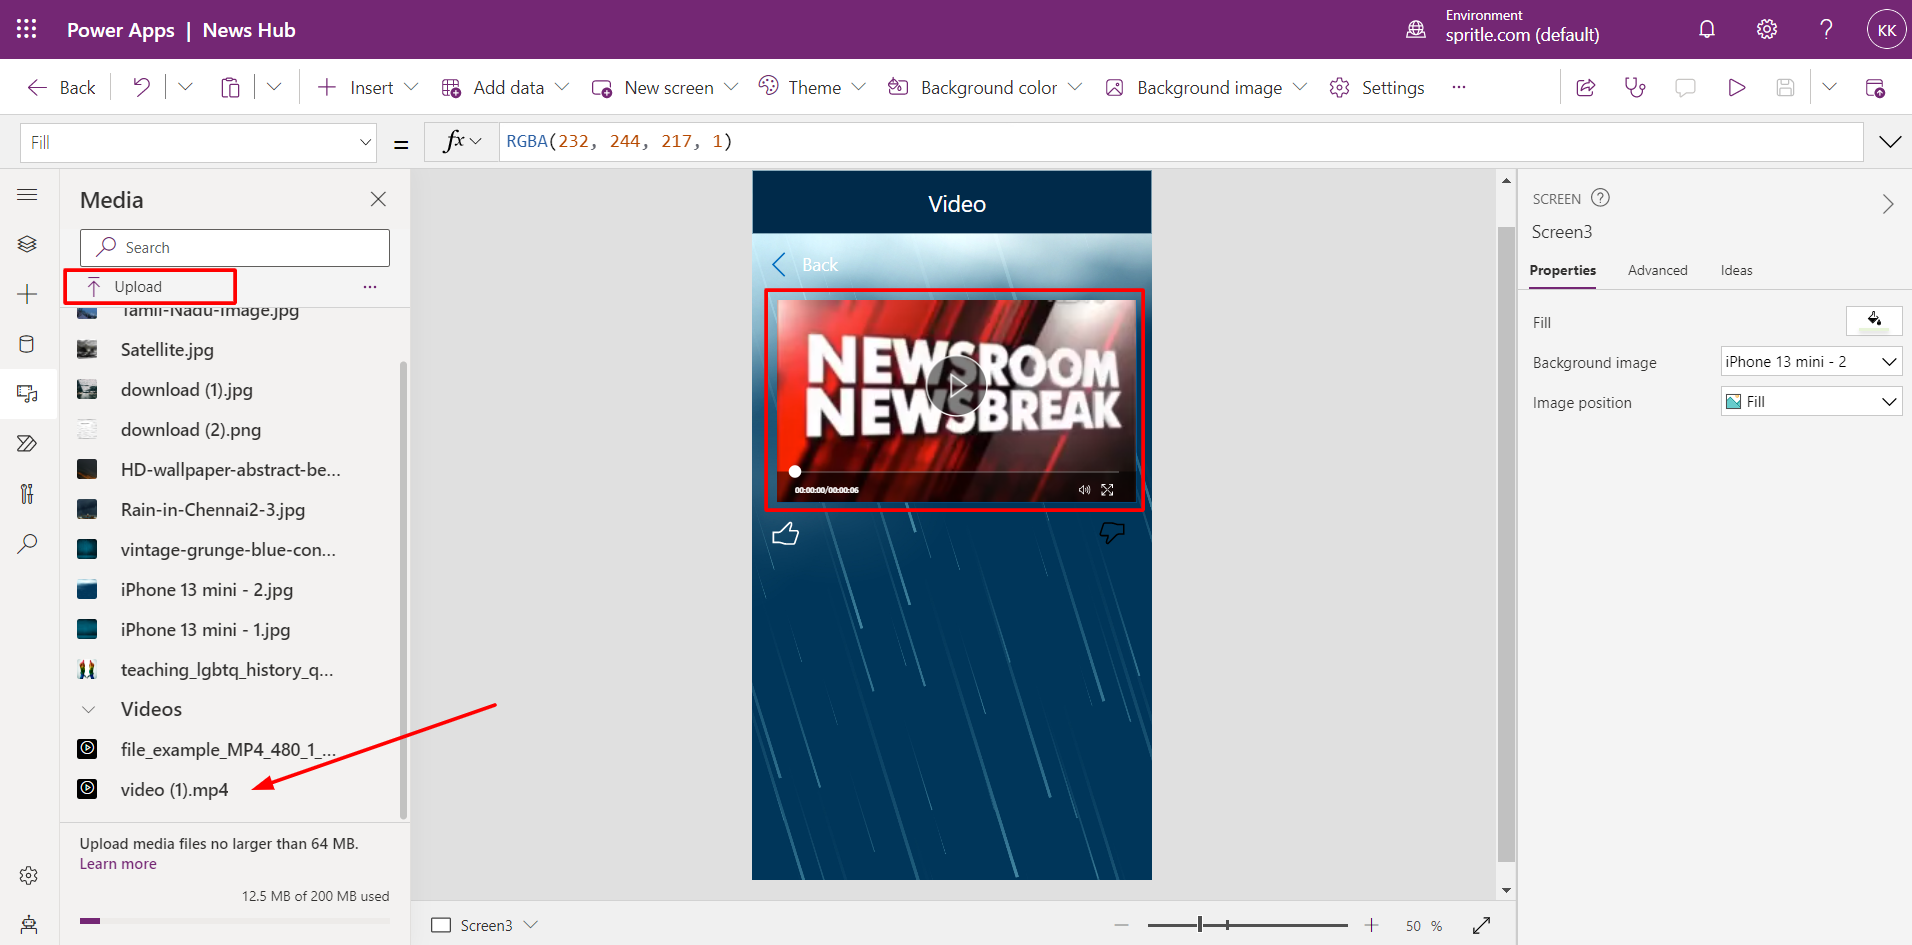
STEP 1: Upload and add the news video.
STEP 2: Click the Media icon in the side menu at the left.
STEP 3: Click ‘Upload’ and choose a video to upload. Click ‘Open’.
STEP 4: Click the video uploaded in the list to add to the screen.
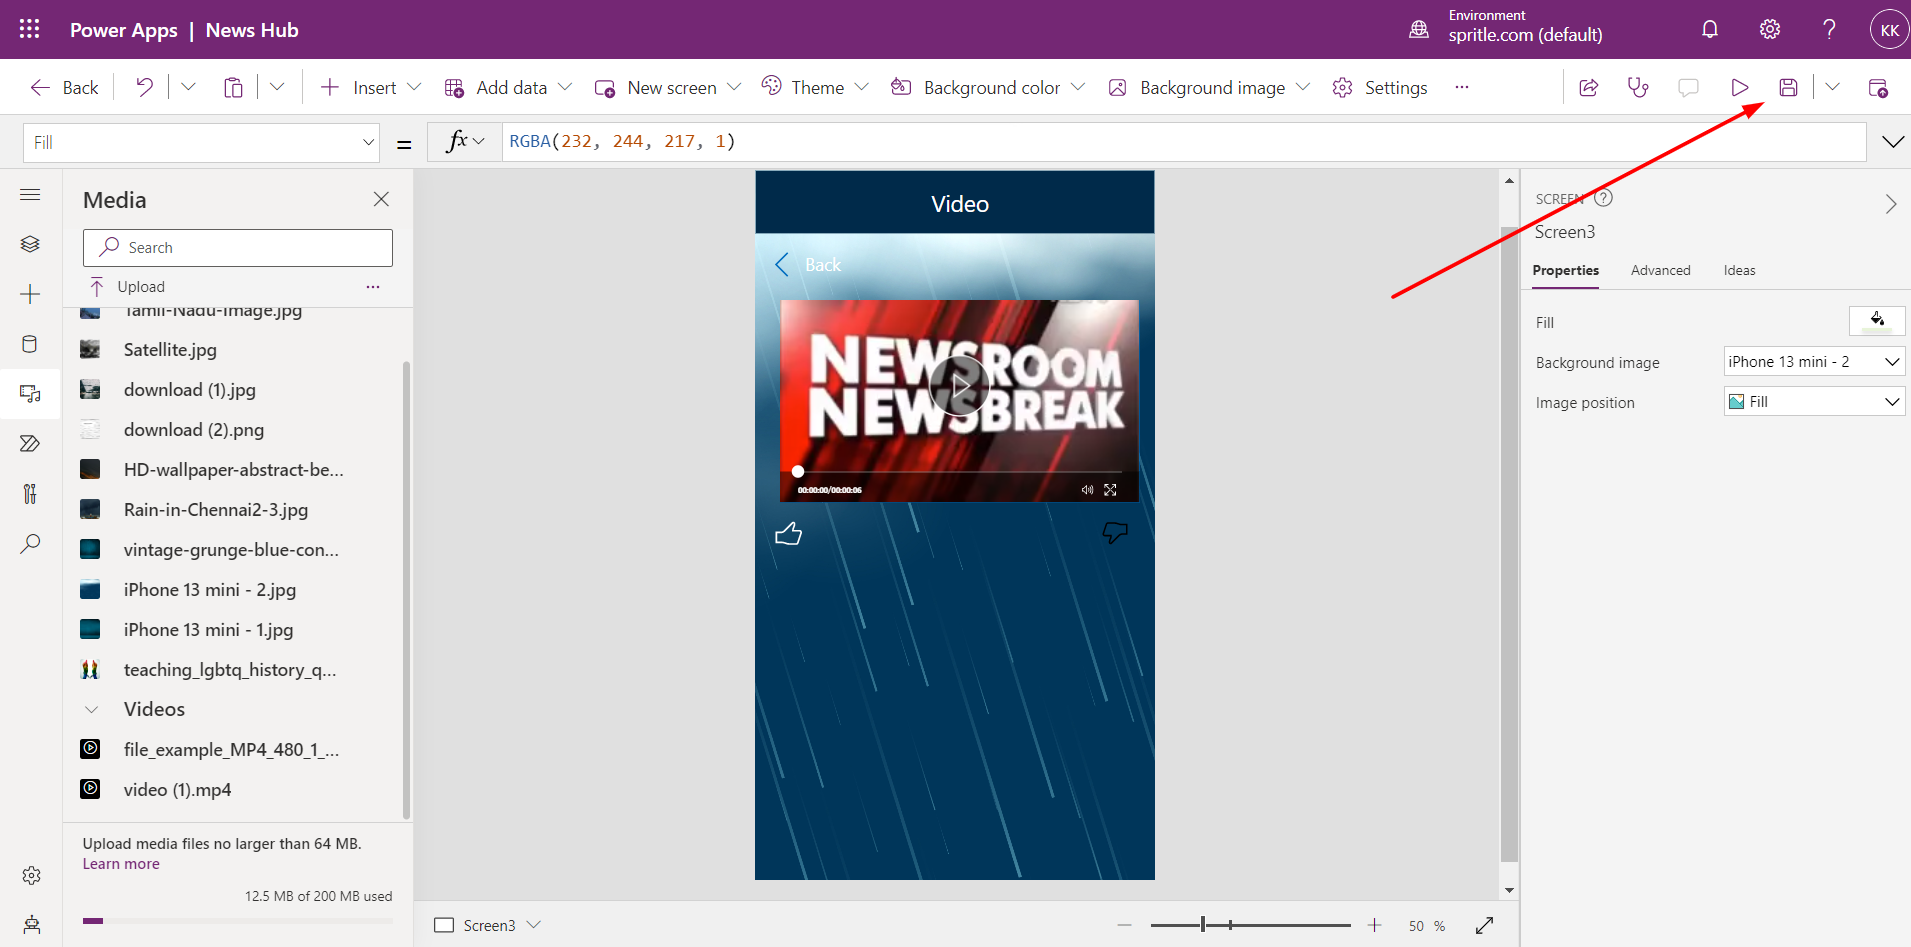
STEP 5: Save the changes by clicking the ‘Save’ icon or using Ctrl + S key.
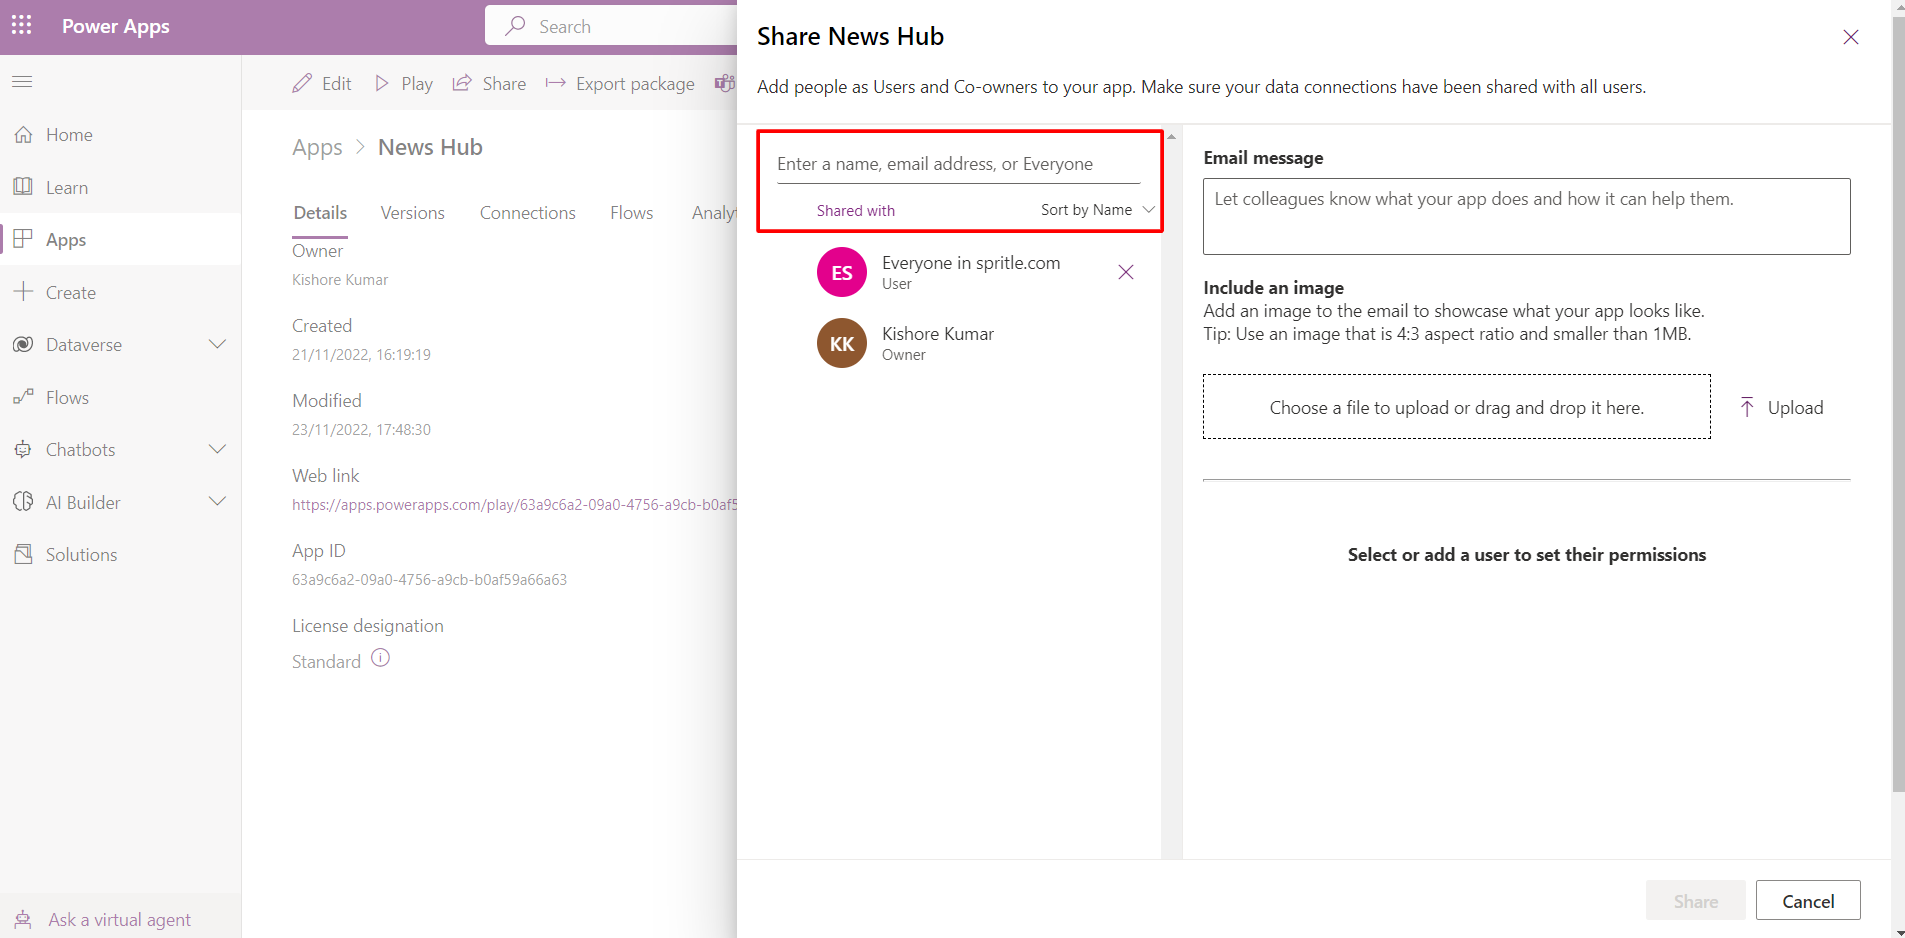
Publish and Share the application- Click the ‘Publish’ icon to publish the app created.
The published app version will be live and it can be viewed by following the steps.
STEP 1: Click the ‘Share’ icon.
STEP 2: Enter the email address of everyone in the email address field.
STEP 3: Click the Share button.
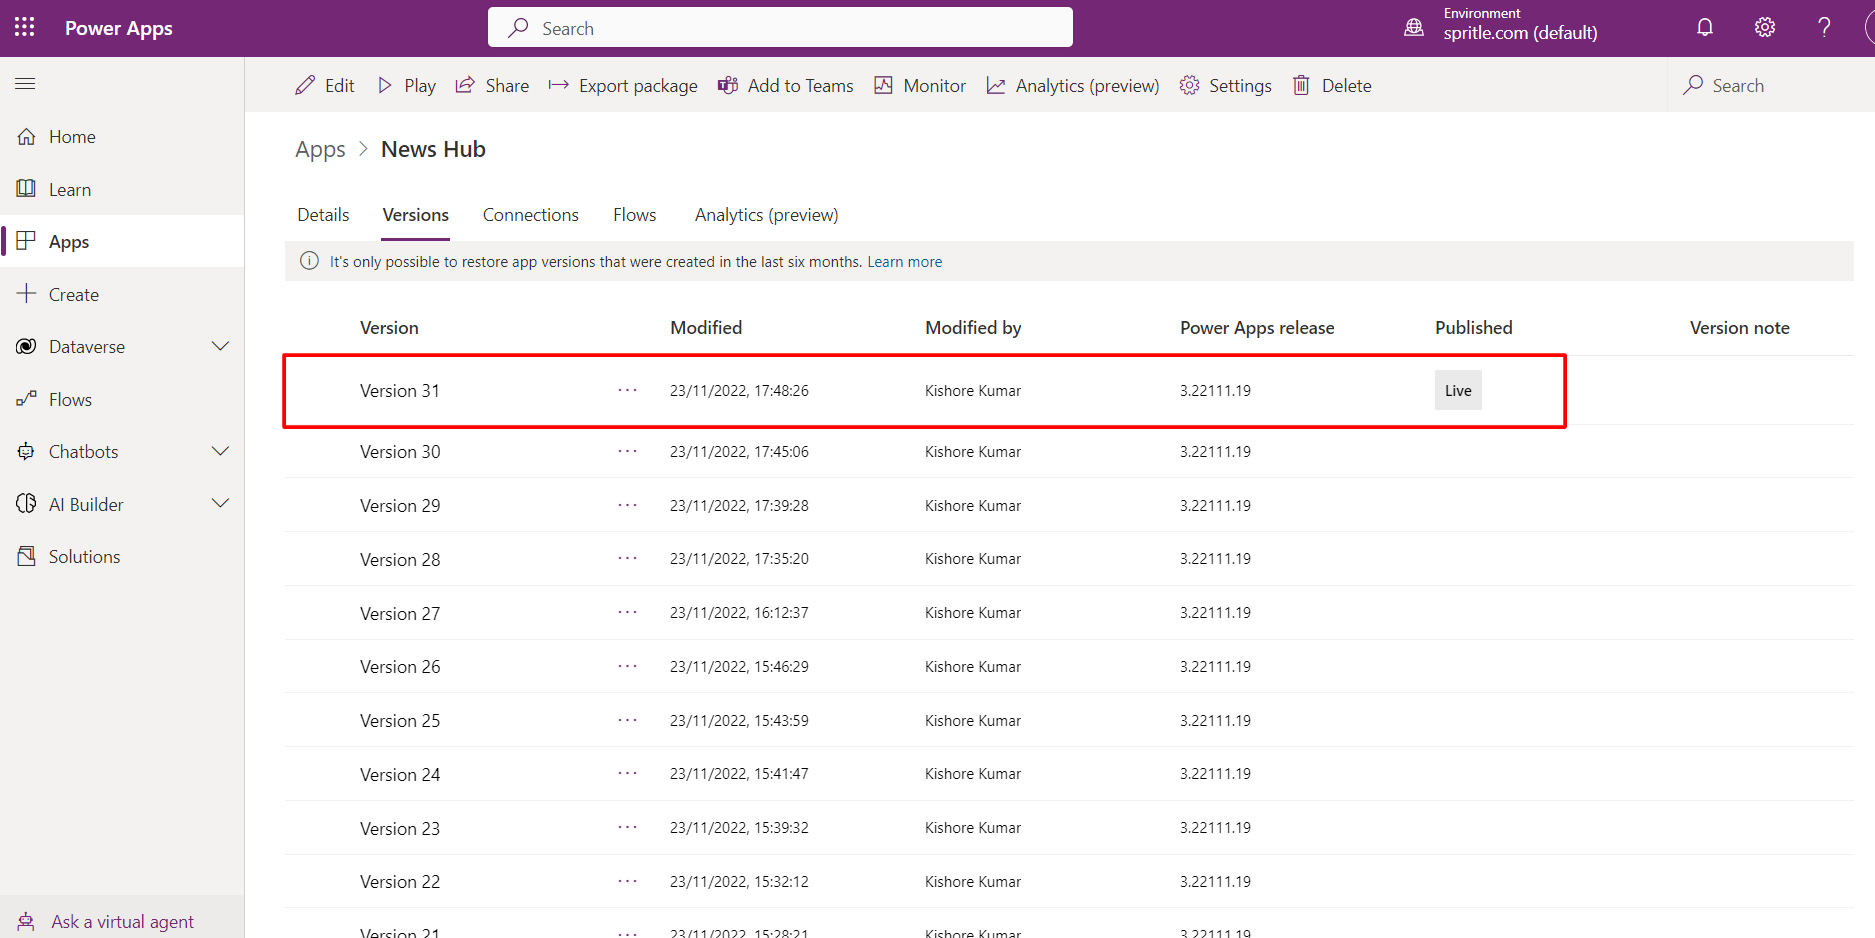
STEP 4: Click the versions tab to view the details of versions and the latest version in live.
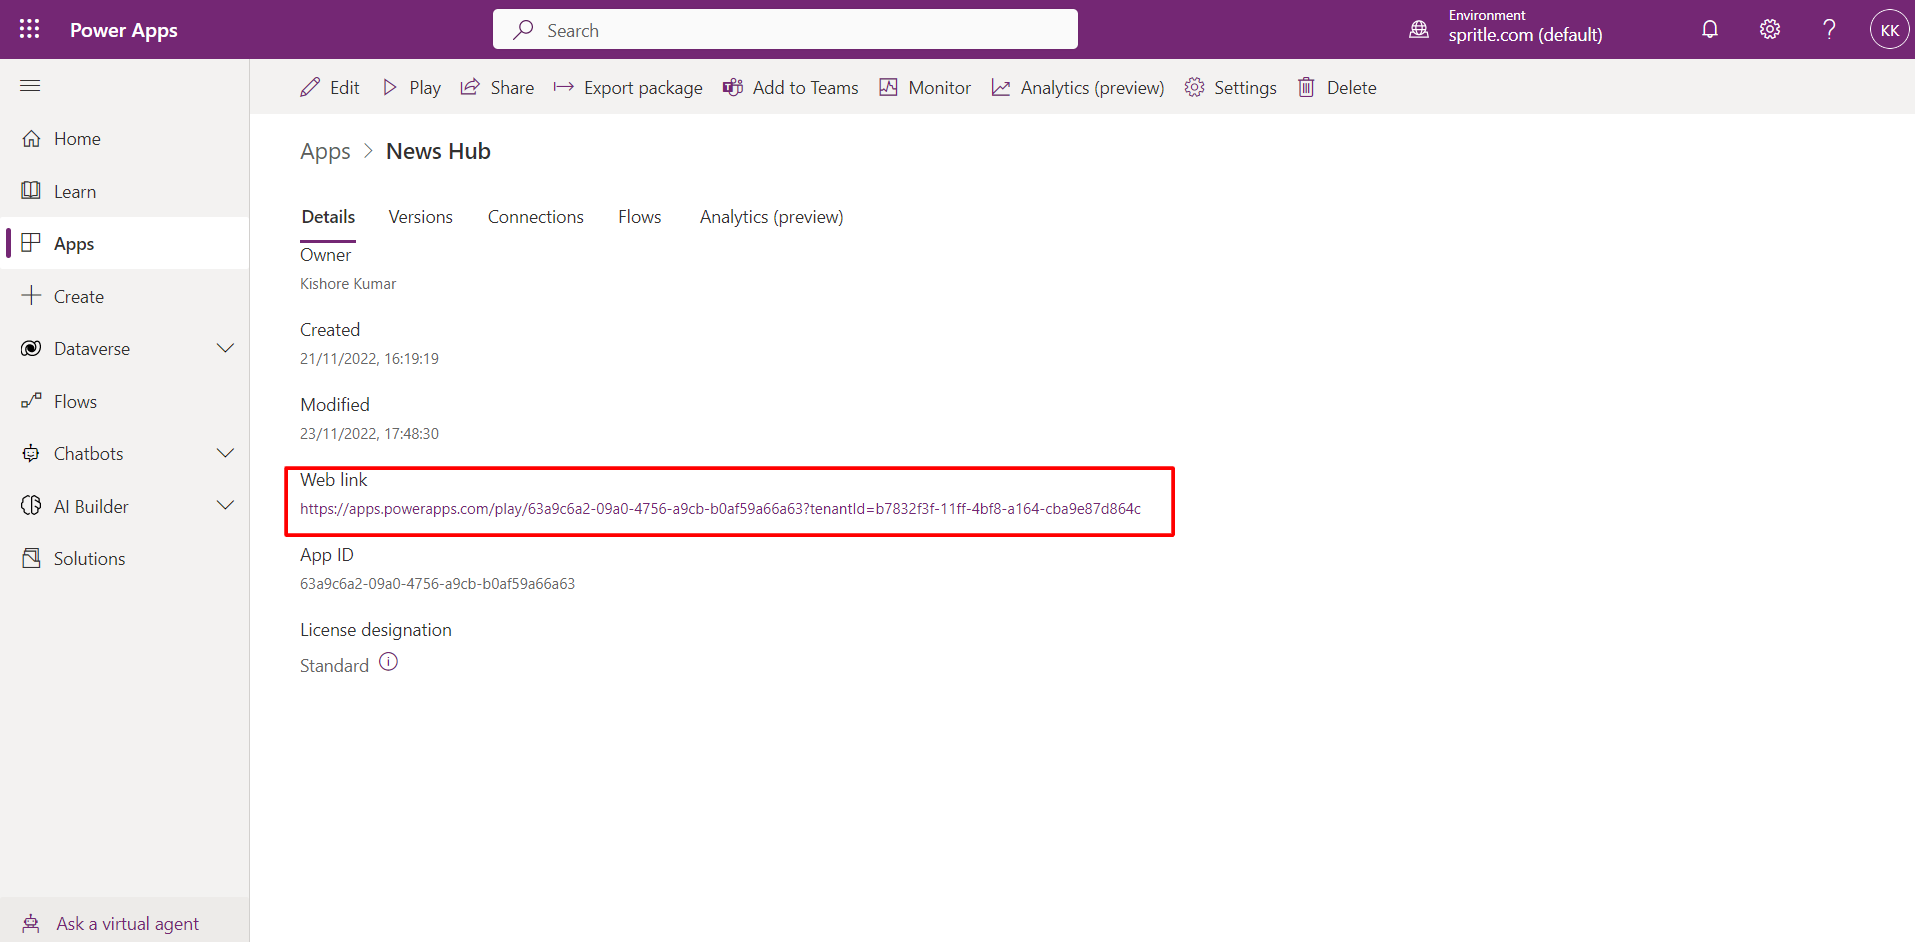
STEP 5: Copy the web link on the details page and share it to access the live app.
Below is the sample video of the customization process mentioned above.
Here we are with some of the customization processes like adding an image and editing the images, text, and videos and saving, publishing, and sharing the live app. You guys out there try customizing your application with Power Apps and let me know what you feel about this feature.
We will look into other features like automating the workflow in my upcoming power apps blogs. Until then, keep expecting the best from us as always!