
Hi there! In today’s fast-paced world, Mobile applications have become a significant segment of our daily lives. From communication to entertainment, we rely heavily on these apps to keep us connected and well-informed. As a result, the demand for mobile app development has increased rapidly in recent years. And React Native is a popular framework for building cross-platform apps and has gained a lot of attention from developers due to its ease of use and flexibility.
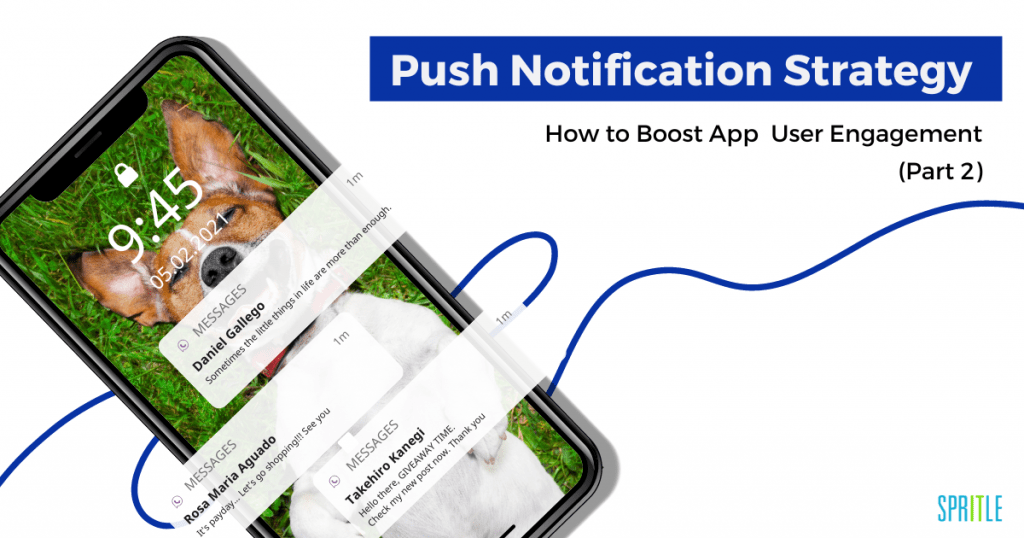
One of the most critical features of any mobile application is push notifications. They keep users engaged and informed about important updates, events, and promotions.
Implementing push notifications in a React Native app can be challenging, especially for beginners. That’s why in the previous blog, we have learned about how they function and have explored their importance. So, in this article, let’s build an Android app with Firebase and receive our first push notification on our device.
What are we waiting for? Let’s get started!
Adding Firebase To Your Android App- A Step-by-Step Guide
Steps To Follow
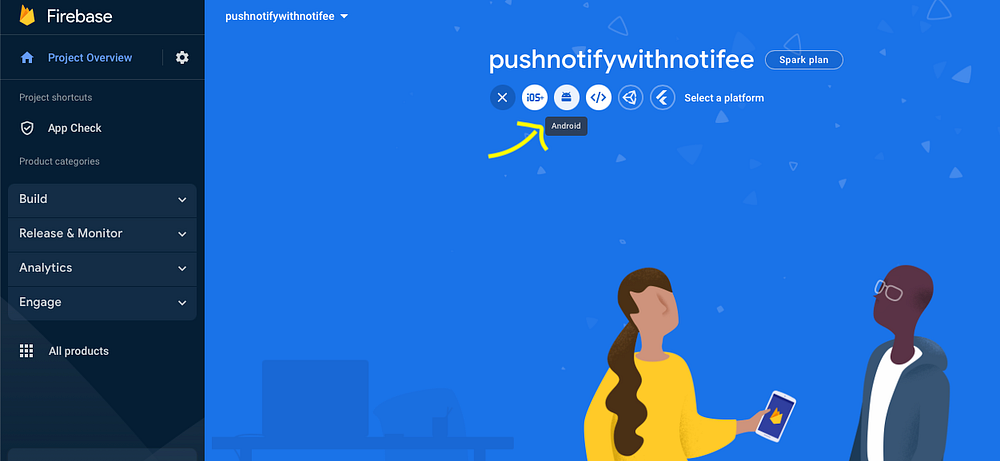
1. Select the pushnotifywithnotifee(your project name) project in the Firebase Console and click the ‘add’ button. You will then see this screen. Choose ‘Android’ from the list.
2. This screen will appear when you select Android.
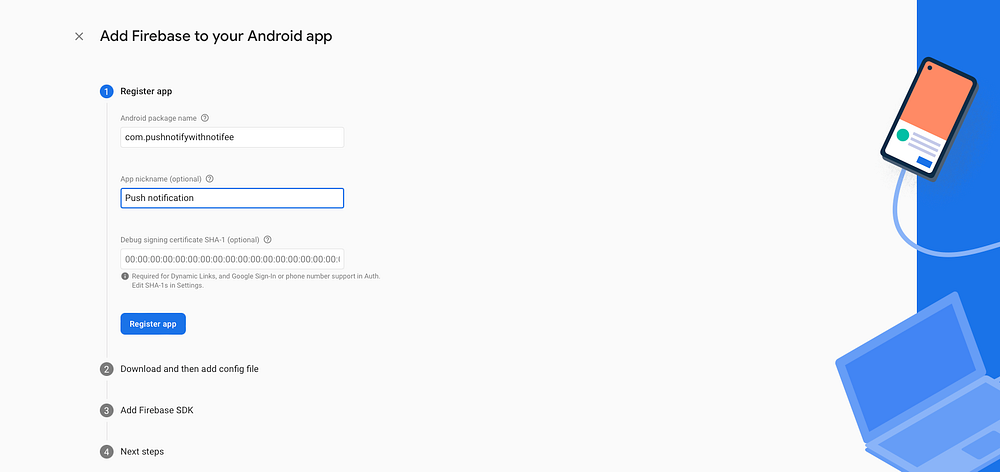
Enter the name of your app package and click Register. The package name may be found in the root folder of your React Native project — android/app/src/main/Androidmanifest.xml.

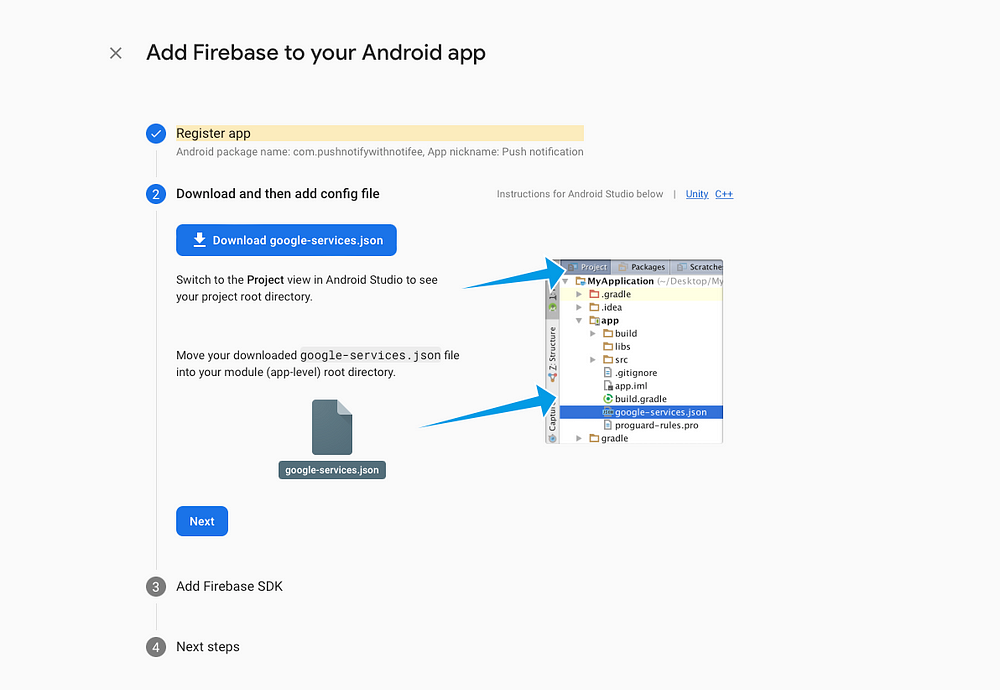
3. Copy and paste the google-services.json file into your android/app.
4. To make the google-services.json config values accessible to Firebase SDKs, you need the Google services Gradle plugin and click Next.
Add the plugin as a build script dependency to your android/build.gradle
Then, in your android/app/build.gradle file, add both the Google services plugin and any Firebase SDKs you want to use in your app.
After adding the plugin and the desired SDKs, sync your Android project with Gradle files and click Continue to Console. Finally, you can see the app in the Firebase.

5. Next, Jump into the coding part. React Native Firebase provides native integration of Firebase Cloud Messaging (FCM) for both Android & iOS(The FCM SDK performs mapping of your APNs token to the FCM registration token).
To Configure the APNS, you must have an Apple developer account. However, readers! We will see about iOS and APNS as step-by-step guides in the upcoming blogs. So, falling back to FCM, it is a cost-free service allowing for server-device and device-device communication. The React Native Firebase Messaging module provides a simple JavaScript API to interact with FCM.
Using npm or yarn, add React Native Firebase to your project. I’m choosy about yarn.
yarn add @react-native-firebase/app
To configure FCM add this package
yarn add @react-native-firebase/messaging
Receiving Push notification
We can send FCM messages to real Android devices or emulators. Here, I am using an Android emulator to get the notifications. So, firstly, to obtain the FCM token, you need to register your app with FCM for that import messaging from the react-native-firebase package and execute the registerDeviceForRemoteMessages function in App.js. Secondly, you need to call the getToken Function.
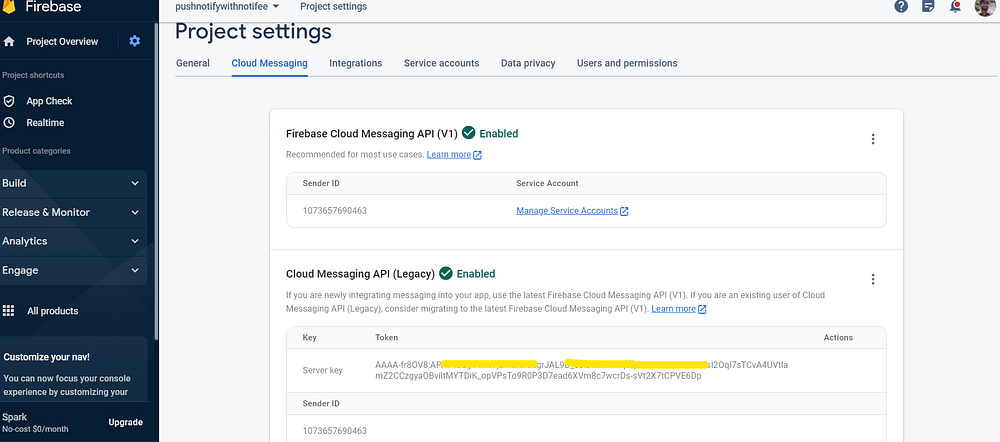
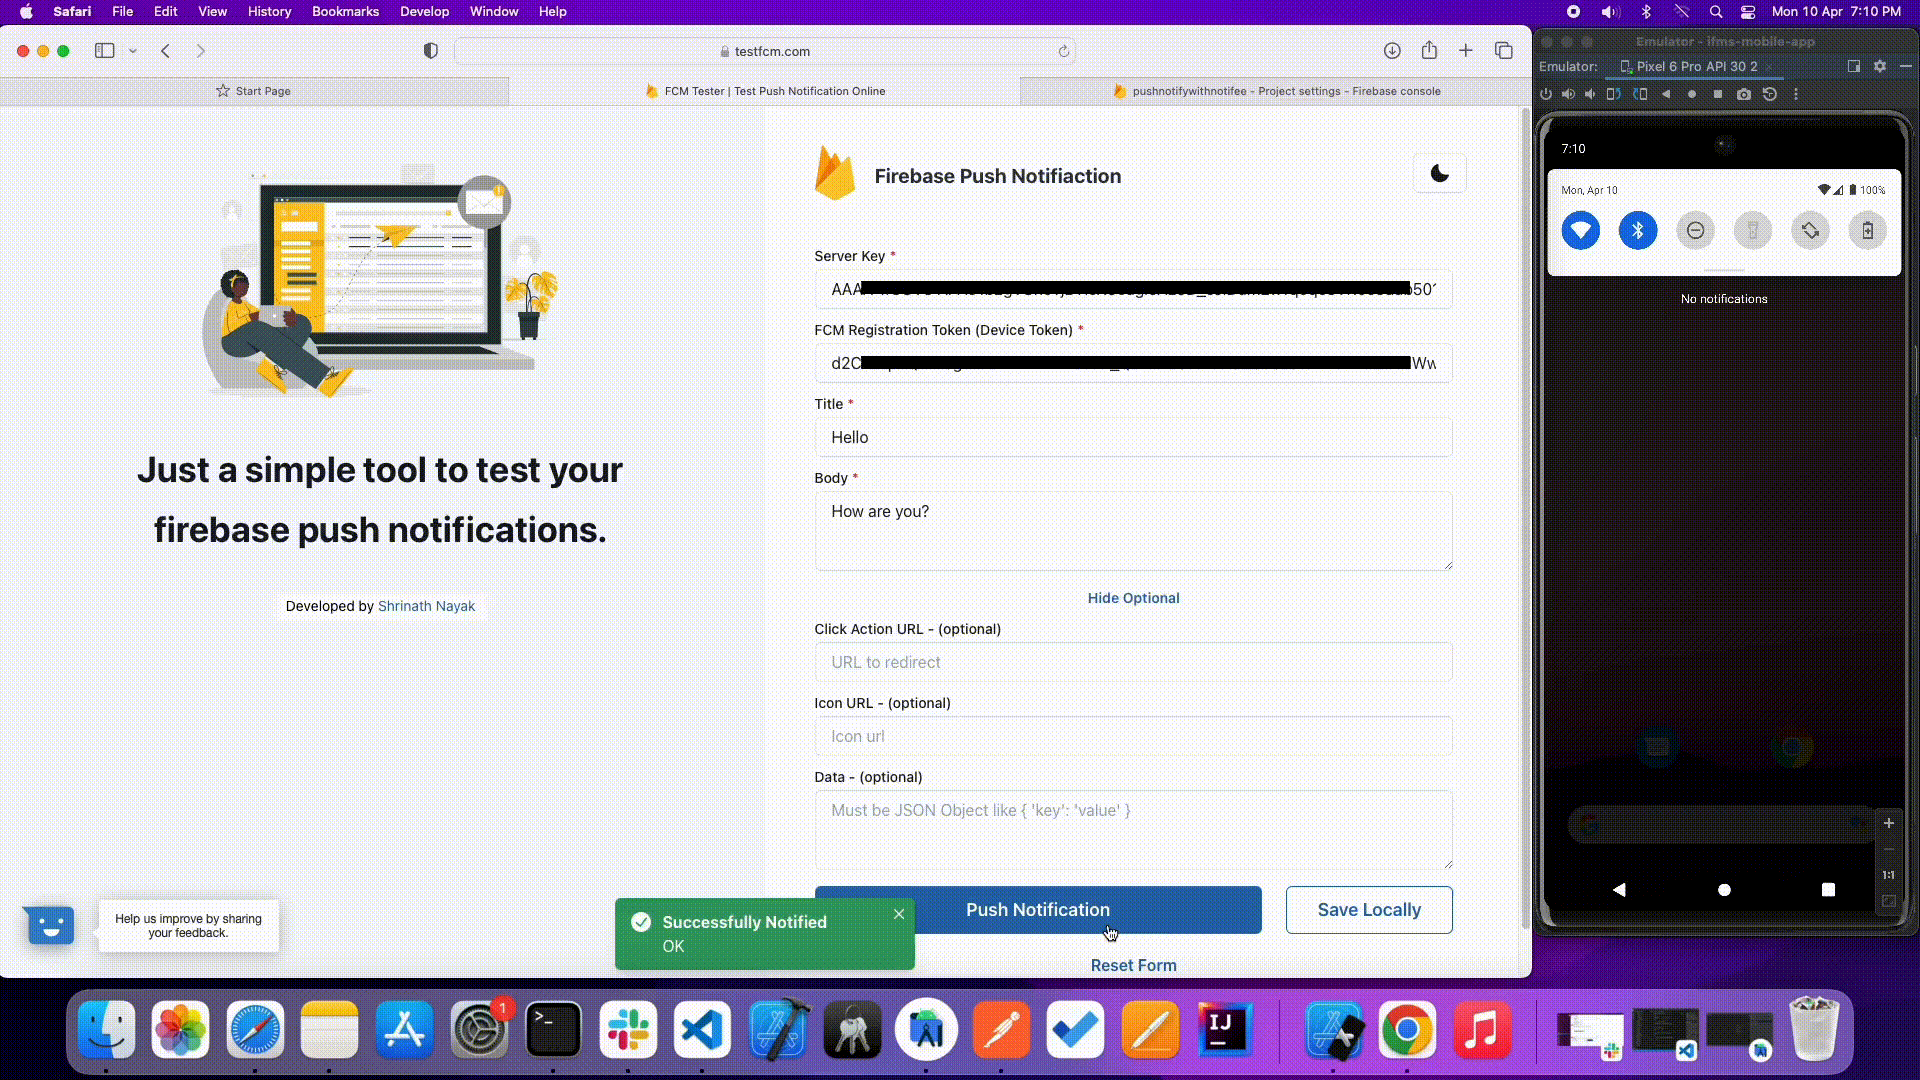
Once you get the token, you may use the test FCM platform to receive your notifications. Simply enter your device token and Firebase server key. In the Project settings > Cloud Messaging, look for your server key.
Finally !, you got the notification 🚀 🚀.
For the backend, Firebase provides Firebase Admin SDK. Your app server or trusted server environment sends message requests to the FCM, which then routes messages to client apps running on users’ devices.
To dynamically send push notifications in real-world projects, you need to store the device tokens of the respective user and send the notifications accordingly.
Now, are you curious about the ins and outs of how push notifications and FCM work? Let’s look in more detail in a separate blog that defines the contexts of both the front-end and back-end.
Summary
Push notifications are a crucial technique for increasing app user engagement. So far, you’ve learned how to add your Android app to Firebase and integrate it with your React Native app in this blog. This place, I believe, captured your interest.
In the very next blog post, we will beautify our notification with Notifee. Until then, keep expecting the best from us. Bye-bye.