
Apps are becoming viral in and around world and smart phones are ruling us , everyone has smartphone and types of smartphones are more than 1000. We develop a App which need to supported in all android version with various dimensions and screen size. Whether is that possible and yes it comes with solution like Ranorex tool .
Ranorex
Ranorex gives you a simple solution “Record once , test in multiple times” whenever you want.
In this blog I would like to explain the easy steps to record and run the test for mobile applications in Ranorex.
Software needed
Need to install the Ranorex desktop application. Its supports windows both 32 and 64 bit. Once Ranorex is installed kindly follow the below steps for the web application testing.
Steps to be followed:
- 1. Connect the device to the computer with USB cable , once connected go to settings tab and click on the Developer option and in that select USB debugging option as shown in the below image.

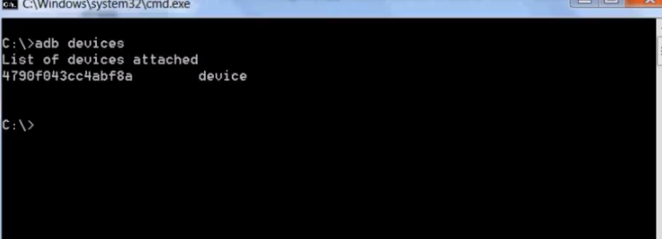
- 2. Once finished with your phone setting , confirm that your device has been connected to system , for that go to command prompt in your system and type “adb devices” , if the phone is connected then it will display your device id or else again try the step 2 .
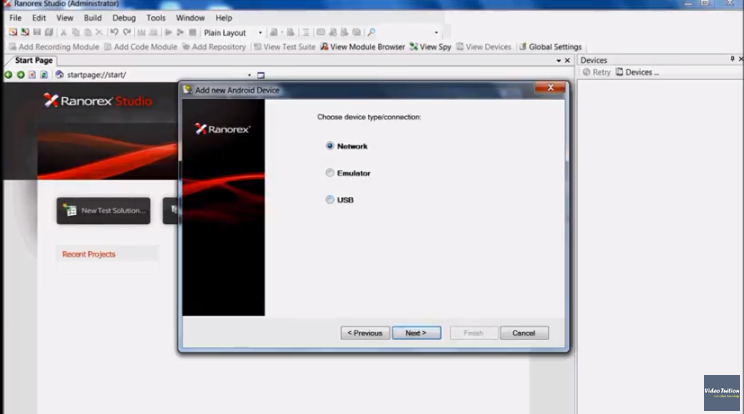
- 3. After that click on the Ranorex window and click the view devices button at the top of the Ranorex window.
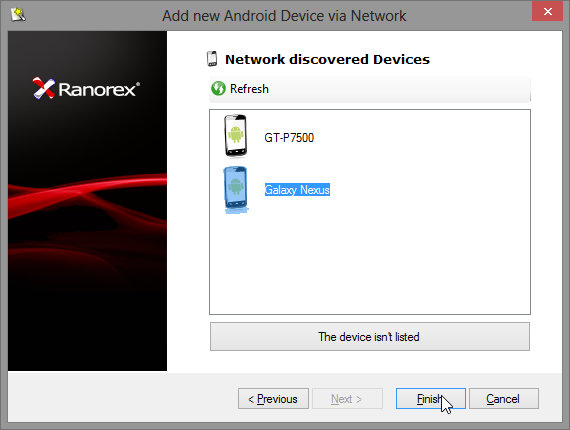
- 4. Once clicked you can view the devices connected on the right of the Ranorex window. On clicking the devices in the right tab it opens up with Dialog box as “Devices” in that click Add devices and then click ‘”Android” and then it will ask for type of connection for devices in that click ” USB” .
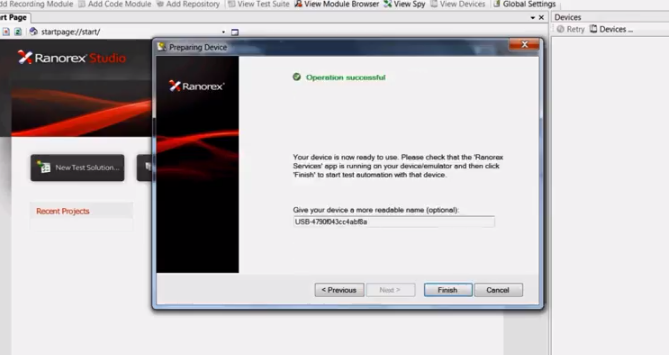
And then it will list out the device is which is connected to the system , click on the device id in which you need to run the test and click on next button. Once done it will display the success message , at last click the Finish button.
- 5. The successfully added devices will be getting displayed, click on the device name and click ok .
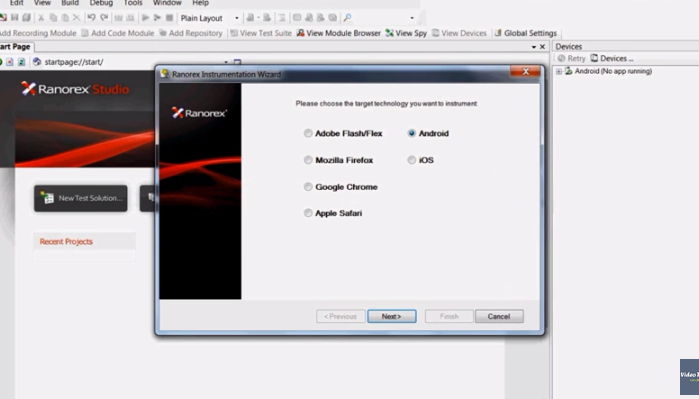
- 6. Setting up APK instrumentation: This is for installing APK in your mobile devices you have added to Ranorex successfully . Move to tools tab and click on the Instrumentation Wizard , now a dialog will get opened in that select the “Android ” and give next.
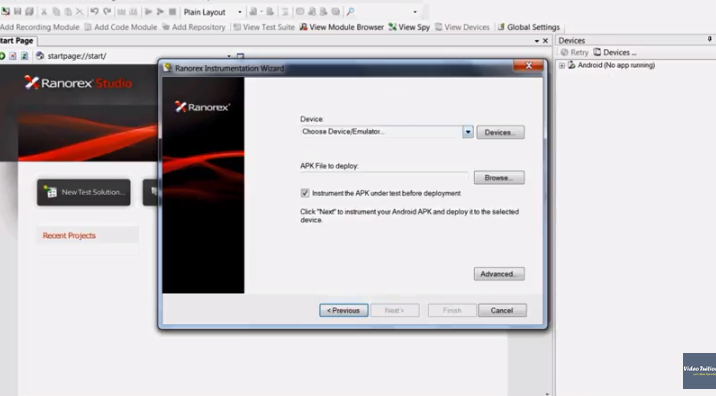
- 7. Once done . it wil ask for emulator to test and the path for your apk stored in your local machine.Add both data and click next button , it will take 2 – 5 mins for the instrumentation and once done click on the Finish button.
- 8. All set up section is over now it time for creation of new project , click on “New test solution ” in the welcome page and dialog box will appear . Give name for the test recording and click on save or open button.
- 9. Click on the record button after creating a new test solution.
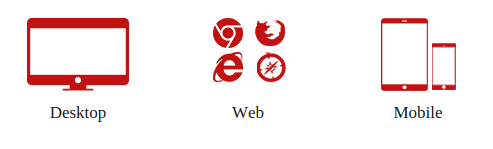
- 10. On clicking the record button it will ask for the platform to be tested , desktop or web or mobile app, Click on the Web application.
 11.Click on the APK file name you have added and click on “Record” button.
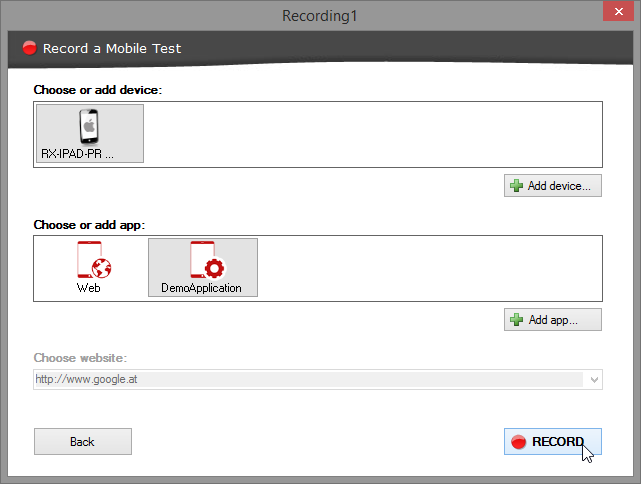
- 11. It will start recording your actions you are doing in mobile device which you have attached to the system, you can see the recording window with pause button, validation button, and stop button in the Ranorex window.
- 12. Validation can be done by clicking the validation button and the object or text or image or alert message that has to be validated.
- 13. Once you done with your recording the recorded steps will be added to the Ranorex studio.You can also add events manually by clicking on the “Add event ” button.

- 14. You can run the test session by clicking the “Play ” button near the record button.
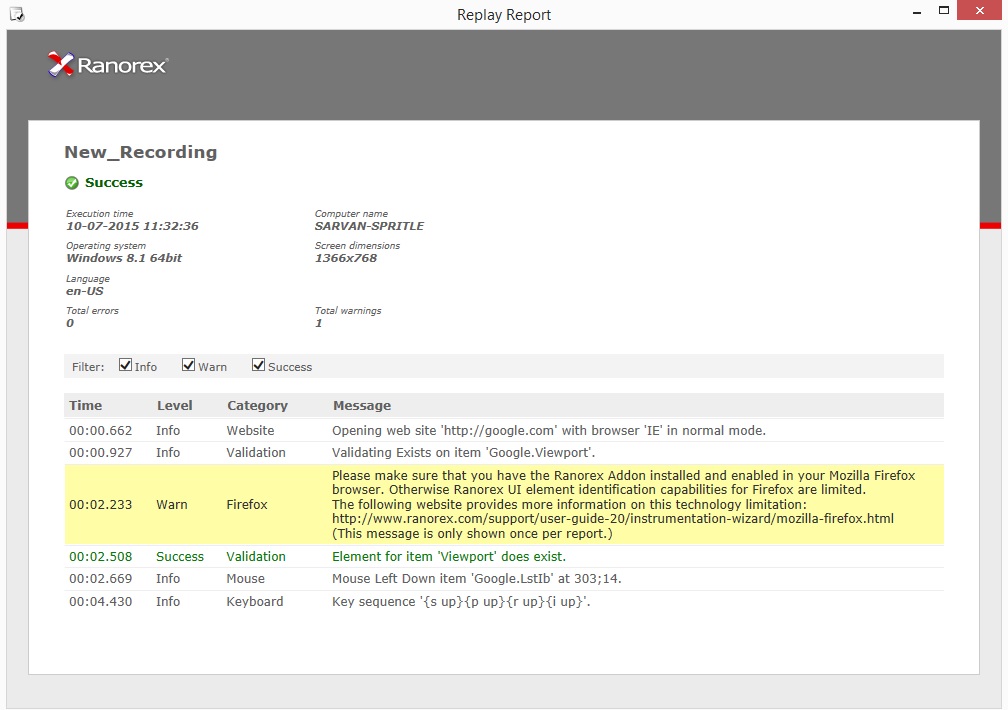
- 15. Once the session is over, you will be getting a Report which states the status of the Test Pass or Fail and which section got Failed.
Note : The session recorded can be exported as CSV file.
Thank you guys, hope this blog gives you a idea for automation testing for mobile apps using Ranorex.
Good steps in detail 🙂
Thank you Shahul .