
In this era of rapidly changing technology, mobile devices have made their way into all spheres of an individual’s life. Knowing the user’s location is one of the most prominent features that we have devices. It can be used to track the path that user went through or to find the current location of a person to identify where he/she is.
User location comes in handy when a user should be tracked continuously.
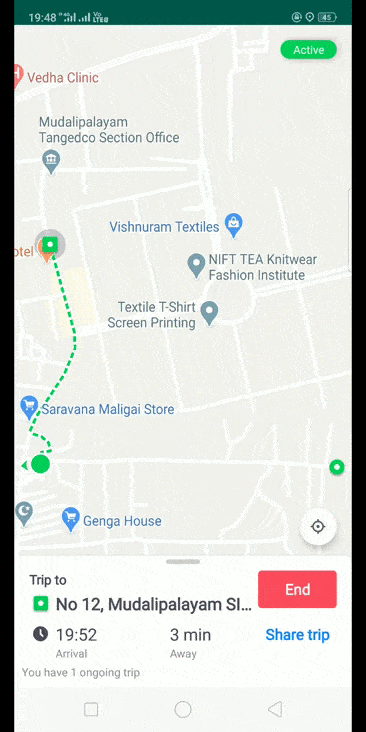
Eg: In an Ola and Uber app, tracking the current location of the cab is made possible using continuous location tracking.
In our app needs a real-time location tracking feature. we found out more than 8 services. During development, we faced some difficulties with service like no official support for React Native, their SDK is very complicated and API is very opaque & rigid and is not flexible for us to build workflows with it.
Finally, we tried HyperTrack service is interesting and adaptable to our requirements like official React Native support (for cross-platform mobile app development), to get real-time location updates while moving, also to get the tracking URL, and so on.
This time we came up with an experiment to build a location tracking mobile application that allows users to track the location using HyperTrack and React Native.
This blog contains useful steps that you can perform to integrate HyperTrack with React Native. Okay! Let’s dive in.
HyperTrack
The easiest way to drive operations efficiency with app location
HyperTrack is a live location tracking to your mobile app. Live location is made available along with ongoing activity, tracking controls, and tracking outage for reasons.
React Native HyperTrack SDK is a wrapper around native iOS and Android SDKs that allows the integration of them into React Native apps.
SDK provides access to functionality that collects location, activity, and device health data. The module exposes methods to start and stop tracking and interact with the HyperTrack APIs.
Setting up HyperTrack Account
Sign up for HyperTrack and get your publishable key from the Setup page.
For Android, Configure the FCM key on the Dashboard using the Firebase guide
For iOS, Upload your Auth Key (file in the format AuthKey_KEYID.p8) and fill in your Team ID
Once we ready with your HyperTrack Account, we can create a new project for we react native mobile app.
Add team members to your account and invite them to get the HyperTrack Live app as well. you will find the PlayGround section in your dashboard. PlayGround lists your newly registered devices and manages to track them.
PlayGround empowers you to:
- Start and stop tracking for your devices from the cloud
- Assign and change device names and metadata
- Create and complete trips for your devices
Integrating with React Native
HyperTrack provides SDK for various platforms like Android, iOS, ReactNative, Cordova, Ionic, and flutter.
Let’s see the steps required to integrate an HyperTrack SDK within React Native app for both Android and iOS
Integrate the React Native SDK
Create a React Native project and run yarn (or npm install, if using npm) inside your new YourApp directory.
Then, install the hypertrack-sdk-react-native package:
yarn add hypertrack-sdk-react-native
Or, if using npm:
npm install hypertrack-sdk-react-native --save
Android
Goto AndroidManifest.xml under app/src/main/AndroidManifest.xml and remove that line:
android:allowBackup="false"Go to build.gradle and change minimum SDK version:
minSdkVersion = 19Add in repositories section:
maven {
    name 'hypertrack'
    url 'https://s3-us-west-2.amazonaws.com/m2.hypertrack.com/'
}
iOS
Using CocoaPods, we can easily integrate the HyperTrack plugin with the react native application.
My Podfile looks like so:
require_relative '../node_modules/react-native/scripts/react_native_pods'
require_relative '../node_modules/@react-native-community/cli-platform-ios/native_modules'

platform :ios, '11.0'

target 'Quickstart' do
  config = use_native_modules!

  use_react_native!(:path => config["reactNativePath"])

  # Enables Flipper.
  #
  # Note that if you have use_frameworks! enabled, Flipper will not work and
  # you should disable these next few lines.
  use_flipper!
  post_install do |installer|
    flipper_post_install(installer)
  end
end
Install the native HyperTrack SDK through CocoaPods:
pod installEnable Background Modes in your project target’s Capabilities tab. Choose “Location updates”.

Set the following purpose strings in the Info.plist file:

In the app capabilities, ensure that remote notifications inside background modes are enabled.

In the same tab, ensure that push notifications are enabled.

Registering and receiving notifications
Import and register HyperTrack SDK to receive push notifications about tracking status in AppDelegate.m file
@import HyperTrack;Add register method inside the didFinishLaunchingWithOptions method like below,
- (BOOL)application:(UIApplication *)application didFinishLaunchingWithOptions:(NSDictionary *)launchOptions {
    [HTSDK registerForRemoteNotifications];
    return YES;
}
Inside the didReceiveRemoteNotification method, add the HyperTrack receiver. This method parses only the notifications sent from HyperTrack.
- (void)application:(UIApplication *)application didReceiveRemoteNotification:(NSDictionary *)userInfo fetchCompletionHandler:(void (^)(UIBackgroundFetchResult))completionHandler {
    [HTSDK didReceiveRemoteNotification:userInfo fetchCompletionHandler:completionHandler];
}
If you want to make sure to only pass HyperTrack notifications to the SDK, you can use the “hypertrack” key:
- (void)application:(UIApplication *)application didReceiveRemoteNotification:(NSDictionary *)userInfo fetchCompletionHandler:(void (^)(UIBackgroundFetchResult))completionHandler {
    if (userInfo[@"hypertrack"] != nil) {
        // This is HyperTrack's notification
        [HTSDK didReceiveRemoteNotification:userInfo fetchCompletionHandler:completionHandler];
    } else {
        // Handle your server's notification here
    }
}
Building a mobile app
It is a basic application that gives a simple way to explore with the HyperTrack SDK.
// Import HyperTrack SDK API
// You can also use CriticalErrors to react to different kind of errors preventing tracking (ex: permissions deined)
import {CriticalErrors, HyperTrack} from 'hypertrack-sdk-react-native';

const PUBLISHABLE_KEY = "Paste_your_publishable_key_here";

export default class App extends Component {

    state = {
        deviceId: "",
        trackingState: "Stopped",
        isTracking: false
    };

    _initializeHyperTrack = async () => {
        // (Optional) This turns on logging for underlying native SDKs. Placed on top so SDKs start logging immediately
        HyperTrack.enableDebugLogging(true);

        // Initialize HyperTrack with a publishable key
        this.hyperTrack = await HyperTrack.createInstance(PUBLISHABLE_KEY, true);

        // Obtain the unique HyperTrack's DeviceID identifier to use it with HyperTrack's APIs
        const deviceId = await this.hyperTrack.getDeviceID();
        this.setState({deviceId: deviceId});

        // (Optional) Set the device name to display in dashboard (for ex. user name)
        this.hyperTrack.setDeviceName("RN Quickstart");

        // (Optional) Attach any JSON metadata to this device to see in HyperTrack's API responses
        this.hyperTrack.setMetadata({driver_id: "83B3X5", state: "IN_PROGRESS"});

        // (Optional) Register tracking listeners to update your UI when SDK starts/stops or react to errors
        this.hyperTrack.registerTrackingListeners(this,
            // Display or log errors
            (error) => {
                if (error.code === CriticalErrors.INVALID_PUBLISHABLE_KEY
                    || error.code === CriticalErrors.AUTHORIZATION_FAILED) {
                    console.log("Initialization failed")
                } else {
                    console.log("Tracking failed")
                }
                this.setState({
                    trackingState: "Stopped with error: " + error.code + " - " + error.message,
                    isTracking: false
                })
            },
            // Update UI when tracking starts
            () => this.setState({trackingState: "Started", isTracking: true}),
            // Update UI when tracking stops
            () => this.setState({trackingState: "Stopped", isTracking: false}));
    };

    // Call the initialization in componentWillMount
    UNSAFE_componentWillMount() {
        this._initializeHyperTrack();
    }

    // (Optional) Unregister tracking listeners if they were registered in previous step
    UNSAFE_componentWillUnmount() {
        this.hyperTrack.unregisterTrackingListeners(this);
    }
I hope you enjoyed the reading and learned something in the way. Thank you!. Initially, we tried the basics of HyperTrack. Later we planned to share the functionality of trip tracking and views SDK.