
Today, lots of automation tools are available in the market for the various testing purpose like cross browser testing, Responsive testing, load testing etc., We need to pick the proper automation tool based on the requirement of our projects. So here, in my case, we came across the tool called Galen framework. Galen framework is used to test the UI and responsive design of a web application.
(The part -I of Galen framework written by Lakshmi Priya can be found at GalenFramework).
UI is the most important part of our application as it is the face of our application. But, sometimes, our application will be facing issues related to image quality, pixels quality, alignment issue, font variations issues which spoil the look and feel of our app. To address these types of issues, I personally felt galen is the powerful automation tool.
Here, I would like to share the basic spec to test the size of the logo from a sample website.(http://testapp.galenframework.com/).
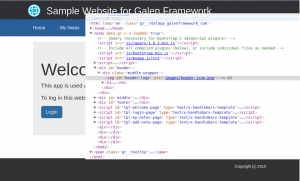
Inspect the Logo
- Choose the logo from the website and inspect it and then write a spec in IDE.
- Place the mouse pointer over the logo and right click and choose to inspect element in the drop-down list, it will show “id” of the logo.
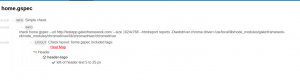
Gspec
- Create a new folder and a new file.
- In the file, write the id of logo under the @objects and given the header px from left.
[source language=”javascript”]
@objects
header-logo #header-logo
header-text #header h1
= Header =
header-logo:
left-of header-text 5 to 25 px
[/source]
Run
- Open terminal : Declare the folder path in the terminal.

- To run the spec, give the follwoing command “galen check home.gspec —url http://testapp.galenframework.com/ –size 1024×768 —htmlreport reports”
- galen check : To check the file.
- home.gspec : File name.
- —url http://testapp.galenframework.com/ : Name the site url that we need to test it.
- 1024×768 : Display the size as per our wish.
- —htmlreport reports : To generate Heat map.
[source language=”javascript”]
karthi@karthi-desktop:~/Documents/Galen$ galen check home.gspec –url http://testapp.galenframework.com/ –size 1024×768 –htmlreport reports
========================================
Test: home.gspec
========================================
check home.gspec –url http://testapp.galenframework.com/ –size 1024×768 –htmlreport reports -Dwebdriver.chrome.driver=/usr/local/lib/node_modules/galenframework-cli/node_modules/chromedriver/lib/chromedriver/chromedriver
= Header =
header-logo:
left-of header-text 5 to 25 px
========================================
—————————————-
========================================
Suite status: PASS
Total tests: 1
Total failed tests: 0
Total failures: 0
[/source]
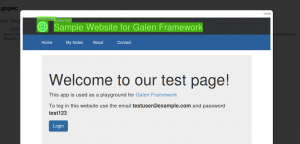
- After running the spec successfully, we move forward generating the HTML file using this command “google-chrome reports/report.html”.

- Once the report is generated, visit the chrome browser which shows the report.

- Tap on the home.gspec then clicks on the info bar shown “Heat Map” link. Heat Map is used to compare our spec with screen shot image of the website.
- In the below result, a spec is shown in heat map image.
Conclusion
- From this part I just explained how to write a spec for the logo and how much pixel it takes on(depending upon the project requirement). In the next part, I will explain the remaining functions of the galen spec.