
Hello everyone, happy to see you again. In this blog, we will be discussing the ZAP tool which is used as a security testing tool for web applications. So before digging into it let’s learn some basics of security testing.
Security Testing Basics
Software Security Testing is the process of assessing and testing a system to discover security risks and vulnerabilities of the system and its data. We define testing as the discovery and attempted exploitation of vulnerabilities.
The common breakout of security testing is:
- Vulnerability Assessment – The system is scanned and analyzed for security issues.
- Penetration Testing – The system undergoes analysis and attack from simulated malicious attackers.
- Runtime Testing – The system undergoes analysis and security testing from an end-user.
- Code Review – The system code undergoes a detailed review and analysis looking specifically for security vulnerabilities.
How the pen testing process is done?
It can be done by both manual and automated pen-testing. It is often used in conjunction, to test everything from servers, networks, devices, and endpoints.
There are three stages in which pen testing can be followed:
- Explore – The tester attempts to learn about the system being tested. This includes trying to determine what software is in use, what endpoints exist, what patches are installed, etc. It also includes searching the site for hidden content, known vulnerabilities, and other indications of weakness.
- Attack – The tester attempts to exploit the known or suspected vulnerabilities to prove they exist.
- Report – The tester reports back the results of their testing, including the vulnerabilities, how they exploited them and how difficult the exploits were, and the severity of the exploitation.
Introducing ZAP
ZAP stands for Zed Attack Proxy and is a free, open-source penetration testing tool being maintained under the umbrella of the Open Web Application Security Project (OWASP).
ZAP is designed specifically for testing web applications or websites.
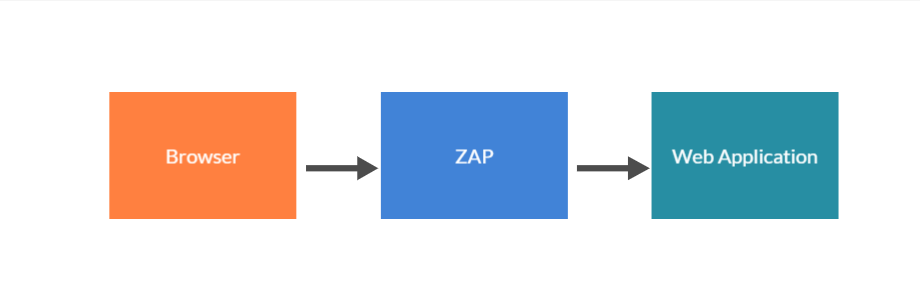
Zap can be also defined as Man-in-middle Proxy because it stands between the tester’s browser and web application so it can easily intercept and inspect each one of the messages or requests sent between a browser and web application.
How do we Install and Configure ZAP?
ZAP has installers for Windows, Linux, and Mac OS/X. There are also Docker images available on the download site listed below.
Install ZAP
The first thing to do is install ZAP on the system you intend to perform pen-testing on. Download the appropriate installer from this Download page.
Note that ZAP requires Java to run, the Mac OS/X installer includes an appropriate version of Java but you must install Java 8+ separately for Windows, Linux, and Cross-Platform versions. The Docker versions do not require you to install Java.
Once the installation is complete, launch ZAP and read the license terms. Click Agree if you accept the terms, and ZAP will finish installing and automatically start.
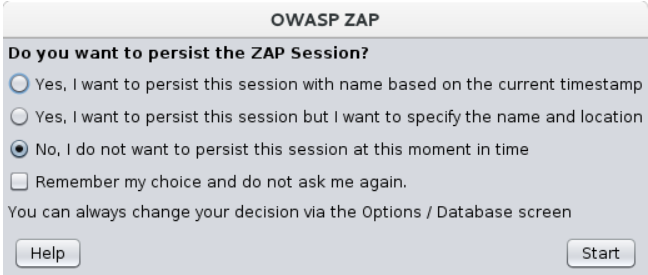
When the setup is completed, we can start the application. Once the application is opened it will show a window to persist the session.
So if you want to store the current session you can choose either by timestamp or name and location. For now, let’s skip this process and choose NO as shown in the below image.
ZAP Desktop UI
Now let’s explore the UI of this tool as categorized below.
| UI Section Name | Description |
| Menu Bar | Provides access to many of the automated and manual tools. |
| Toolbar | Includes buttons that provide easy access to the most commonly used features. |
| Tree Window | Displays the Sites tree and the Scripts tree. |
| Workspace Window | Displays requests, responses, and scripts and allows you to edit them. |
| Information Window | Displays details of the automated and manual tools. |
| Footer | Displays a summary of the alerts found and the status of the main automated tools. |
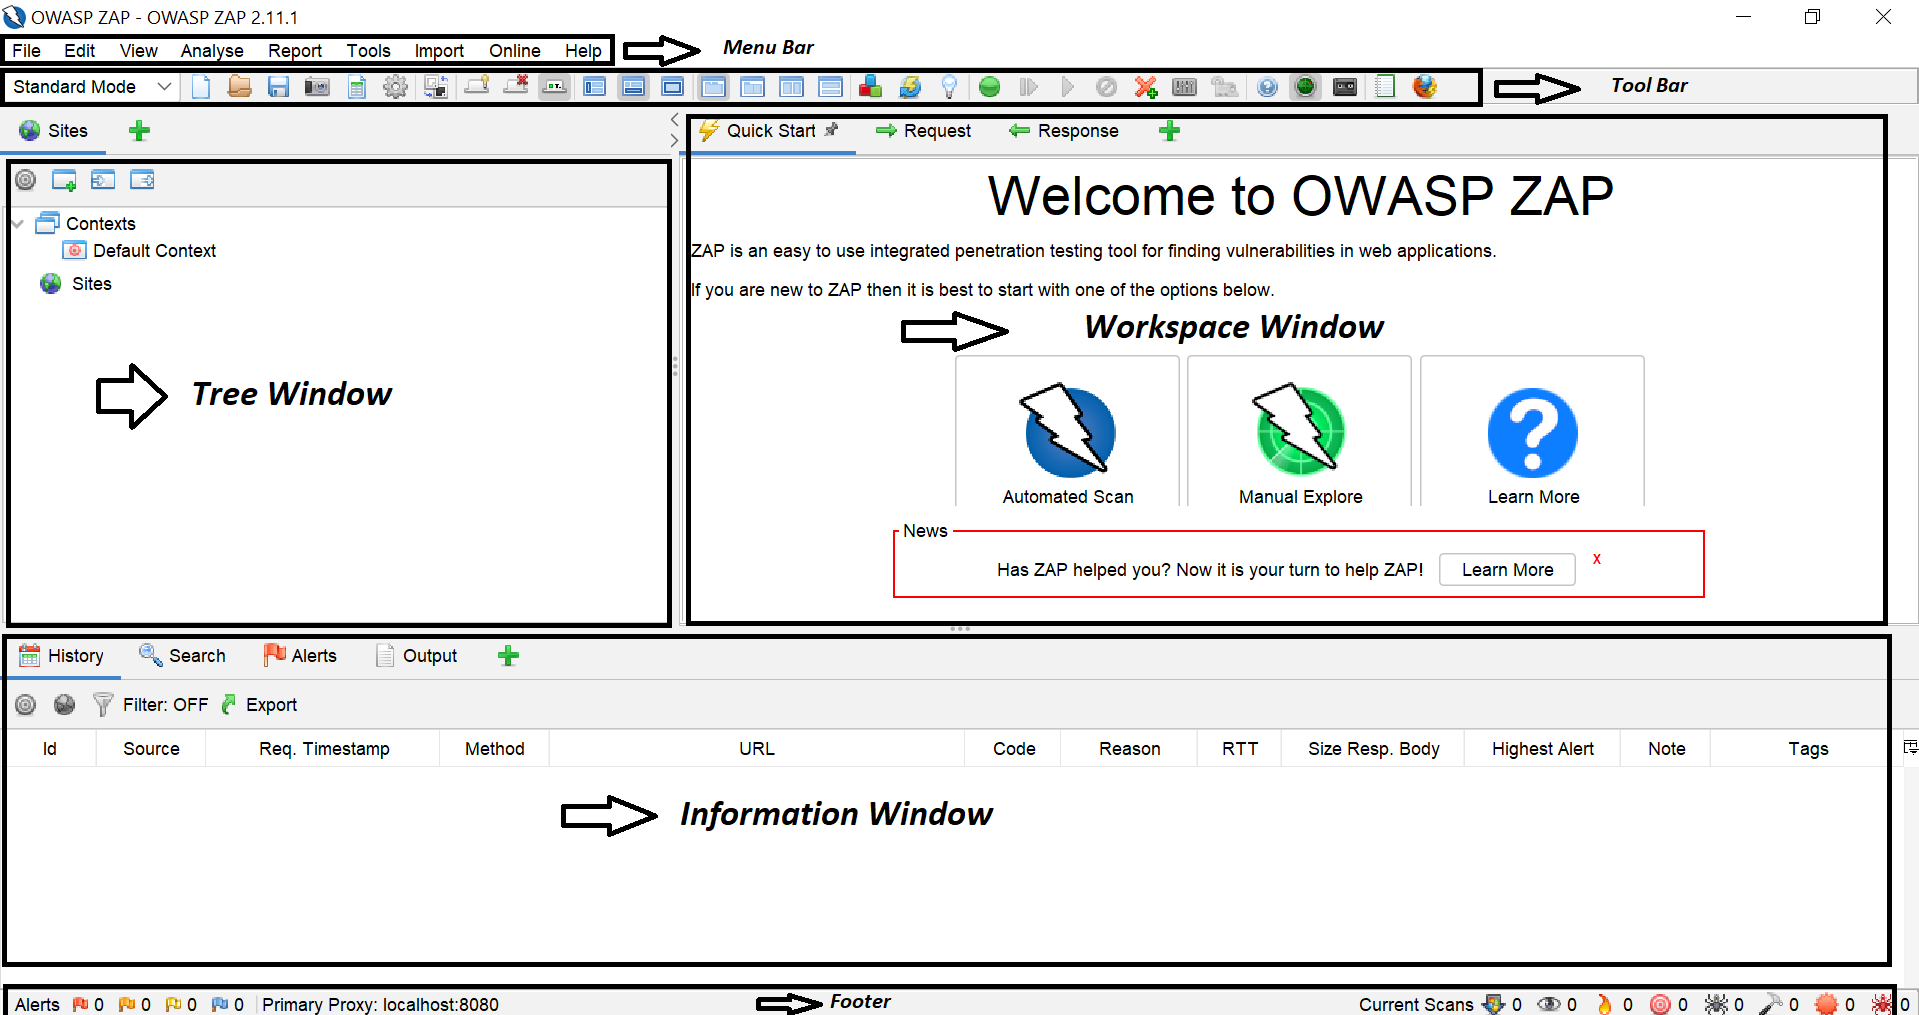
For more information about the UI, see ZAP UI Overview in the ZAP online documentation.
A quick note: You should only use ZAP to attack an application that you have permission to test with an active attack. Because this is like a real attack, actual damage can be done to a site’s functionality, data, etc.
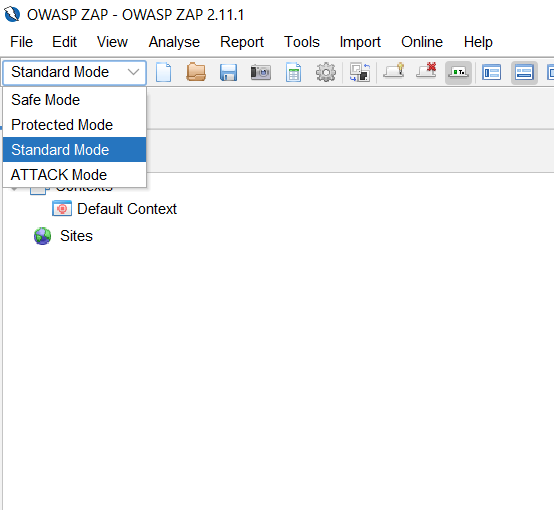
There is a dropdown to choose how zap should work so that you can customize it as per your needs in the dropdown.
Running an Automated Scan
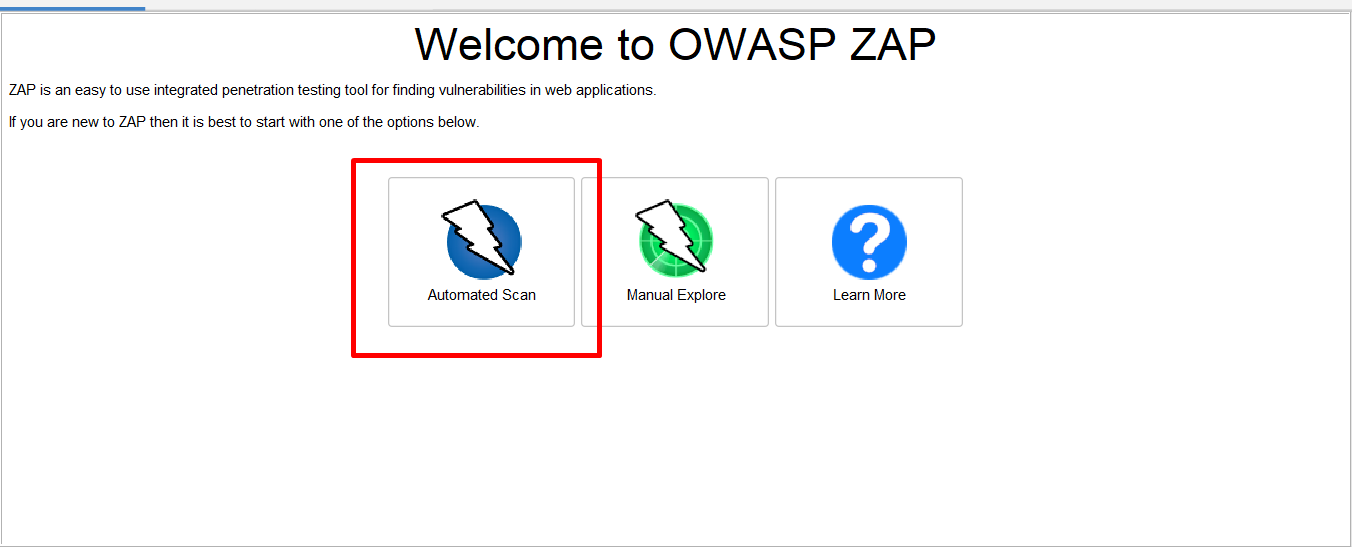
Now let’s use the easiest way to start the process with a help of a quick guide in the workspace window. In that choose automated scan as the first step
Step 1: Click on “Automated Scan” in the workspace window.
Step 2: Now give some demo URLs in the “URL to attack” field.
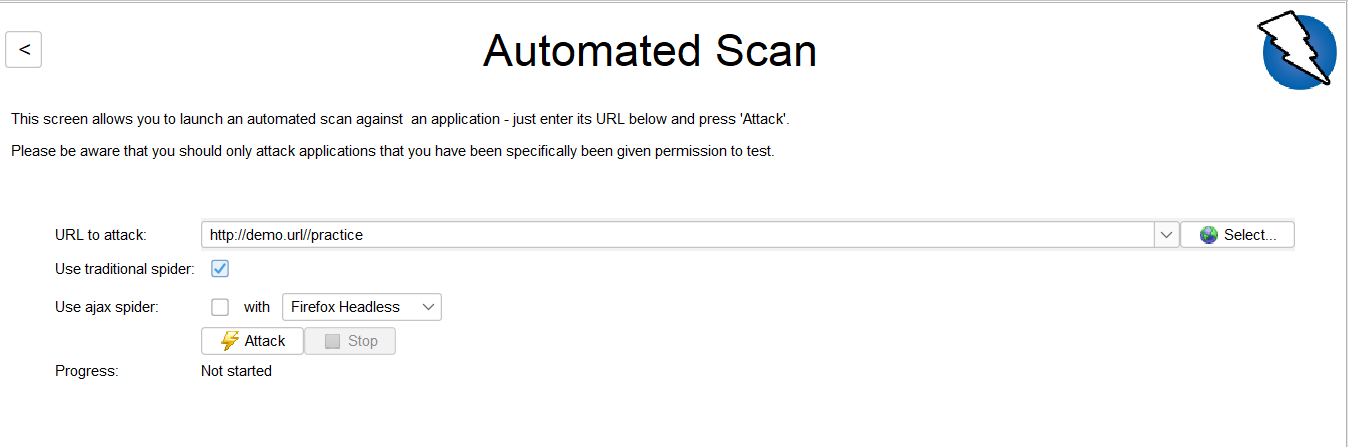
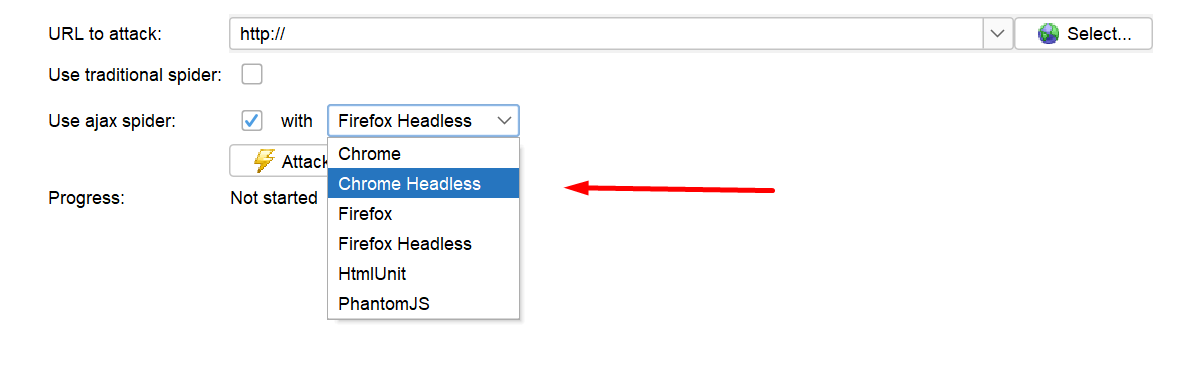
Step 3: So the next step is to choose a Spider in zap. As you can see, Zap contains two types of spider web application crawling.
- Traditional Spider: This spider will examine the HTML response and it is really fast but it is not effective when you are using the Ajax web application which generates javascript links.
- Ajax spider: This spider is more effective and it can find the response of the ajax application but it is quite slower than the traditional spider but more effective.
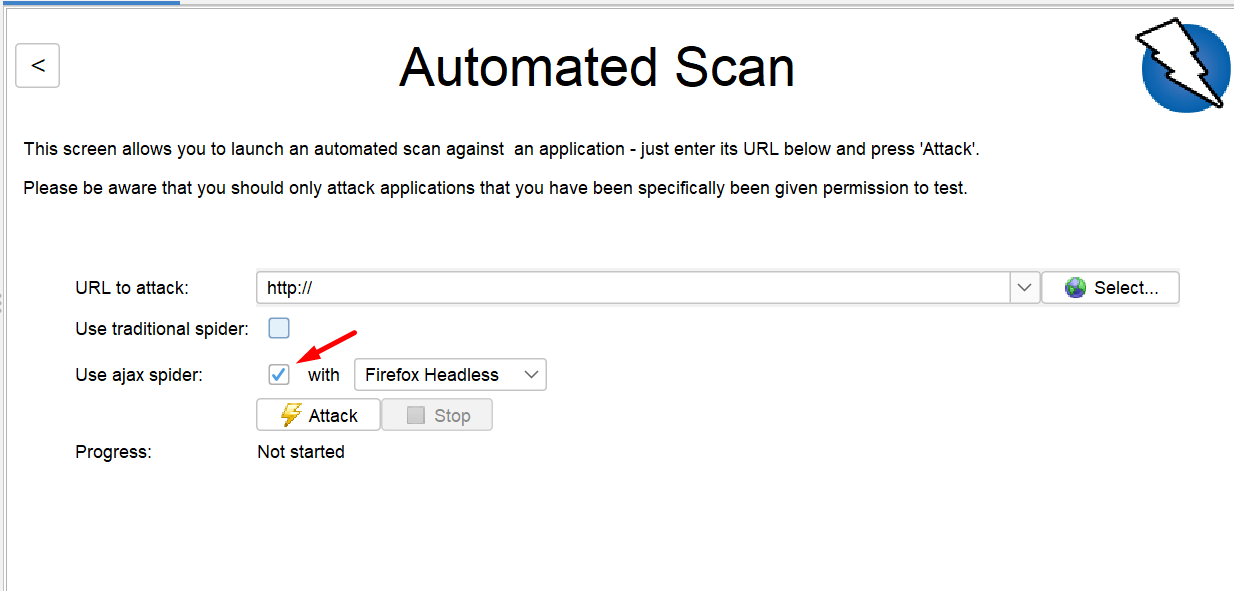
Step 4: Choose the browser you need to scan, if you are using ajax spider use browser headless for better response. Now I will choose Chrome Headless.
Step 5: Now, the automated scan is ready. To start the progress hit the Attack button.
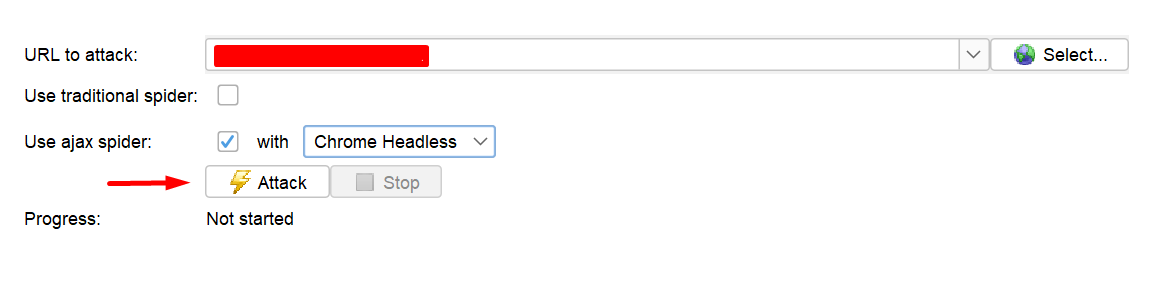
Now it will attack every URL and once the process is completed it will show the progress in the Progress Bar as shown in the image below.
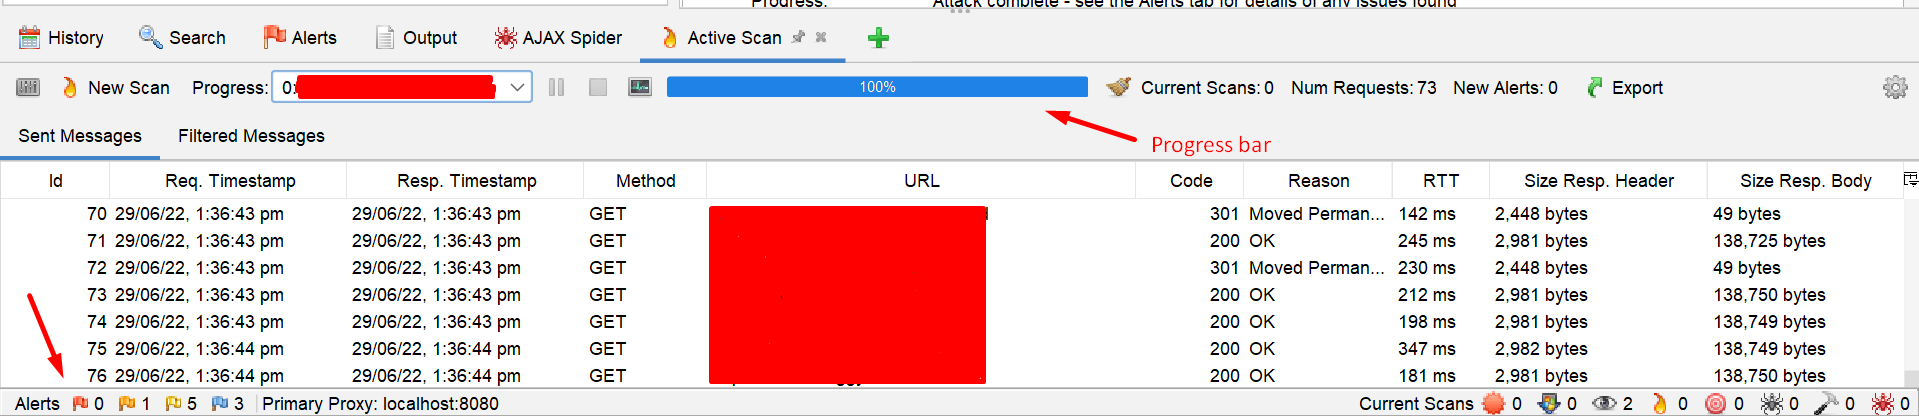
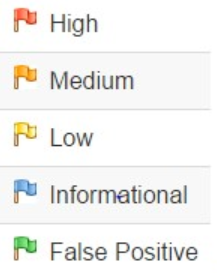
Alerts: There are five types of the alert flags in the scan progress screen that indicates the below,
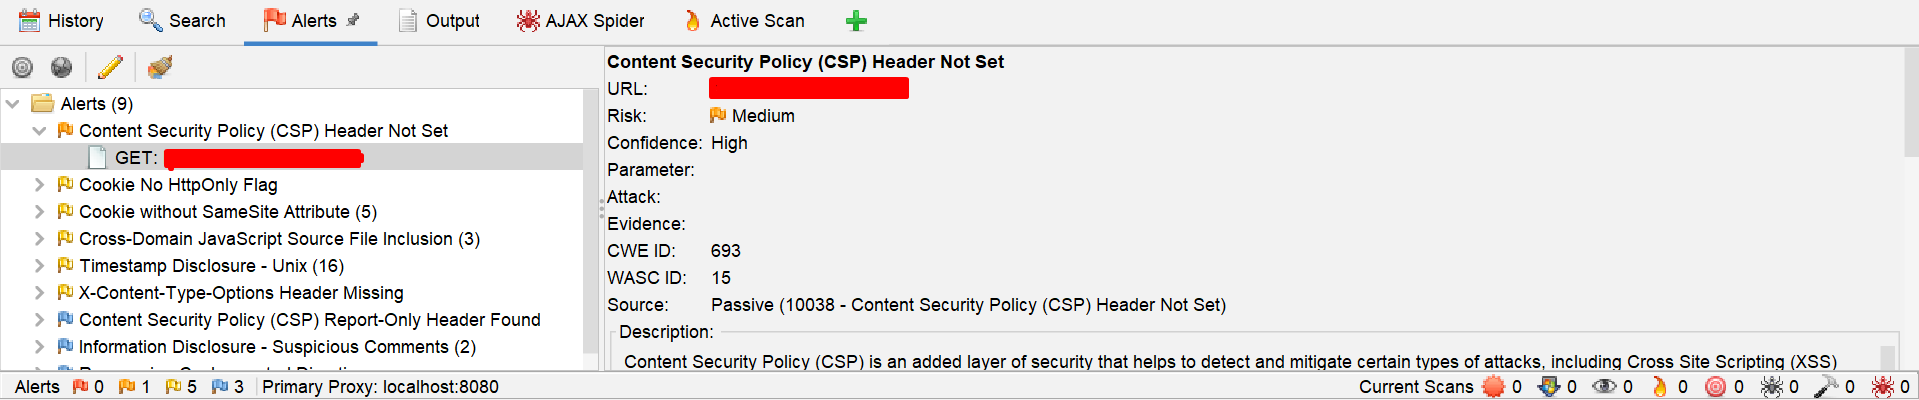
View Alerts and Alert Details
When the scan is completed it will automatically navigate to the alerts page, in which it lists every alert one by one.
When you click on any alert in the list, it will show the description or details of the alert as shown in the image.
View Request and Responses
We can also view the response and request in the workspace window.

We can either view it as a text or large text. To view it in the large text, we can choose from the dropdown.

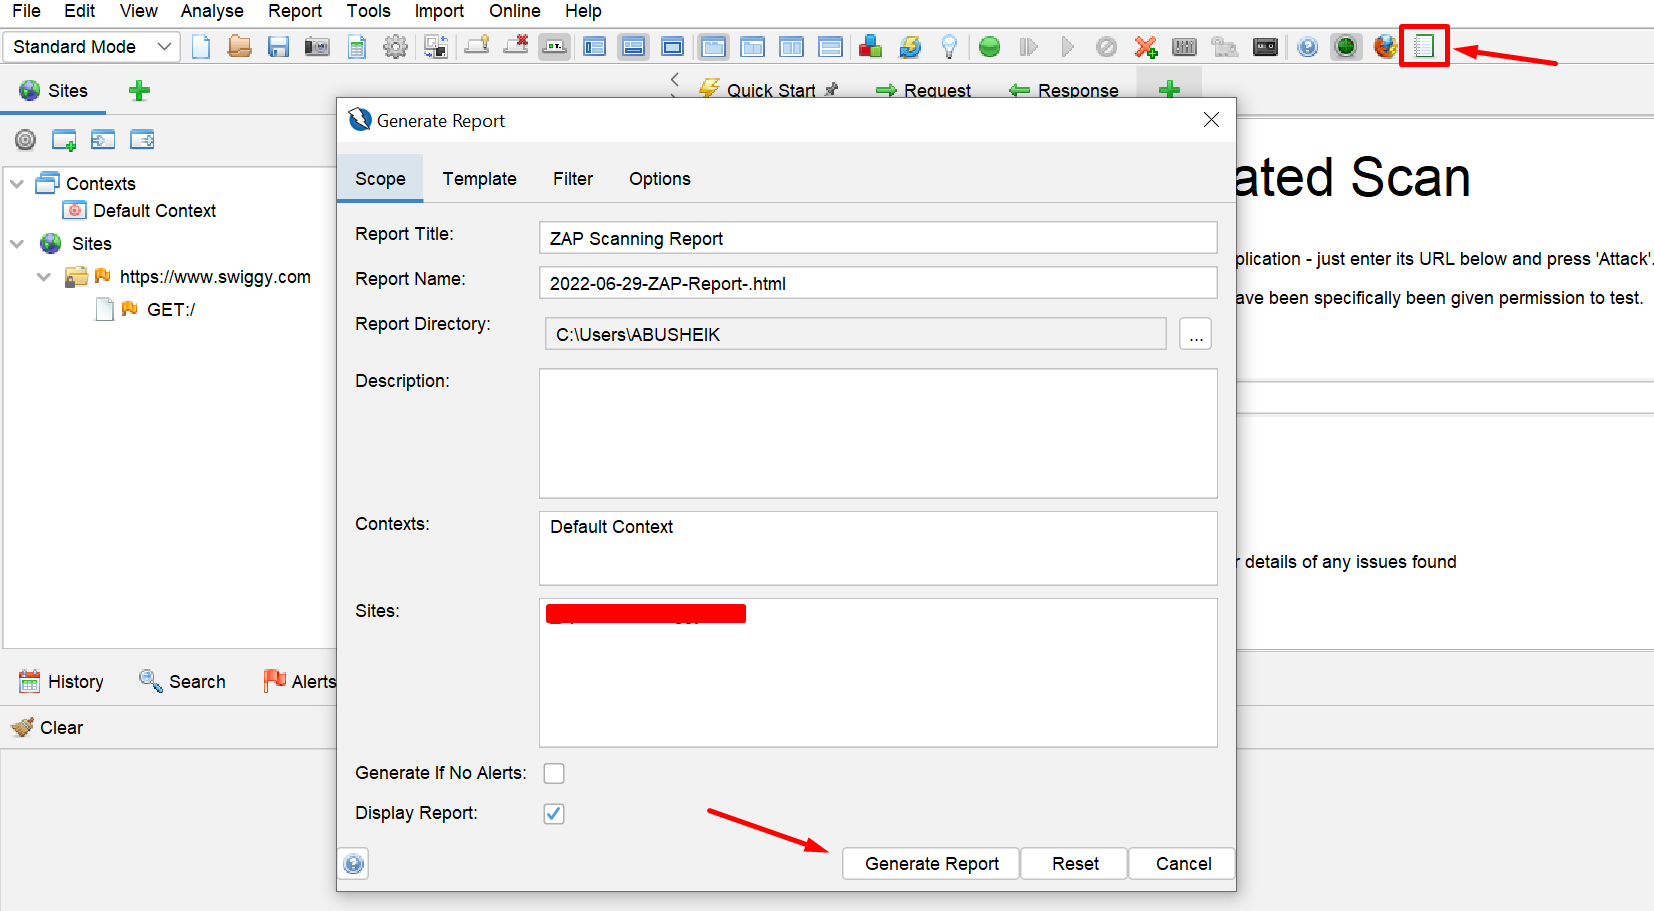
Saving reports
We can also generate the scan report in the ZAP application by clicking on the report tab and choose “Generate Report”. Once clicked, a scan report in HTML format will be generated.
The End
So yeah that’s all for today, As of now, we have discussed the installation of zap and how to perform an automated scan and save reports in zap.
In my upcoming blog, we will be discussing the manual scan, advanced desktop features, and automation using zap. Until then, keep expecting the best from us as always!
Happy Testing!