
Hey there! In this first blog of mine, I have detailed my experience of building a Sports meet and events tracking mobile application from scratch to getting it live in the app stores using React Native and Expo.
I’ve talked about how going an extra mile from the defined requirements, and adding personal touches to the app garners good appreciation from the client and users alike, and some key learnings documented here that you as an avid reader would find helpful. Let’s get started!
Project Overview
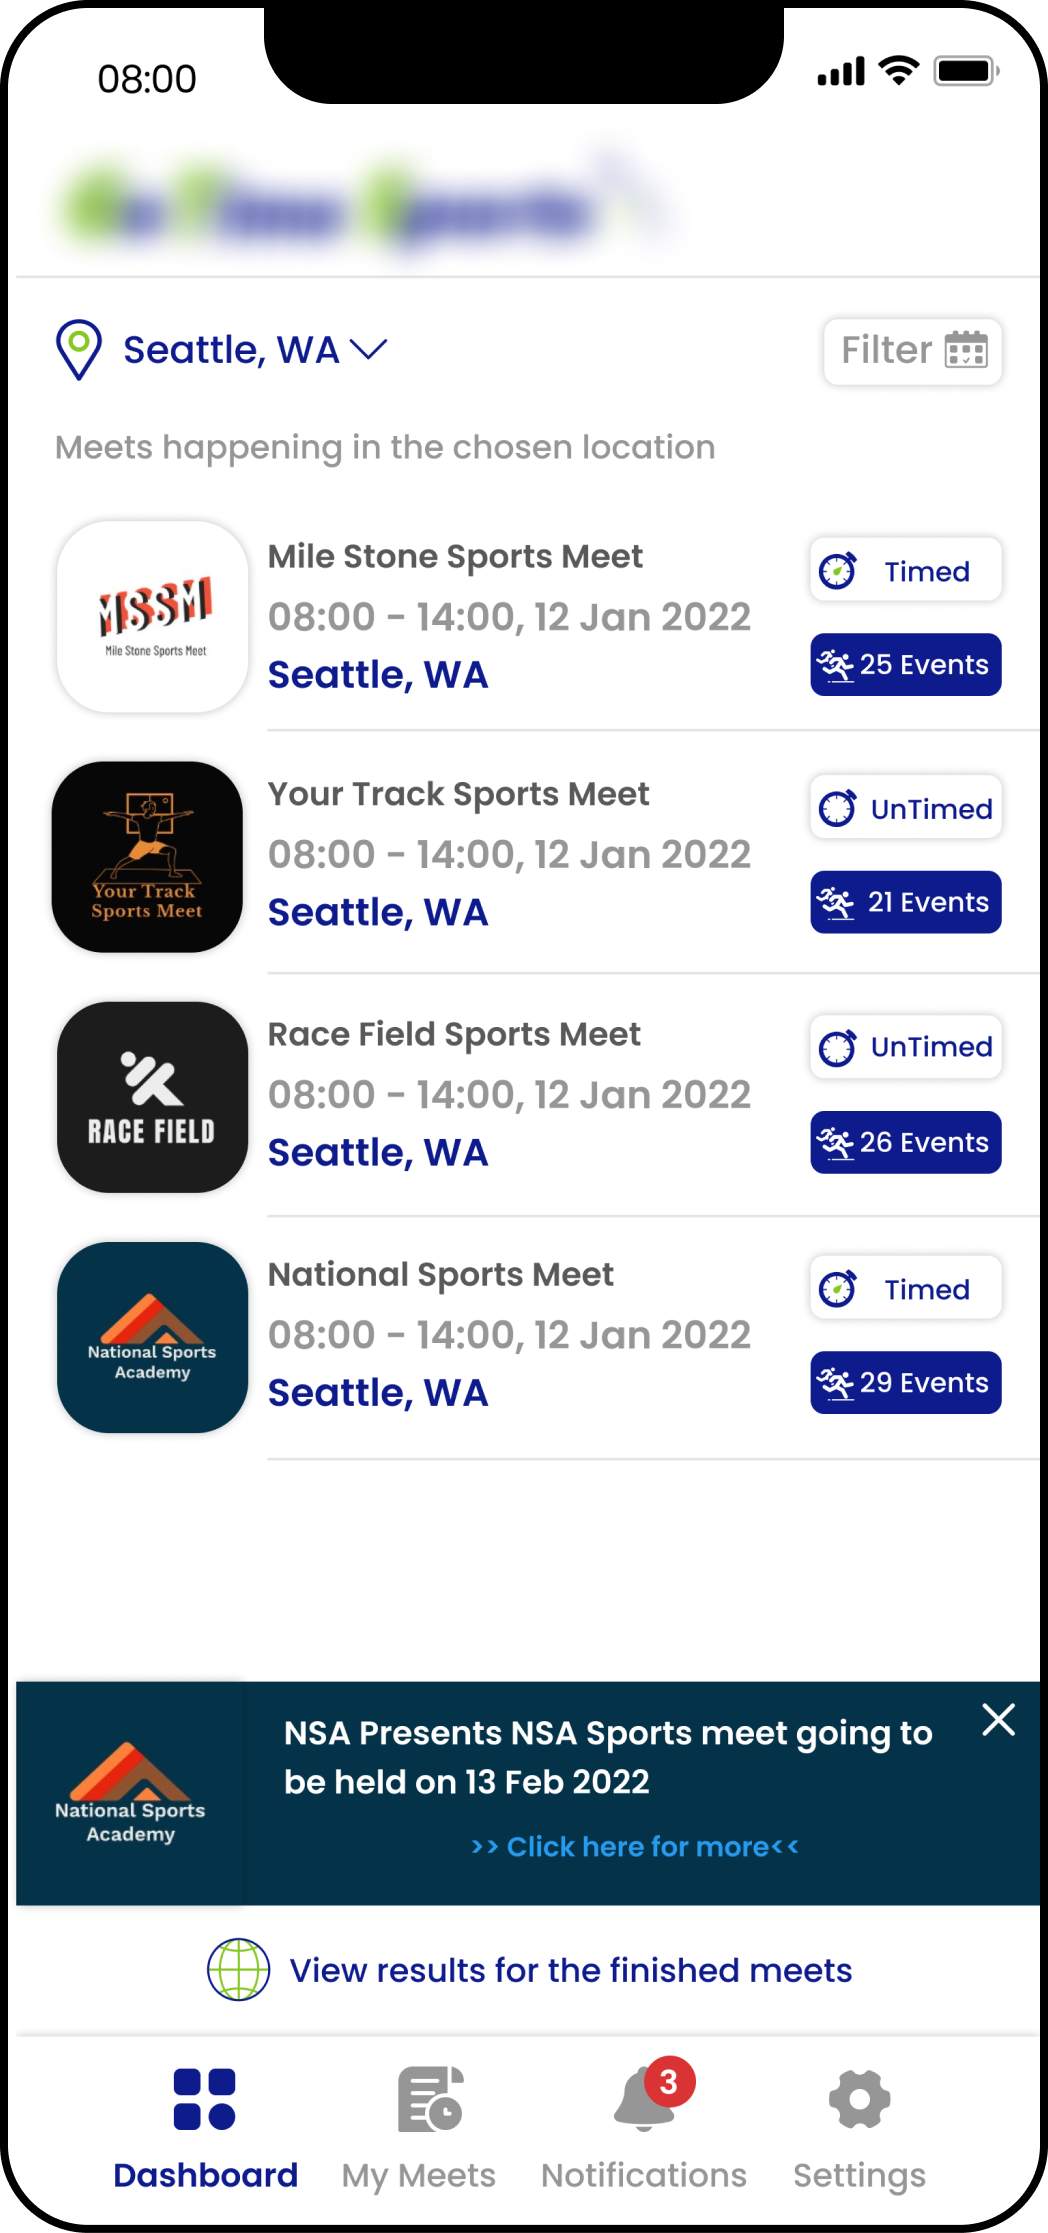
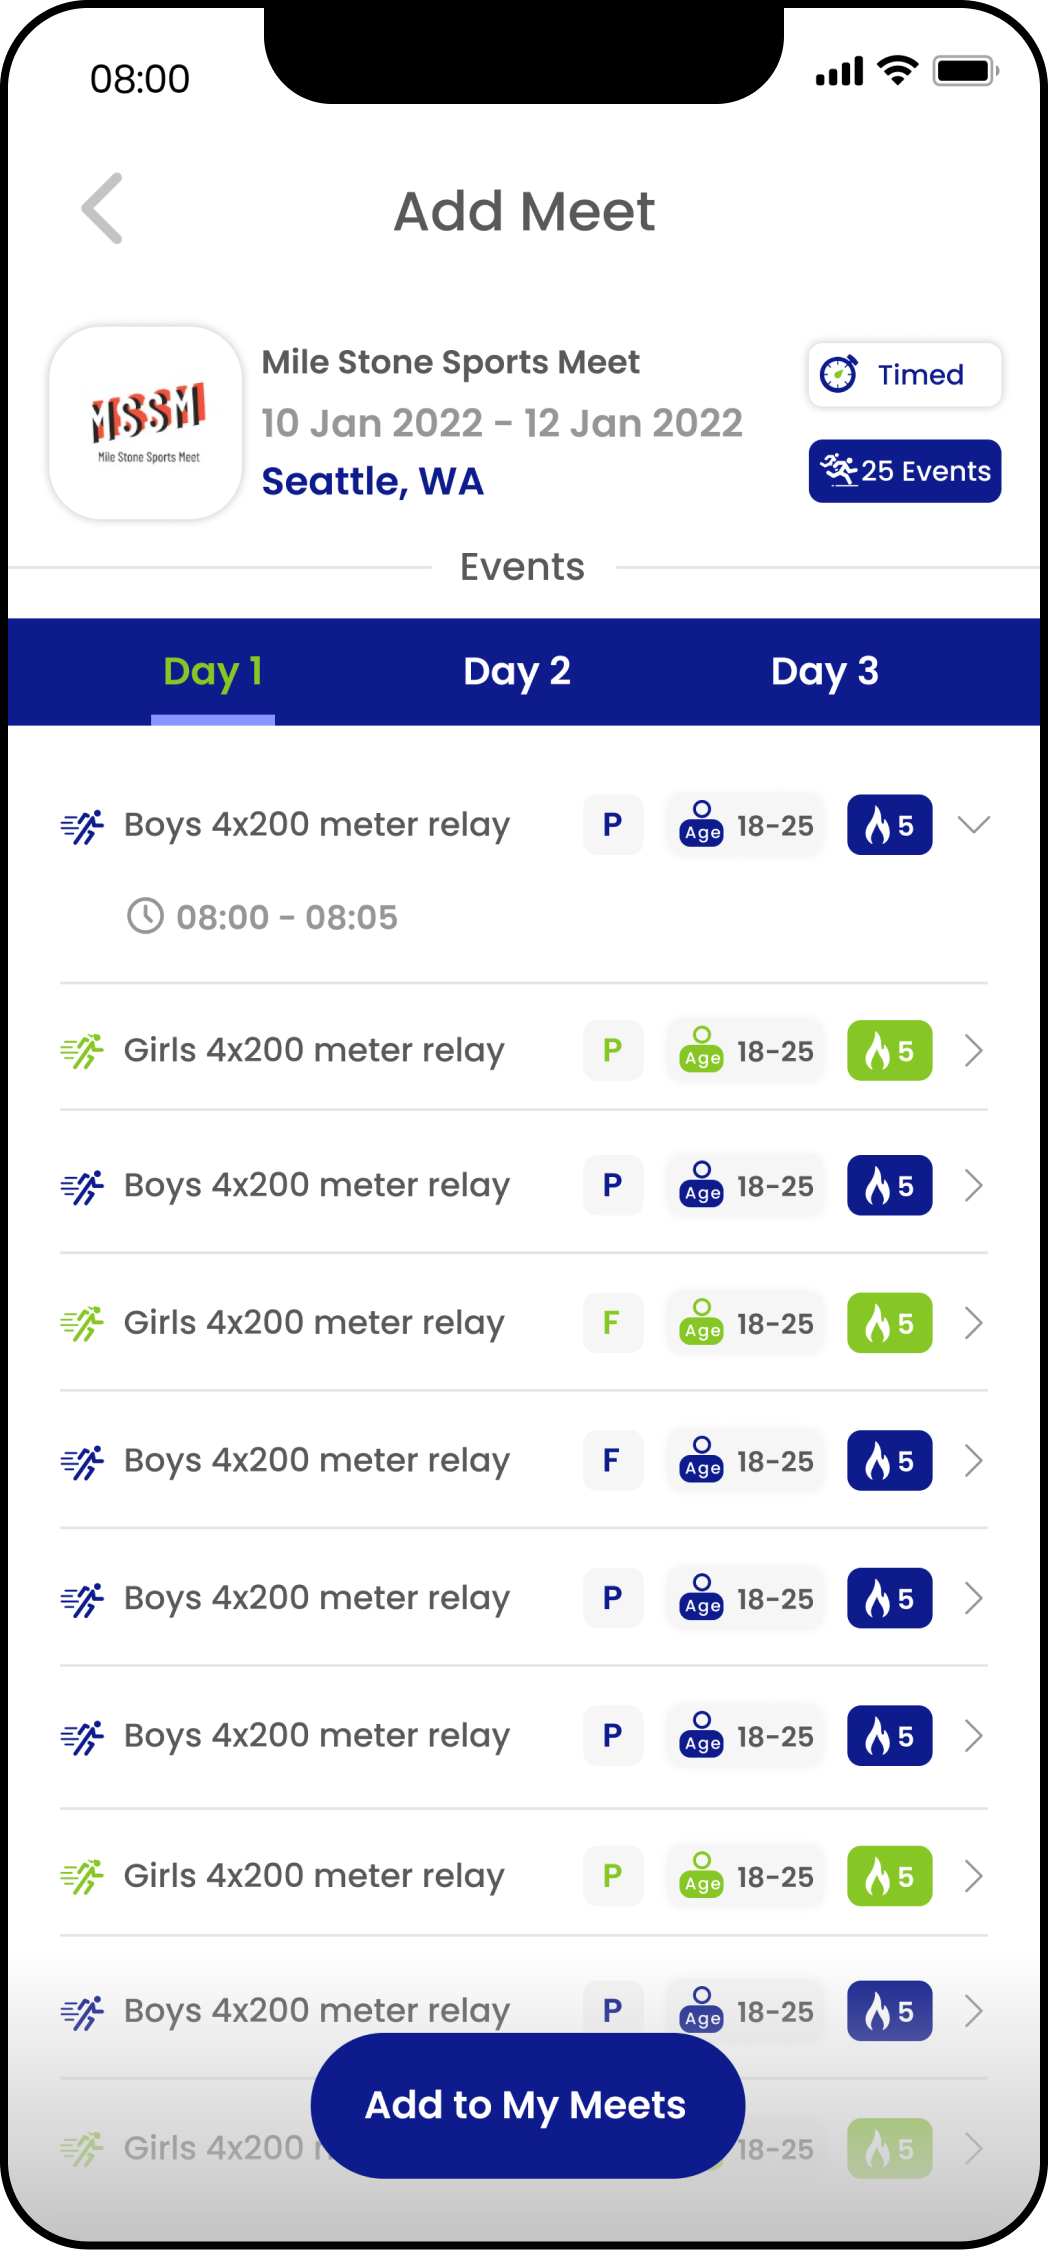
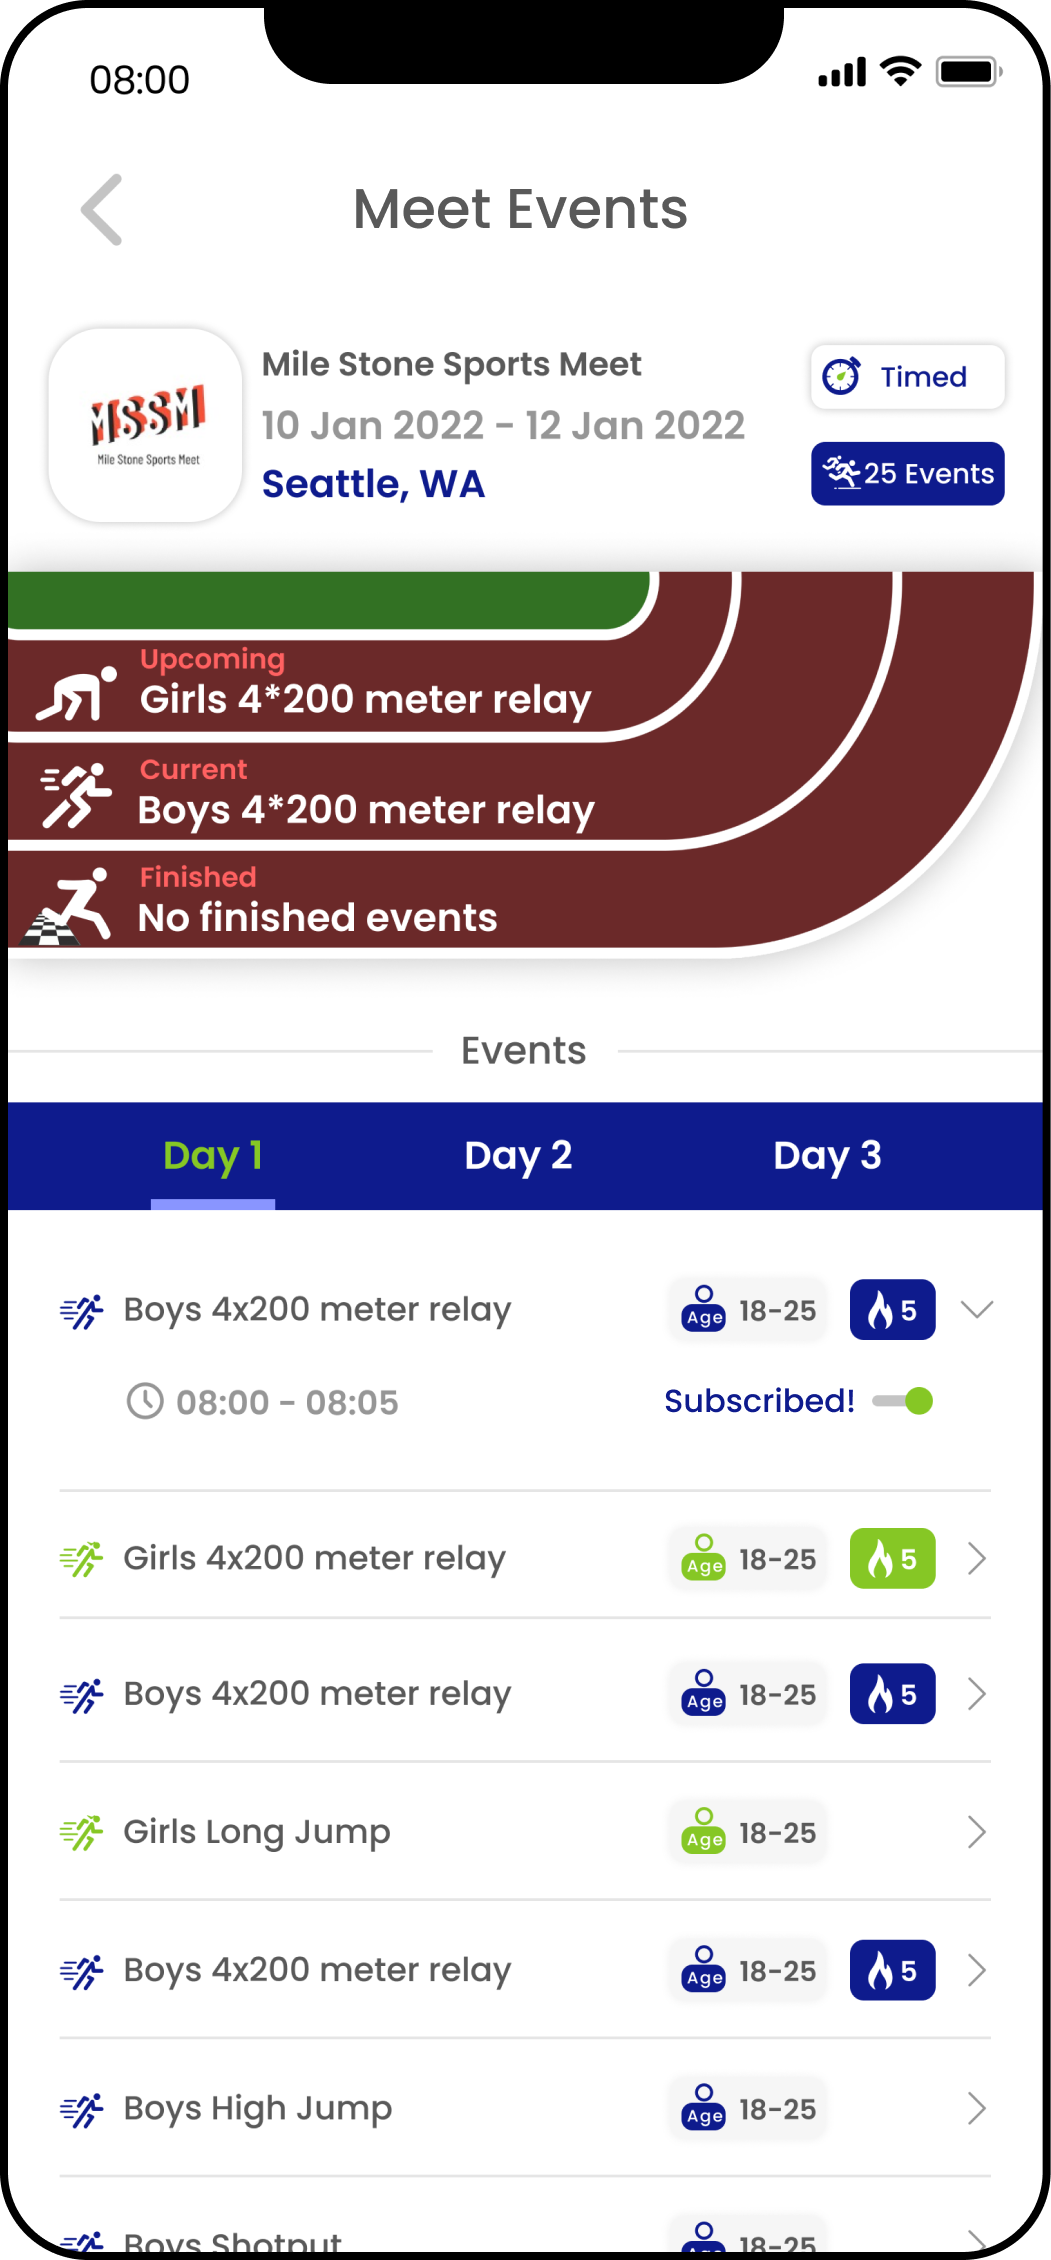
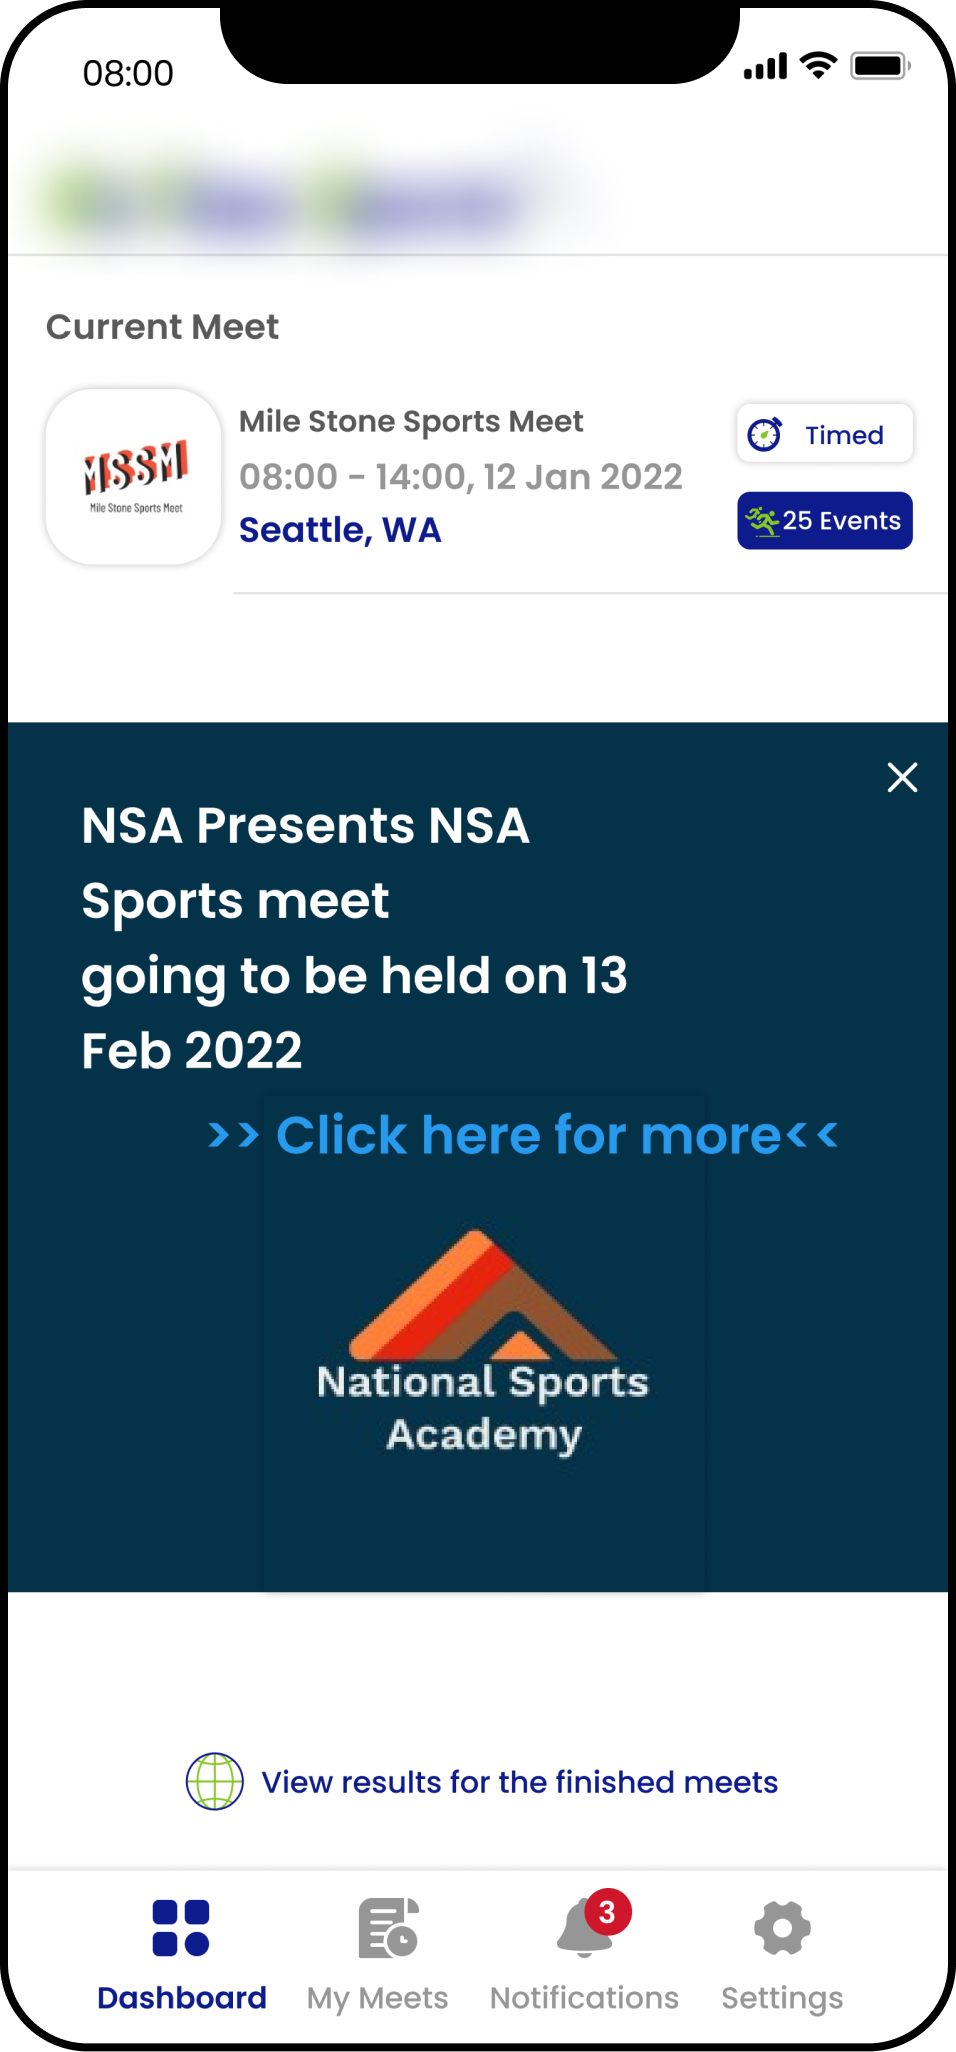
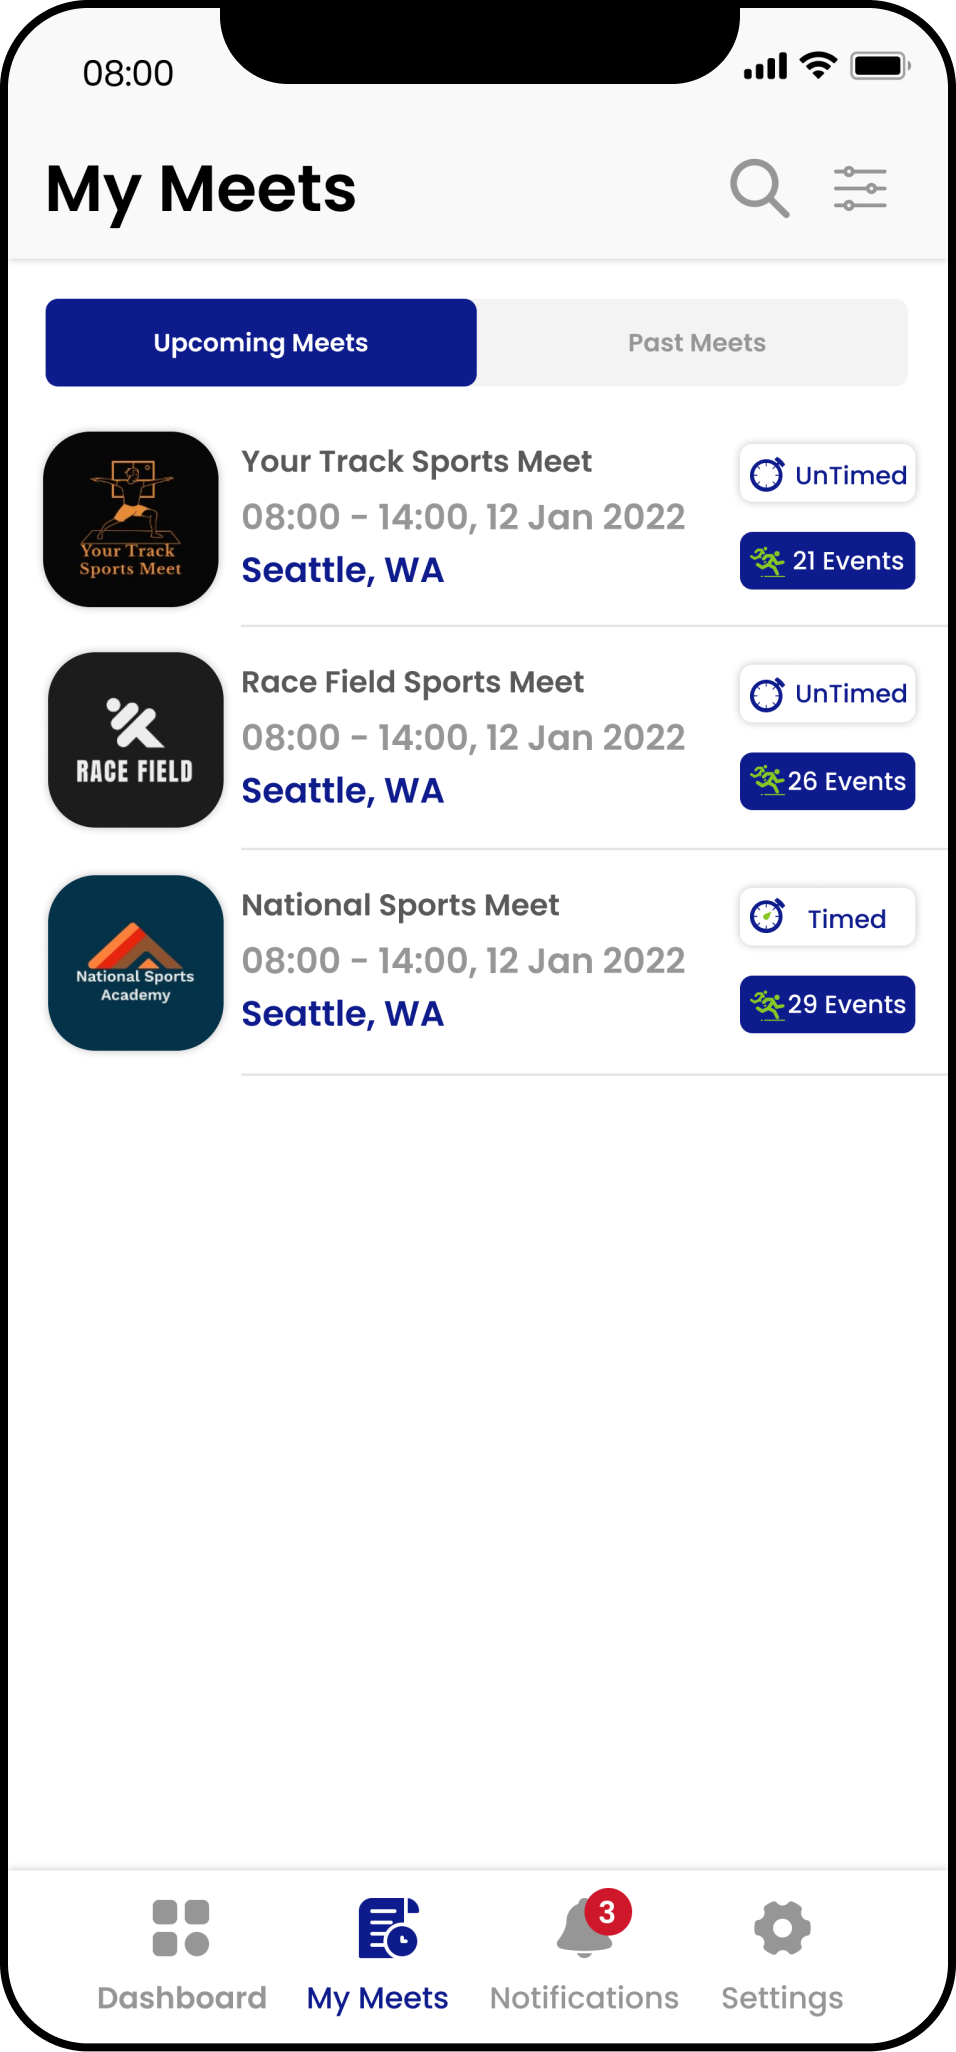
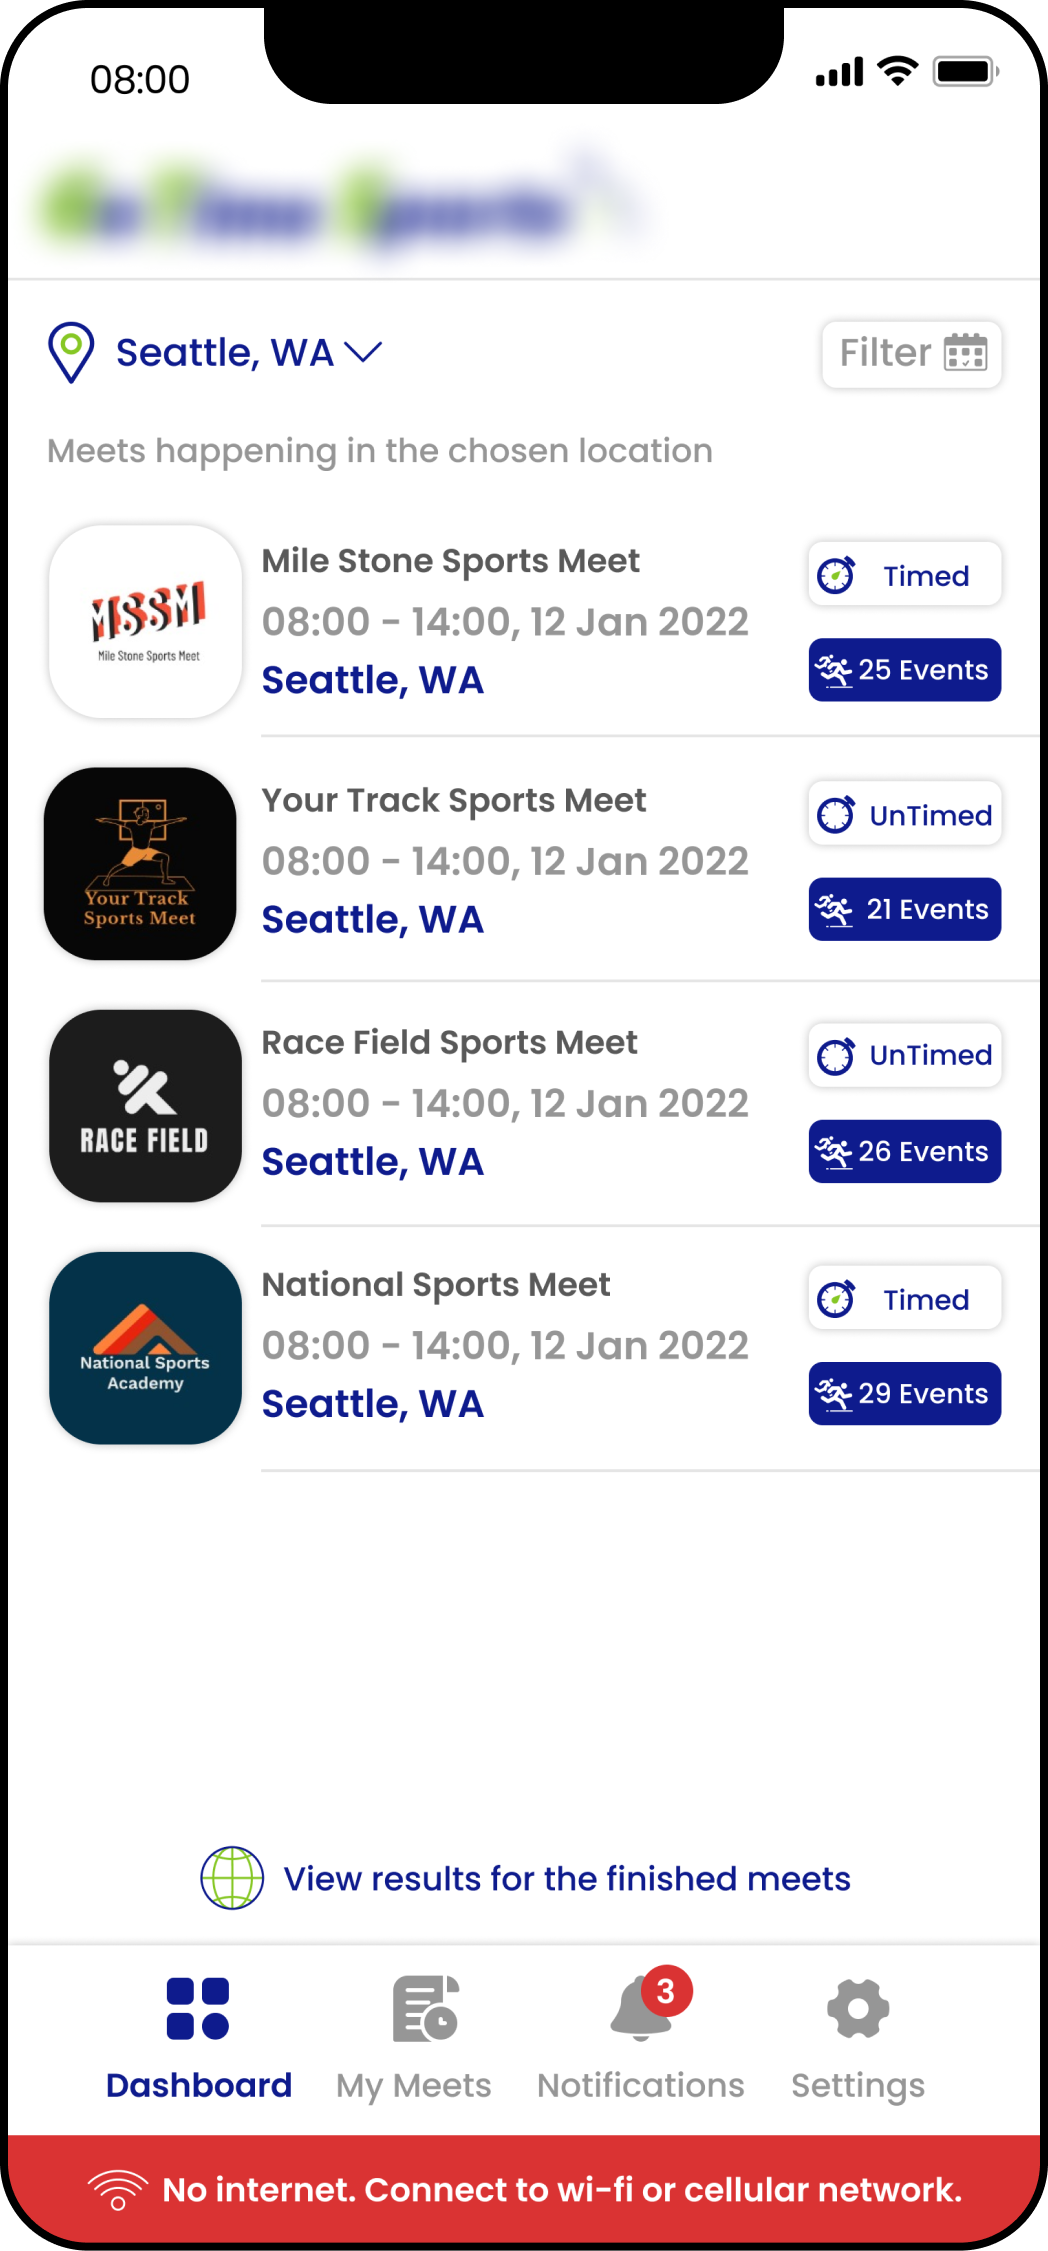
The project in hand required building an application to view, register, attend, and get notified about sports meets and their events, held across different states in America. It has multiple users such as Coach, Athlete, Spectators, and Meet Director for whom the functionalities change accordingly. These common users can view created meets and their events and register for up to 3 meets. They can track events in real-time for each of the registered meets, can enable notifications for up to 5 events per meet, and also view results of finished meets. Below are some sample screens which showcase some of the above use-cases.
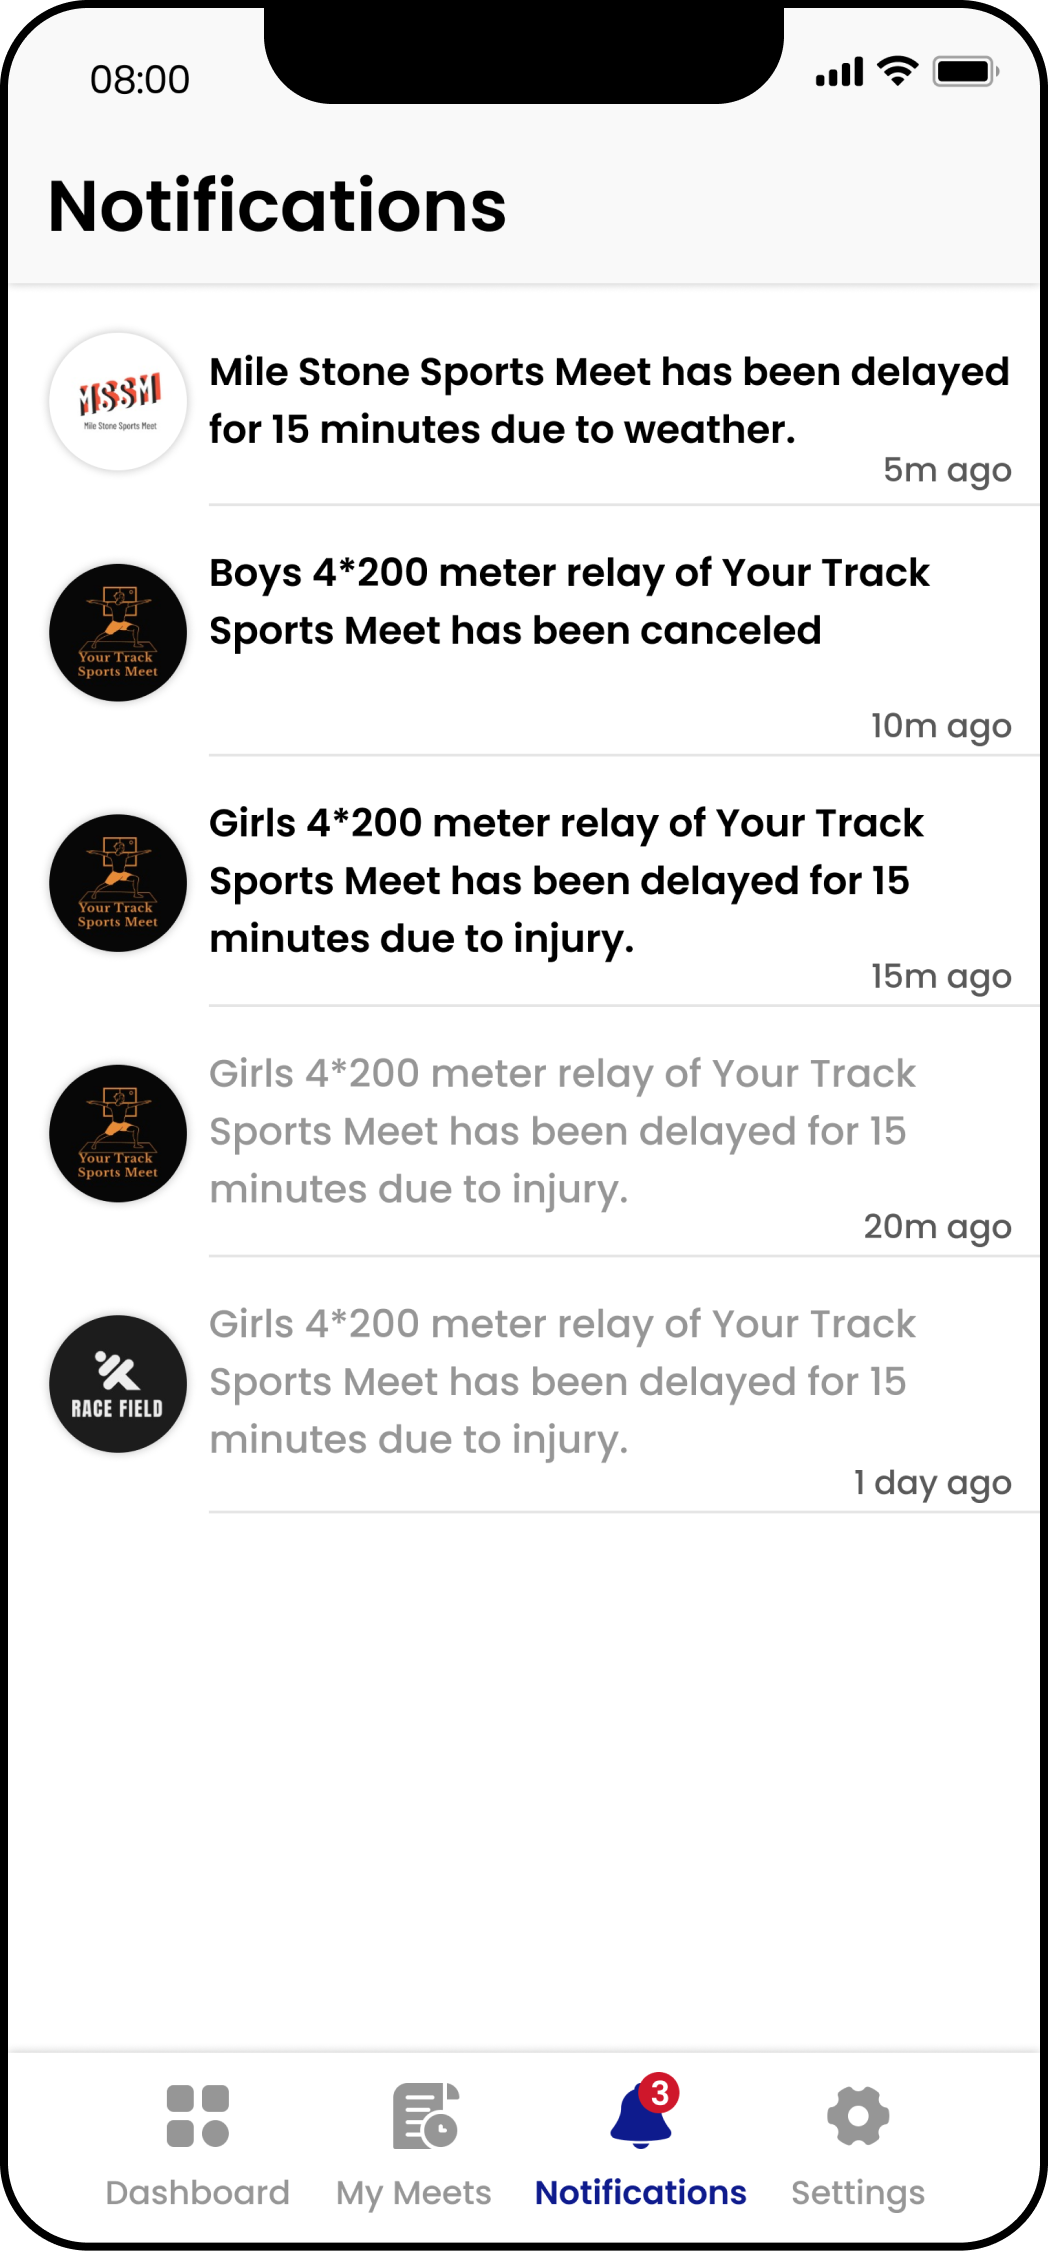
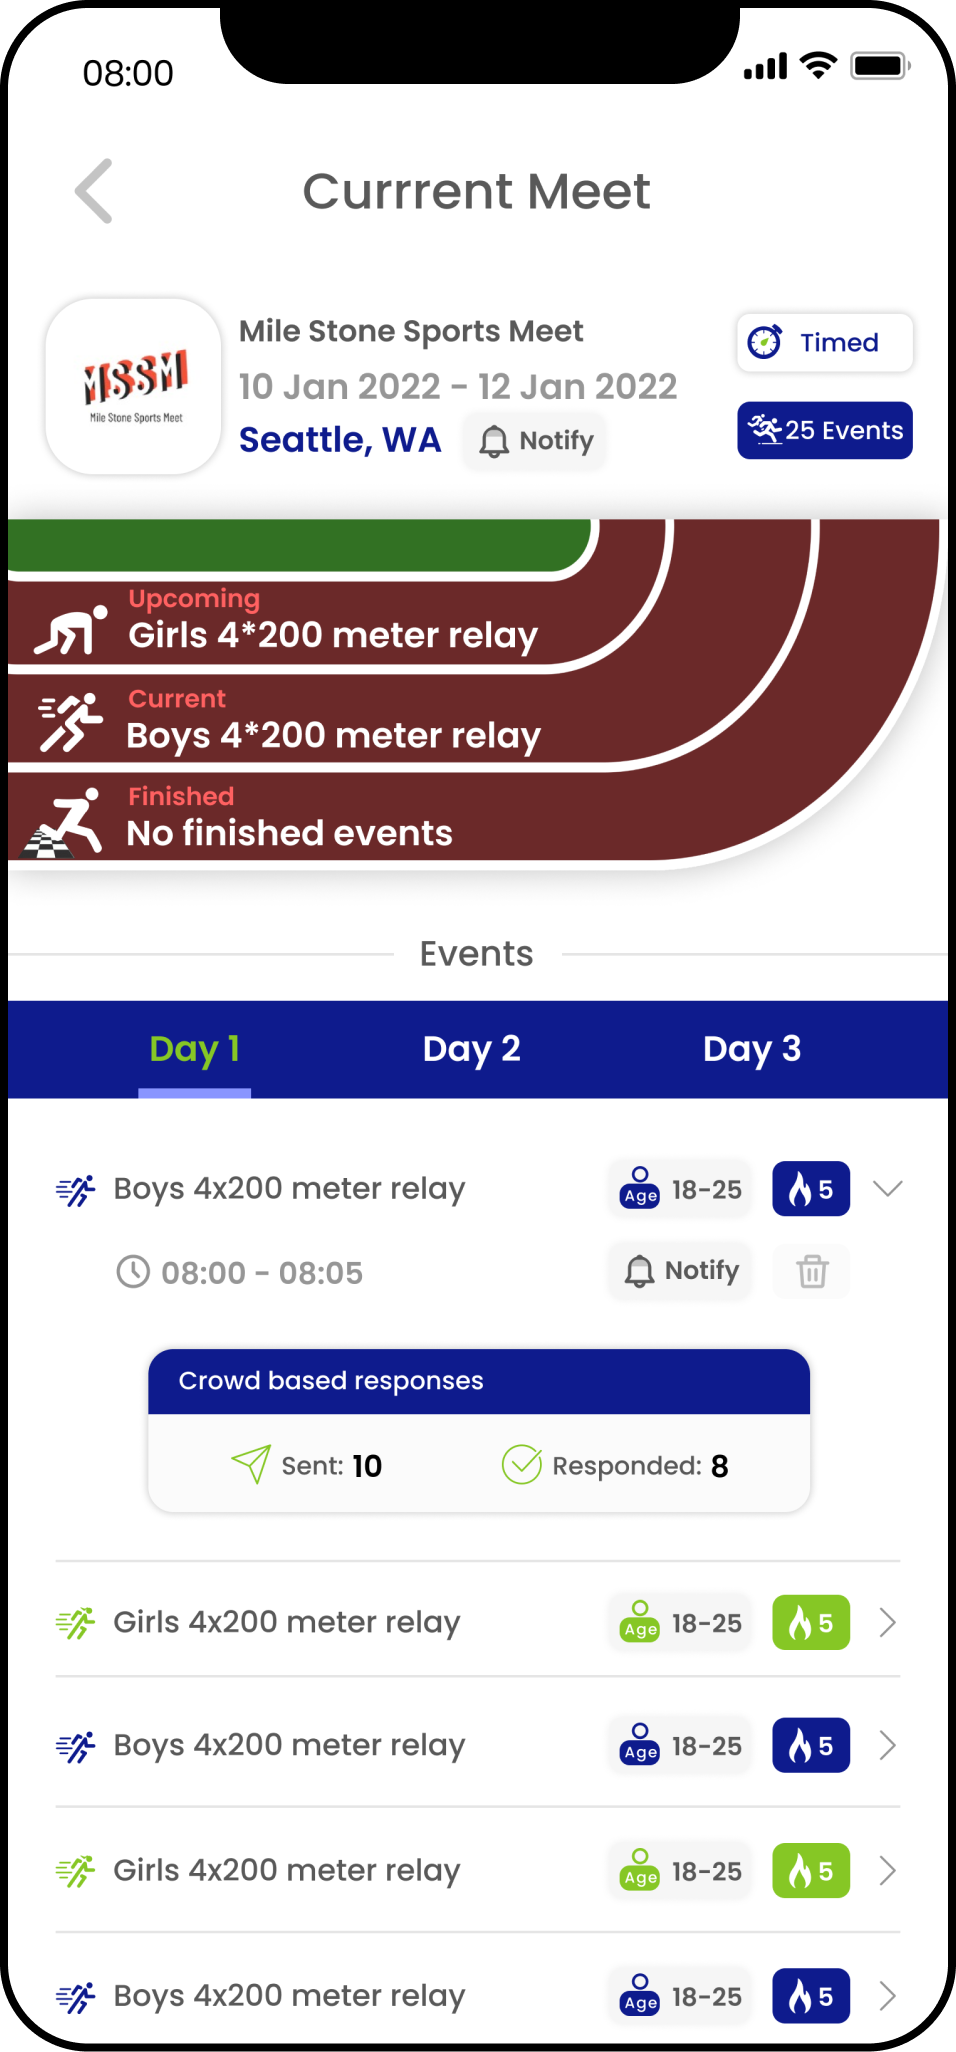
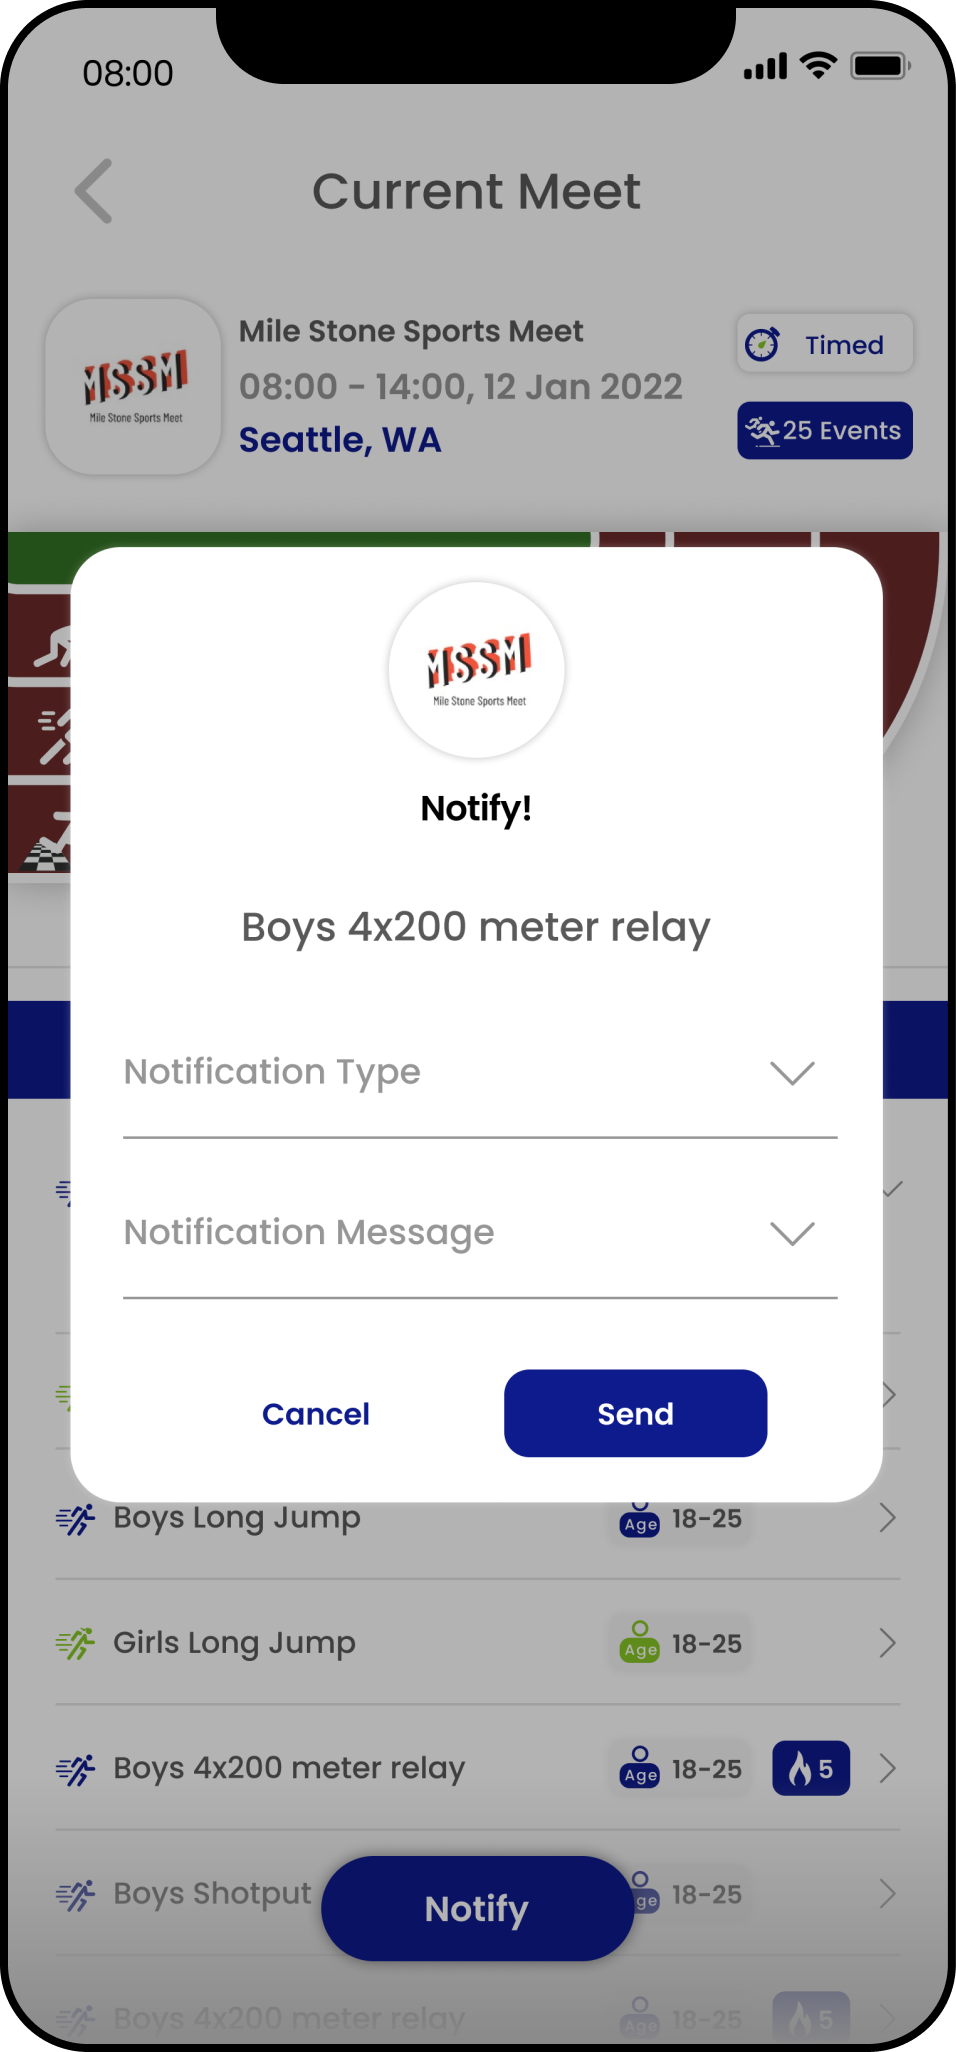
On the contrary, Meet Directors can create meets and manage them. They have the ability to change the heats (rounds in an event), delete an event, delete meets, view past and upcoming meets, and notify users subscribed to the meet or event individually about delays, cancellations, alerts, and so on. Below are some sample screens which showcase some of the above use-cases.
Key Learnings
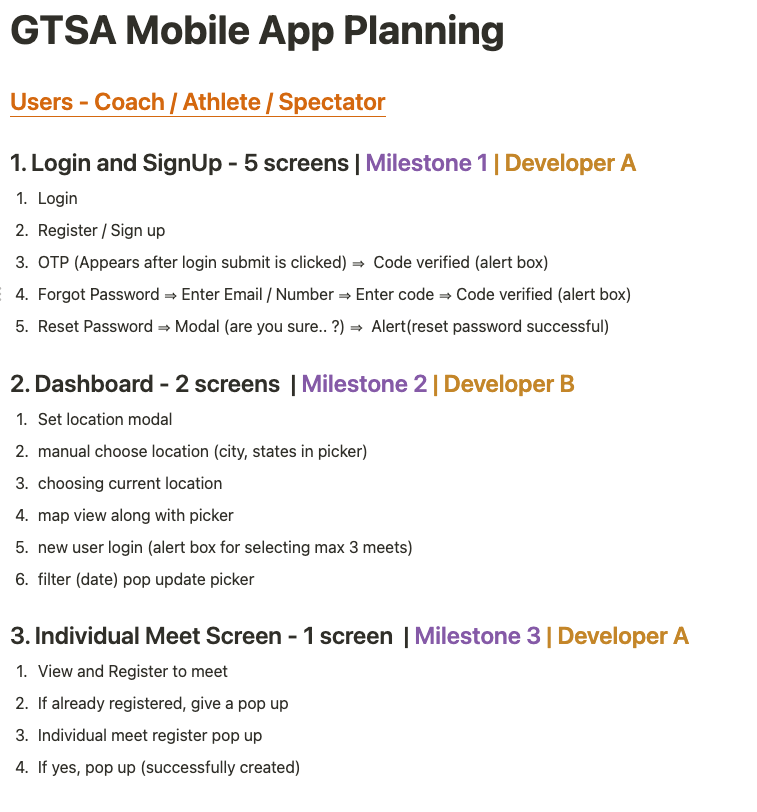
I. Planning ahead
Once the UI designs for the app are ready, it is only natural to dive immediately into the coding process and start building the application. But a good practice before doing this is creating a high-level action plan and dividing the whole process into small chunks or milestones.
It is often good to add details on each task, assumptions if any, questions, and doubts that may arise while breaking down the tasks. By doing this, we help simplify the process, identify any missing information, and also reduce any overwhelming feelings we might experience as the application scales.
Below are a few images of some pre-planning done for this project.

II. Folder structure to the rescue
One of the most important learnings from this project was implementing a good folder structure. This may not look like that big a deal but believe me, as the project grows bigger, the only thing saving time and preventing stupefaction when looking for definite code blocks while debugging is well-structured folders.
Since in React, we have the luxury of writing and maintaining UI blocks as individual components, it is important to segregate them according to their roles and functions across folders.
Below is a small part of the implementation of the folder structure in this project.
- App: Contains nested folders where each folder has further sub-folders and the related components within them.
- Components – contains all common reusable components needed across the application.
- Hooks – holds all custom hooks created to be accessed across the application.
- Screens:
- Authentication – screens pertaining to authenticating users. For example, SignIn.js, and SignUp.js.
- Common Users – screens related to common users of the app. For example, Dashboard.js
- Management Users – screens related to management-level users of the app. For example, ManagementDashboard.js
- Config: Having individual files which have applications’ common styles, fonts, colors, and other reusable code required. For example, Colors.js, Fonts.js
- Navigation: Contains the entire application’s navigation logic using React Navigation which is split into 3 main files –
- AuthStack – contains authentication flows like sign-in, sign-up, forgot password, OTP, etc.
- AppStack – main application like Dashboard, Meets list, events list components.
- RootStack – contains AuthStack and AppStack and conditionally renders either based on user authentication.
- Provider: Houses the different contexts used for data sharing within the entire application. For example, DashboardContent.js, AuthenticationContext.js
- Service: Holds files for managing various API calls for different users and their respective screens. For example, AuthAPI.js, ManagementAPI.js, ApiPaths.js
Another point to be mindful of is the naming of these folders and subfolders. Names can be camel or pascal cased and should be meaningful so anyone can understand the flow when going through the nested folders.
III. Res(fonts)siveness matters
As for responsive layouts, we achieve it through media queries, Flexbox, and grid system on the web while on mobile we can use Flex and useWindowDimensions API. But what about font sizes? How can we make those responsive?
Unlike on the web, we don’t have relative (rem, em, %) and absolute (px) font sizes. The way I tackled this was by using a good npm package called react-native-size-matters.
It has different scaling functions that we can use to get the apt sizes on various mobile and tablet devices. But did this solve the problem?
Well.. partially yes. The fonts were scaling neatly on different devices but one thing I missed to take into account was how to keep it responsive even when a user manually increases their overall system font size under the phone settings.
This situation was especially true for elderly people using this application who found it difficult to read the normal fonts. They would often have their system font size set to the maximum which would in turn affect the UI in the app as now some components and texts were going beyond the screen.
The way I tackled this issue was by utilizing the PixelRatio API from react-native. Through some experimentation, I found that the devices on which the font size was manually increased had a pixel ratio of greater than 1.
So while defining the font sizes I took into consideration the pixelRatio value using the getFontScale() method and conditionally adjusted the fontSize if it was greater than 1 so that the UI would not get disturbed.
IV. Using a good UI Library
Using a UI toolkit/component library is often useful to reduce development time and effort and helps deliver applications quicker since we don’t have to design and code individual UI components from scratch.
There are many good UI libraries available for react native like RNUI (React Native UI Library), React Native Paper, React Native Elements, React Native UI Kitten, etc. For this project, RNUI was chosen as it had all the required UI elements and also good documentation.
V. Platform-specific tweaks
This was one of the most frustrating discoveries made when building this project. A lot of time when writing certain code, it would work differently for Android and iOS. A good example is triggering a modal to automatically close using a setTimeout() function.
The timeout set for this function would be the same but the effects would vary depending on the platform it runs on. For instance, when the timeout was set at 500ms, the modal would promptly close on Android but not on iOS.
For iOS, setting a higher number works like 750 or 850ms. Not only for this but also for platform-related styling and other niche features, it is best to keep platform specificity in mind so as to prevent any untoward behavior in the future.
We can use the Platform API provided by react native through the Platform.OS() is the method we can check if the device is Android or IOS and then conditionally write different code that works best on these platforms.
VI. Integrating push notifications and third-party SDKs
When developing an application, it is not possible to always build every feature and service from scratch. Apart from being time-consuming, it requires a lot of effort and thorough testing to create something stable and reliable. This is where learning to identify, use and integrate good third-party SDKs with our application comes into play, services that have already been developed and used by a large community.
Push Notifications
For this application, push notification service was a core feature and the choice of service that I went with was expo-notifications. Expo notifications provide an API to fetch push notification tokens and to present, schedule, receive, and respond to notifications. Why this service specifically?
It manages to push notifications for both iOS (through APNS – Apple Push Notification Service) and Android (through Firebase) separately and reduces the developer’s efforts & setup time by writing lesser code.
For instance, expo notifications provide an API where we can fetch the push token, and then upon sending a notification to this push token via the expo server our job is done. The expo server further handles connecting with APNS and Firebase to push the notification to the respective platform devices.
Two issues with this service that I came across were:
- Inability to push to more than 100 devices/push tokens at once unlike when configuring directly in Firebase we can perform 1000 pushes at once.
- You cannot attach images to the notification data and send them to users. The only configurable properties are the title, message, and body of the message along with changing the notification default icon and background tint.
A better alternative to expo notifications without the above issues would be OneSignal. Integration steps for react native are easy and well explained in their documentation.
Error tracking
Another 3rd party SDK integration required for this app was Rollbar which is a cloud-based error tracking and monitoring service. Configuring the rollbar was pretty simple as well, requiring you to add just a few lines of code. This was mainly used at API calls in the application where if there was an error a suitable rollbar method would be called and therefore the errors can be tracked at the rollbar’s web portal. This allows us for quick and easy debugging of errors when the app goes out for beta testing or production.
Google Ads
In-app advertisements were another important requirement and google adMobs was the choice to go with. A good thing here is that Expo includes support for Google AdMob SDK and provides components for banner ads. With good supportive documentation, this also wasn’t taxing to integrate with the application.
VII. Releasing builds to the store
One of the final steps of building the application is getting it ready for being uploaded onto the app stores. This can be challenging the first time anyone does it. Below are some points to keep note of.
Choose your build tool carefully.
Build tools are programs that automate the creation of executable applications from source code (.apk or .aab for an Android app and .ipa for iOS). The building incorporates compiling, linking, and packaging the code into a usable or executable form.
Initially, I had chosen EAS Build for this application. EAS Build allows you to build a ready-to-submit binary of your app for the Apple App Store or Google Play Store. But an issue that I found with it was that it automatically adds unnecessary permission requirements in the manifest file. For example, this project uses coarse location and a fine location to get the position of the user and thereby identify which city and state they are using the app from.
When building the app via EAS Build and submitting it to the Google Playstore for review, it was rejected on the grounds of background location permission being added to the executable. With a lot of debugging, it was found that this build tool had been adding it automatically in the manifest file.
So the fix for this was using the native Android build tool, Gradle. Upon building the app with Gradle, this permission was not automatically added and the executable was accepted on the store. Surprisingly this wasn’t an issue in iOS and I ended up continuing using EAS Build for iOS alone.
Build numbers vs Version numbers
Version and build numbers work together to uniquely identify a particular App Store submission for an app. When submitting a new build to the Playstore or App Store, it is paramount to ensure that the version number and (version code for Android and build number for iOS) have been incremented. The version number works like a name for each release of the app. For example, version 1.0.0 may denote the first release, version 2.0.0 will name the second release, and so on.
When submitting a new release of the app to the App Store, it is common to make mistakes. You may forget an icon in one build, or perhaps there is a problem in another build. As a result, you may produce many builds during the process of submitting a new release of your app to the App Store. As these builds will be for the same release of your app, they will all have the same version number. But, each of these builds must have a unique build number associated with it so it can be differentiated from the other builds you have submitted for the release.
This is especially true when releasing your app for beta testing. When releasing version 1.0.0 of the app, you can release many builds each with incremented build numbers (1.0, 1.1, 1.2) or (1,2,3).
For each new version of your App, you need to invent a new Version Number. Eg: If 1.0.0 was a beta testing version and now the app is ready for production, the version number can be increased to 2.0.0. This number should be a greater value than the last Version Number that you used.
VIII. Going the extra mile
As much as it is important to develop key features required by the client effectively, it is also a rewarding effort to go a step further and think of the application from a user’s point of view. Small additions or details that would enhance the user experience a whole lot better.
Things that the client may not particularly point out but those that as a developer we can identify, going the extra mile making it a tad bit special, garnering big appreciation from the client. Below are some of the extra efforts I took to make the app feel more wholesome and modern.
Animated Icons
The UI designs only had static icons that would be placed throughout the application. I wanted to take this a step further and thought about introducing the motion. Motion drives the user’s attention to a particular object and hints at what will happen during an interaction. It provides guided focus between views and aids in realizing visual feedback.
A way to achieve this was to use animated icons. These are basically gifs that would be added to our project via image tags. Some configuration would need to be done to enable the use of gifs in the application. Check this out for configuring gifs in the RN application. Some good websites for downloading animated icons are lordicon.com, icons8.com, and flaticon.com.
Haptics
This is yet another minor addition that creates elated experiences for users. It often deals with the feeling of “acknowledgment” for users whereupon a tap, touch, or hold, physical feedback is delivered in the form of vibration. Haptics really is key in helping users cement their interaction with a UI element and validates their intended action.
For instance, when clicking a button, it feels duly registered when a response is given back instead of just touching the screen and not knowing if the action has worked. Haptics can be achieved using expo-haptics, which uses Taptic Engine in iOS and Vibrator system service on Android.
Internet reachability
This is something a user would often feel frustrated about when he/she does not know if there’s some issue with their internet connection. They would be going on and about using the app and if there are some connection issues, they might see some error messages or worse a forever loading bar.
To save some hassle, I’ve added an internet connectivity bar at the top level of the app which consistently over a specific number of seconds checks if the connection is present and stable. If any connection drops, the no internet bar in red will pop up from the bottom giving a clear indication to the user and upon connection re-establishment, it pops away.
Below is a code snippet that makes a call to the google server to check if internet connectivity is present or not.
import Axios from "../Service/Axios";

const [internetReachable, setInternetReachale] = useState(true);

  async function isInternetReachable() {
    try {
      let response = await Axios.get(
        ""
      );
      if (response.status === 204) {
        setInternetReachale(true);
      } else {
        setInternetReachale(false);
      }
    } catch (e) {
      setInternetReachale(false);
    }
  }

setInterval(() => {
    isInternetReachable();
  }, 4000);
Swipe down to Refresh
This is yet another underrated feature present in modern applications. The ability to pull down to refresh gives the user control over the data he/she wishes to re-fetch after any data updation. This works only with a FlatList or ScrollView via a prop called RefreshControl.
Summary
Working on this project was truly an exhilarating experience. I have learned so much in the span of 3-4 months, starting from zero knowledge in mobile app development to having built a production-ready application live on the app stores.
Shoutout to my seniors, project manager, tech lead, and company leadership. Without their support and guidance, this wouldn’t have been possible. Looking forward to future projects with tons more to learn & improve upon.