
Previously in a blog that listed out the top 3 No code Automation testing Tools, I have taken the highest-ranked one and have decided to go deeper into its finer details while contributing to the blogs in this series.
Currently, Testing plays an essential role in the software field for building products and releasing them to the customer with good quality and performance. However, testing is not about only ensuring the product quality but also maintaining a good relationship between Business and Customers.
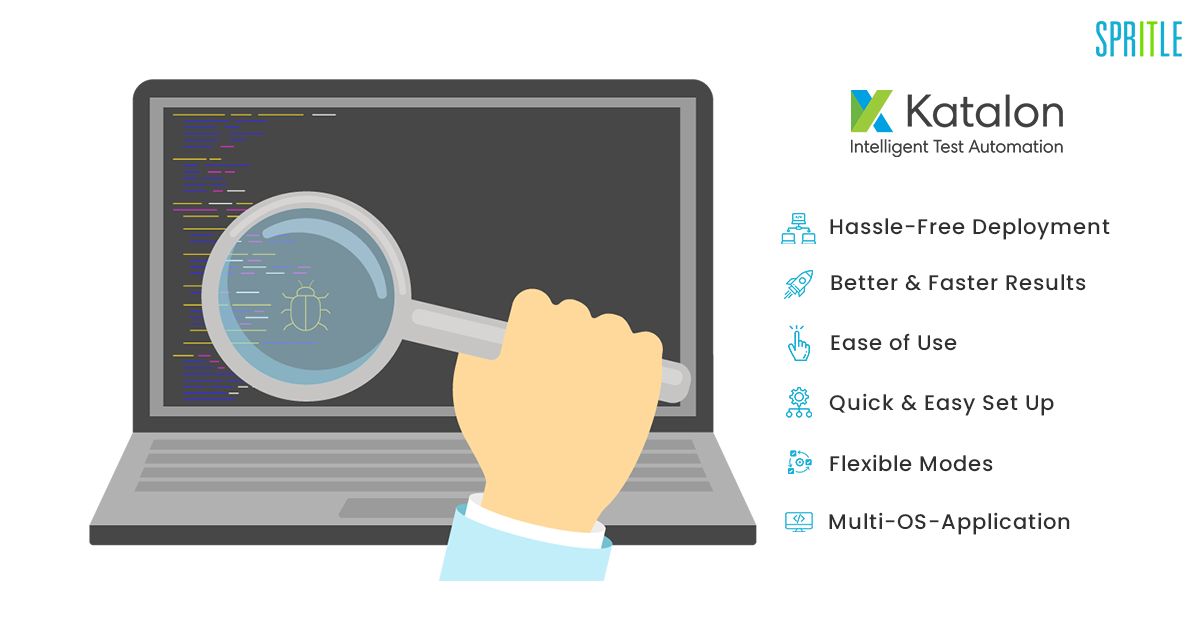
Using Automation tools for testing will reduce the efforts on the repetitive work. Katalon Studio is one of the top 3 automation tools in 2022.
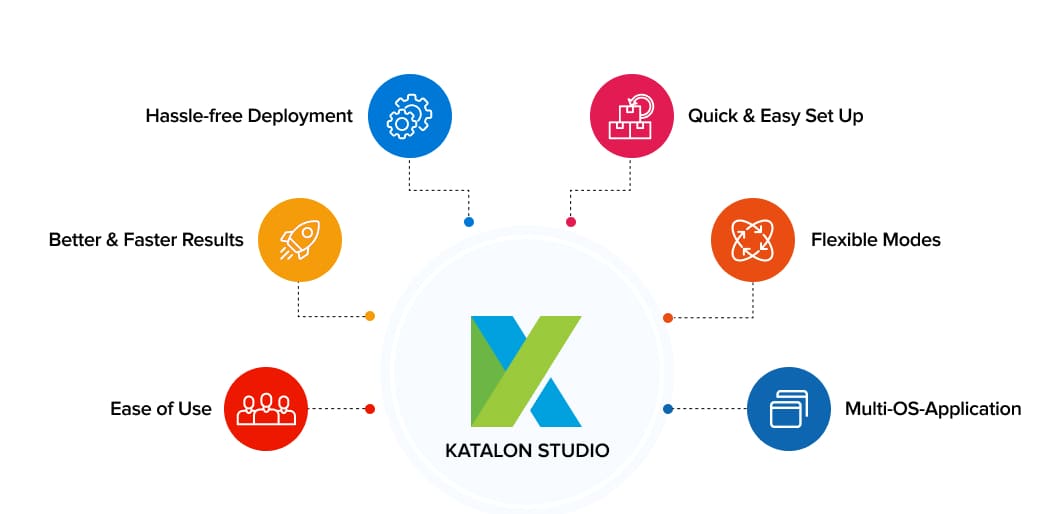
Katalon Studio is developed by Katalon, an open-source tool released in the year 2016. This tool is not only designed to create the Test Scripts without coding but also for the Test Creation, Execution, and Report Generating process.
Using this tool, one can test Web as well as Mobile Applications. For Web Applications, we could use this tool in various devices like Mac OS, Microsoft, and Linux. And for Mobile Applications, we can use this on Android and iOS.
In this blog, we shall learn about the Katalon installation in Windows. Also, I am going to share the execution steps for a mobile application on an Android device.
KATALON INSTALLATION SETUP (for Windows)
Katalon Studio was published recently and gained a vast response in the testing community. Katalon Installation on your android device is very easy. All you have to do is, follow the steps.
TEST EXECUTION
After successful installation, we can start the test execution for the Android application. For this, we can use a sample mobile .apk file. It is a basic testing app used in Katalon for knowledge purposes. Follow the below steps for the Test Execution.
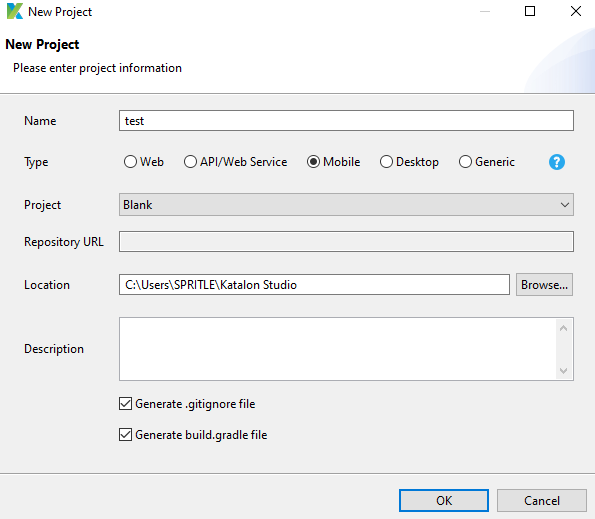
STEP 1: Open Katalon Studio and for creating a new project go to File >> New >> Project, enter a Project Name, and select testing as Mobile. And then click the OK button.
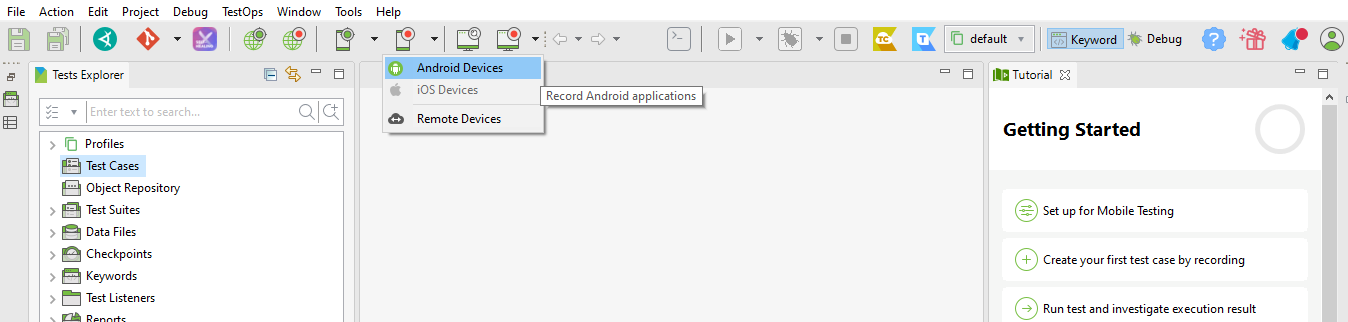
STEP 2: Once a project is created, try recording the script (locate Record Mobile >> Android Devices).
STEP 3: Select the Device Name which was connected to the system via USB cable and then select the respective .apk file from the File Explorer.
STEP 4: Click the Start button. When clicking, a hierarchical view will be displayed which contains objects, and action buttons (Tap, SetText, ClearText, PressBack). These action buttons help to operate the application.
STEP 5: The device view is also displayed after starting the application.
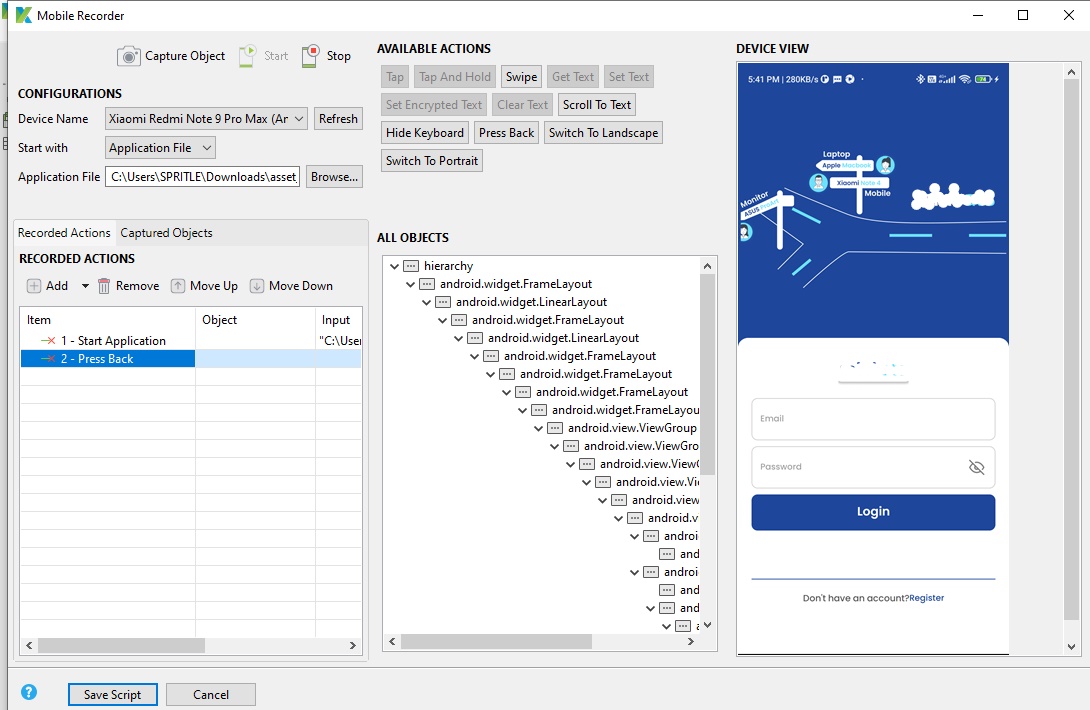
STEP 6: When we click any object in that hierarchical view, it will show in the Device view accordingly.
STEP 7: In this application, we have to cover both positive and negative testing. Firstly, we can test the application in a positive scenario.
STEP 8: For entering the email and password, select “Tap” the Email textbox button and click the “Set Text” button in the “Available Actions” column. And then, enter the valid mail id for login and also repeat the same step for the Password textbox.

STEP 9: Select the Login button and click the “Tap” button in “Available Actions”. After clicking the “Tap” button, it will be logged in successfully. After that click the “Stop” button for ending the process. We have to save the script by clicking the “Save Script” button.
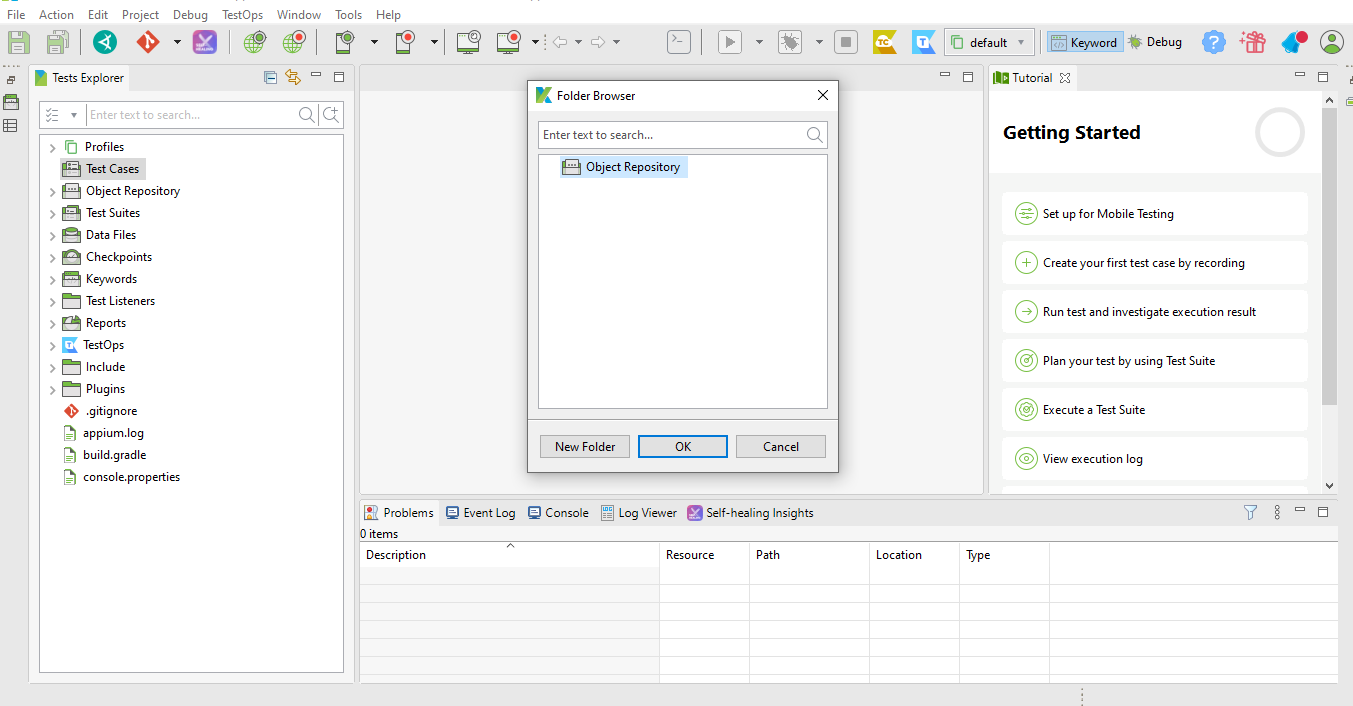
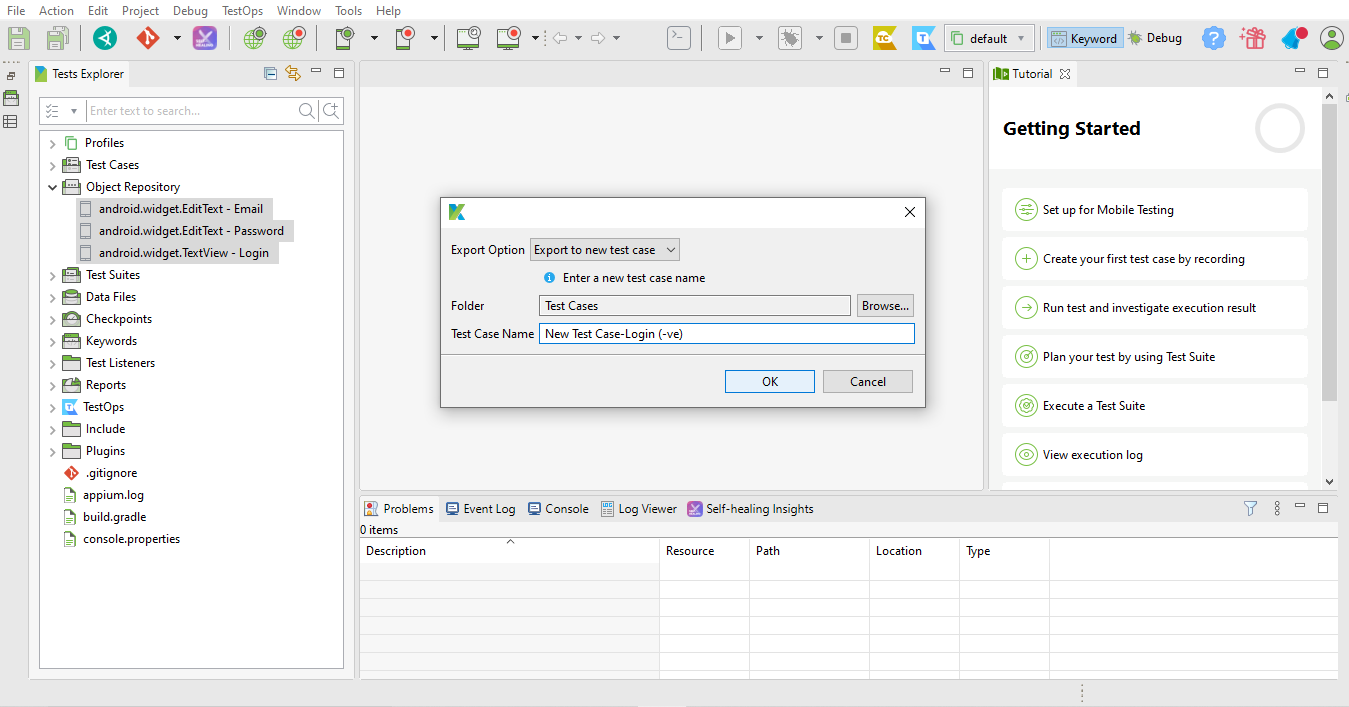
STEP 10: After capturing the objects, close the application and save the script in the Test case, and also save the objects in the Object Repository.
STEP 11: Save the test case with a specific name for our reminder and click the OK button.
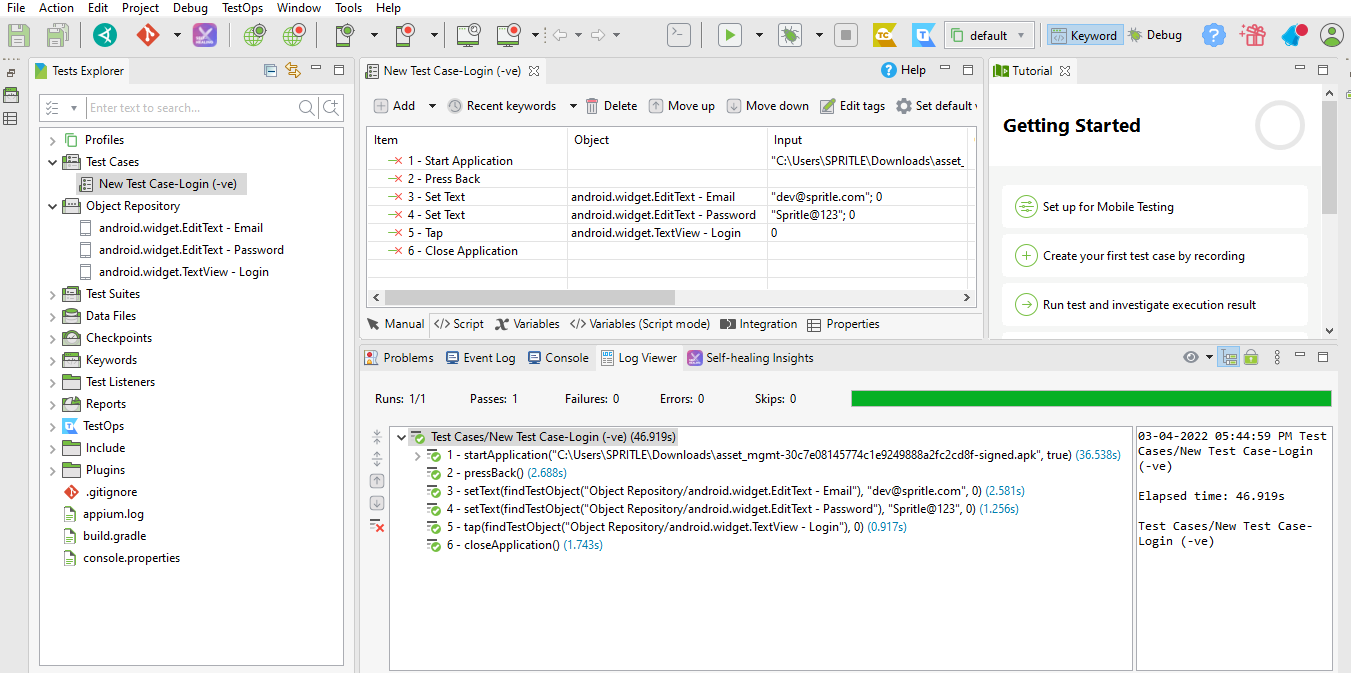
STEP 12: Select the Android device name for running the respective test case (Click Run).

STEP 13: The test execution report is generated. We can get the following details under Log Viewer. These reports can be shared with the integrated platform as well.
1. Passed/ failed test cases.
2. Number of Test runs.
3. Errors and Skips
STEP 14: Repeat the same procedure for negative testing by entering an invalid mail id or password. Run that case, and generate the report.
See how easy it is to execute the test cases using Automation tools. That’s how Katalon helps every non-technical folk to perform codeless testing on real-time applications. Hope this blog would have given you basic knowledge about Testing and how it is done in a No code Automation tool.
Stay tuned for more blogs. Until then, Happy Testing!