
Hello everyone, hope you buddies are doing great! Wondering what this blog is for and the information you are going to gain at the end of the blog? Let me explain it and take you through step-by-step.
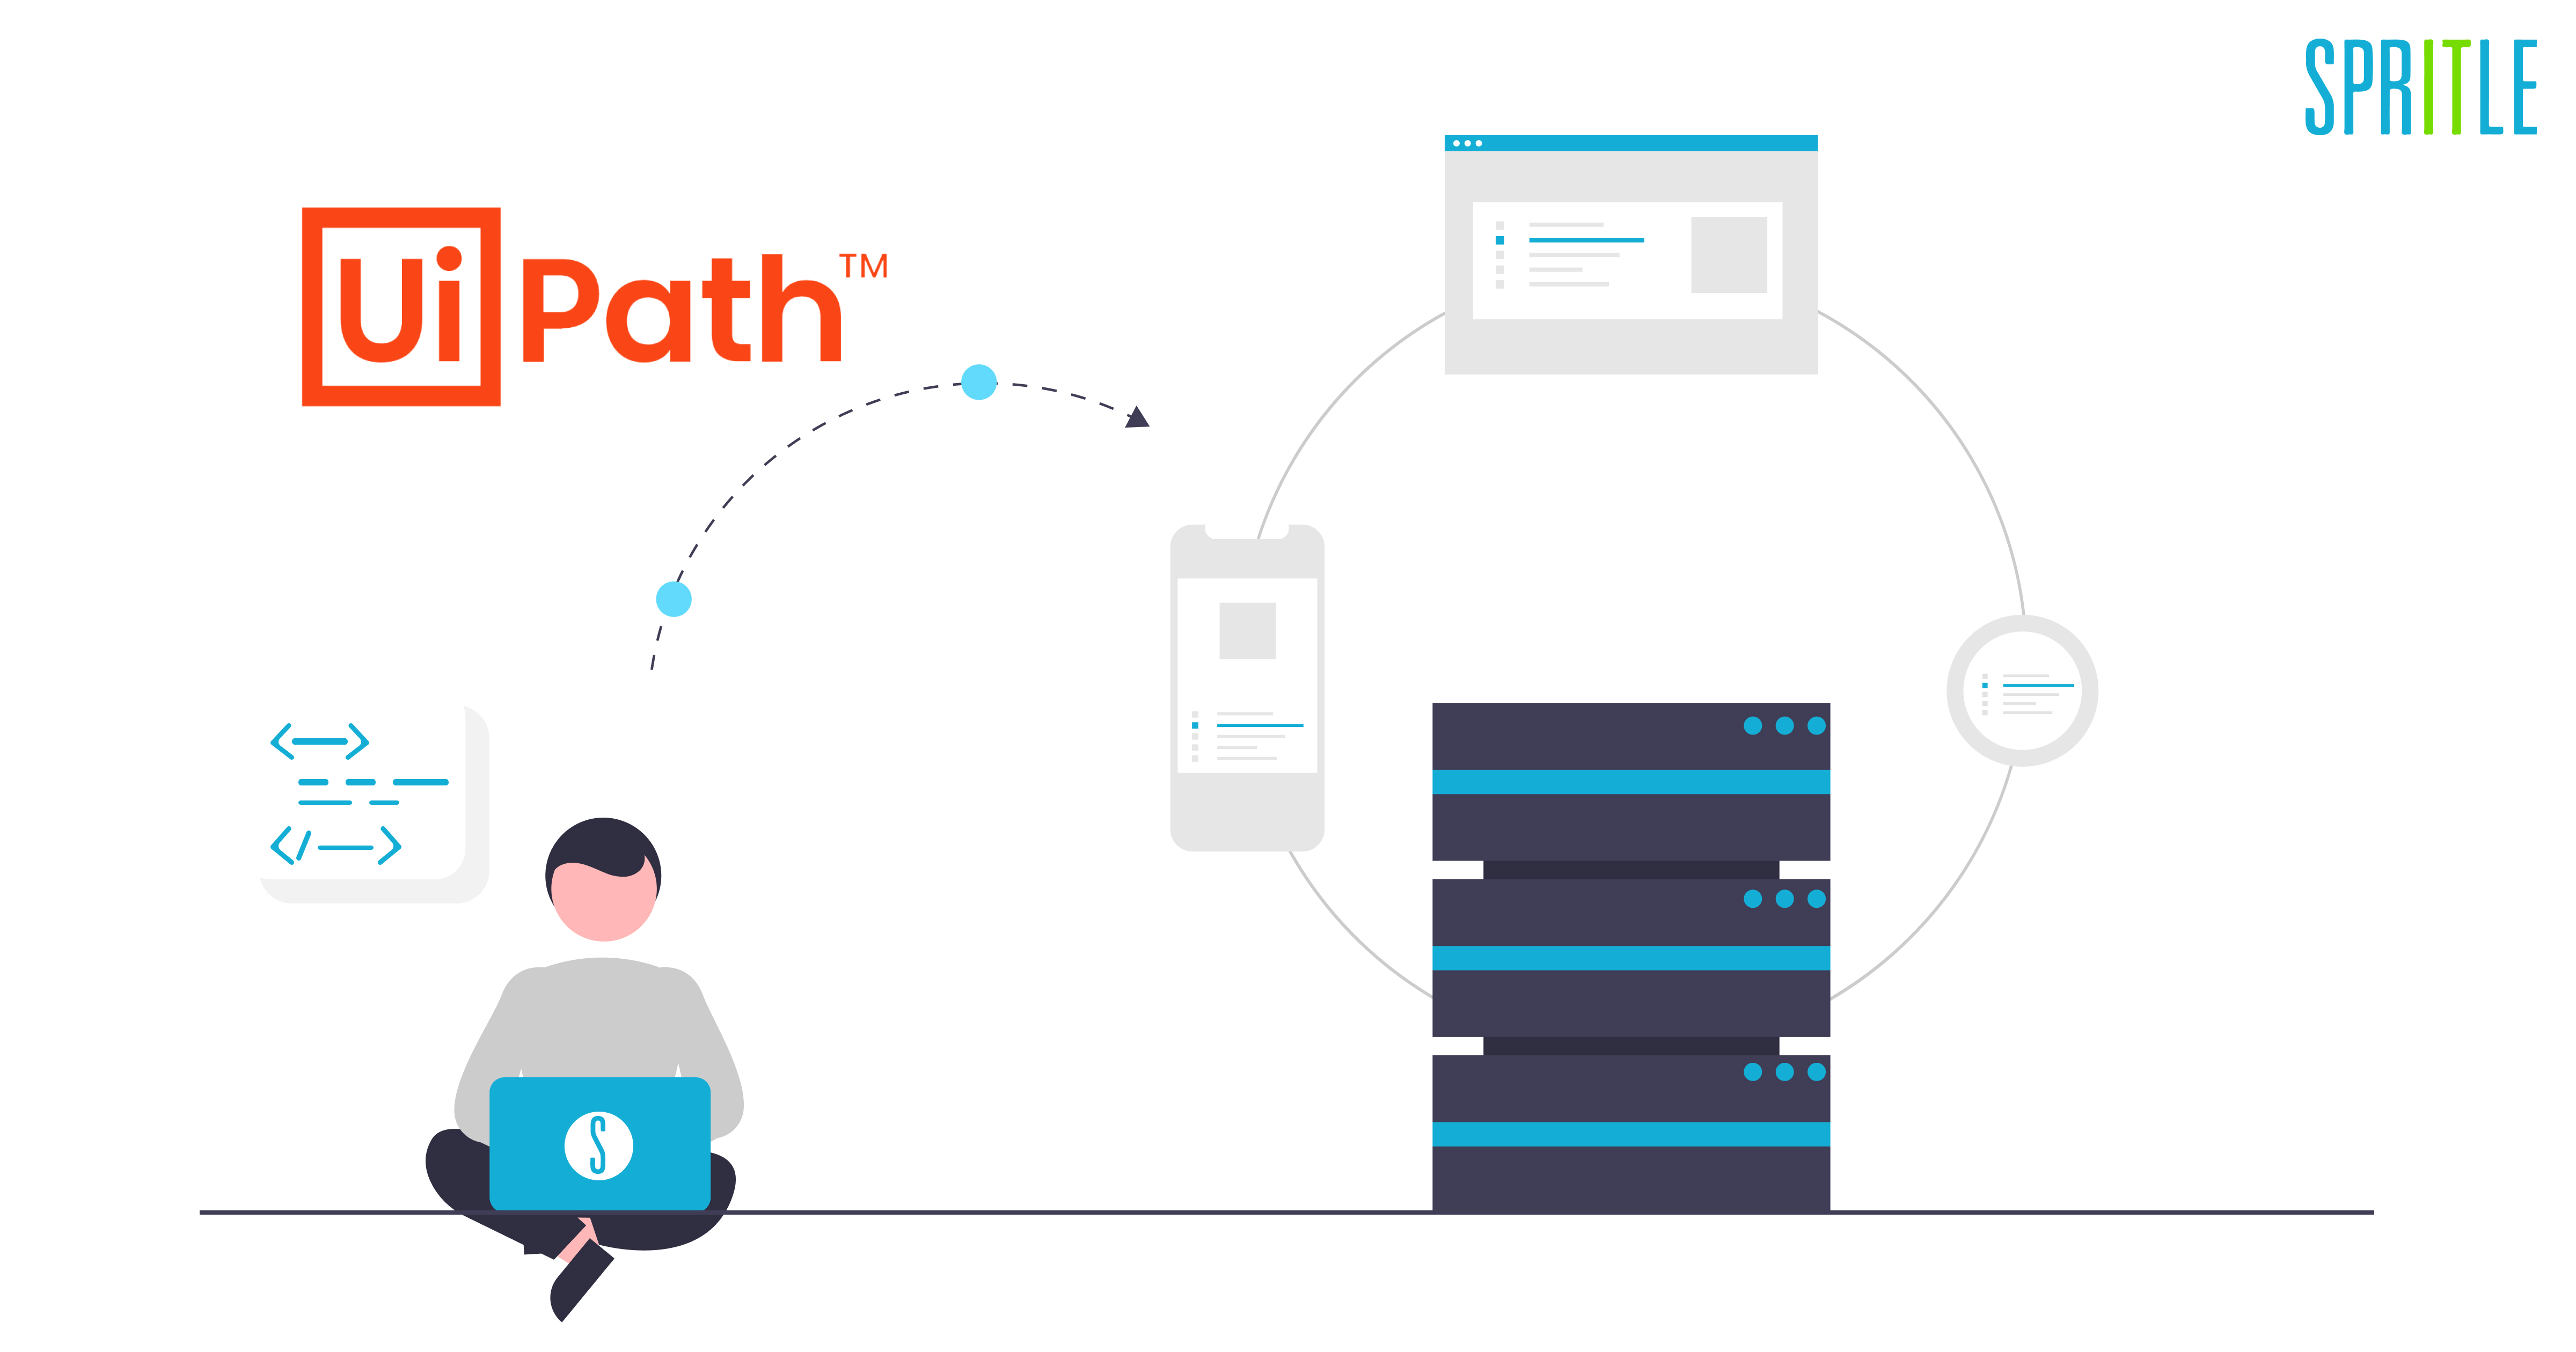
As previous blogs written by my fellow mates explain RPA and UiPath Tool for Data Scraping, this blog is power packed with information on Mobile Automation Projects Using UiPath Templates.
UiPath Studio Community Edition provides multiple activities and packages to develop an automation process. Even though it has those kinds of activities it provides templates to make the development process easy.
What is a Template and How it is configured?
The Automation Process is saved as a template that can be used in other projects. The template contains some packages, dependencies, and workflow with defined arguments and variables which can be used in various automation processes. The following templates are most frequently used in the automation process by a UiPath Developer,
- Mobile Testing Project
- Robotic Enterprise Framework
- Orchestration Process
- Background Process
- Trigger-Based Attended Automation
- Transactional Process
In this blog, our focus will be on creating a Mobile Testing Project using the saved templates in UiPath. Come let us take a swim!
There are different types of mobile apps in the market that needs to be tested and their test cases need to be automated with Android and iOS. There are many processes that can be handled in mobile testing projects including functional testing, performance testing, and load testing of mobile applications.
How does it work?
Mobile Device Automation provides a platform to design and run your device automation without even touching the device. Mobile Device Automation is composed of the following components:
- Mobile Automation Activities
- Studio
- Mobile Device Manager (MDM)
Studio and the mobile automation activity pack help you to create automation workflows, whereas Mobile Device Manager acts as a bridge between your actions and the tested devices. MDM uses Appium to connect and run tests on your physical devices or emulators.
Prerequisites
You would require the below highlighted prerequisites to start with your first automation workflow.
- Studio.
- UiPath.MobileAutomation.Activities. Alternatively, you can use the Mobile Testing Project default template, as this will install the activity package for you.
- Emulator or Physical Mobile Device.
- Download and install Node.js and Appium Endpoint.
Creating a Mobile Testing Project

Closely follow the below steps to create your automation project and hey do not get lost in it!
STEP 1: Open Studio.
STEP 2: Select a Mobile Testing Project from the default templates.
STEP 3: Configure project details and then click Create.
STEP 4: Start with the default test case created through the project.
Configure Mobile Device Manager
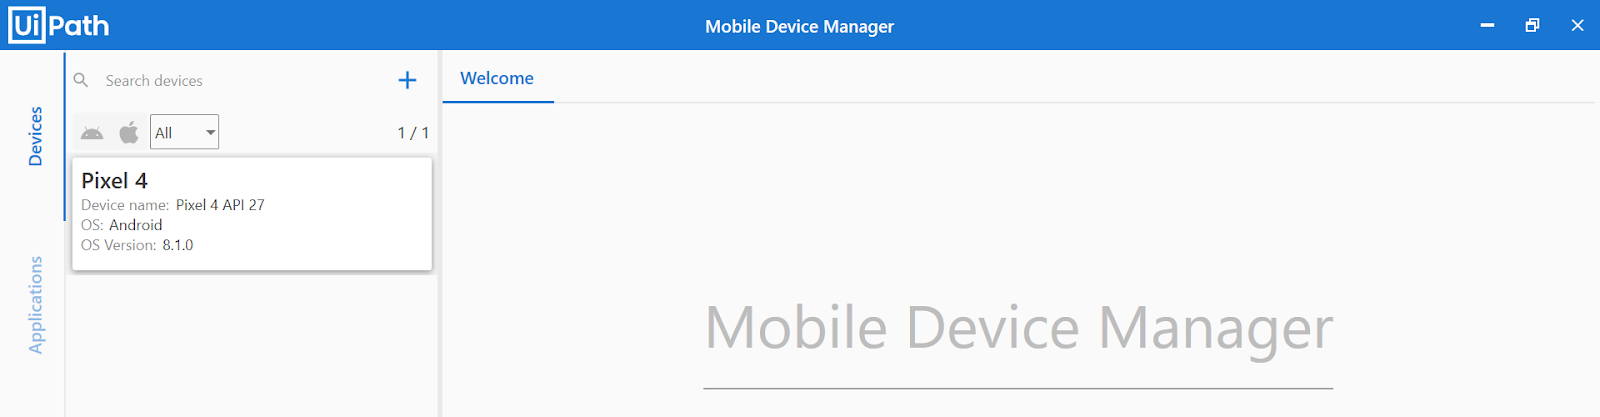
STEP 1: To prepare your test environment, open Studio and navigate to Mobile Automation > Mobile Device Manager to launch MDM.

STEP 2: Add a Device using the below quick steps.
- In the left navigation panel go to Devices.
- Click Add a device.
- Enter all the configurations for the device.
- Click Save & Close to add your application.
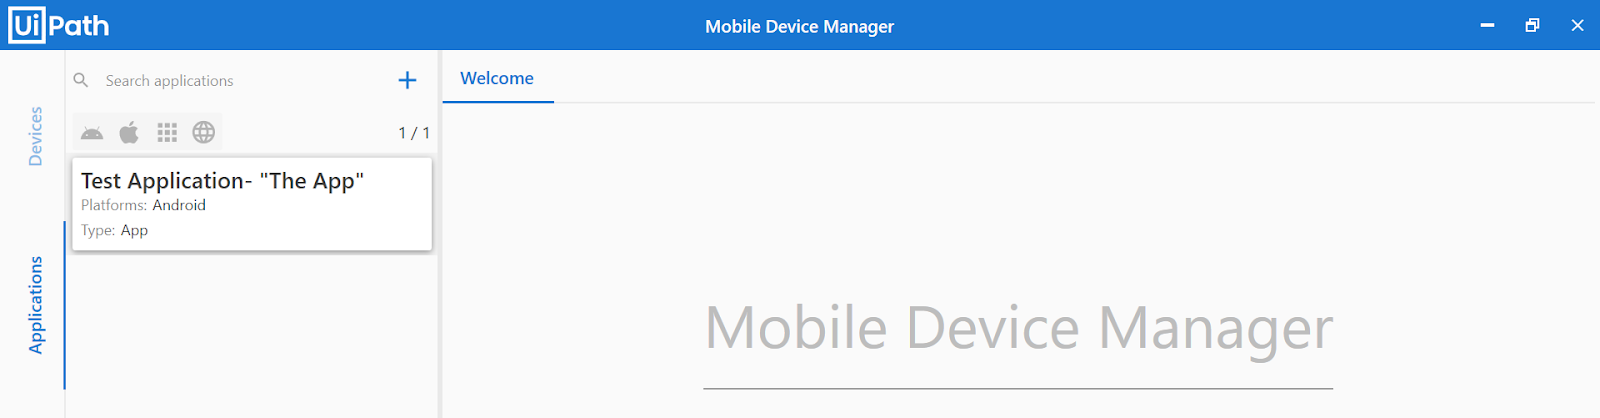
Add an Application:
STEP 1: Add an application to be used by your device.
- In the left navigation panel go to Applications.
- Click Add a new application.
- Enter the Configurations for the Device.
- Click Save & Close to add your application.
Start the Application:
STEP 1: Now you can start your mobile device emulator.
STEP 2: In the Welcome tab, click Start an application.
STEP 3: Select a device and an application by choosing the ones you have just created.
STEP 4: Click on Connect.
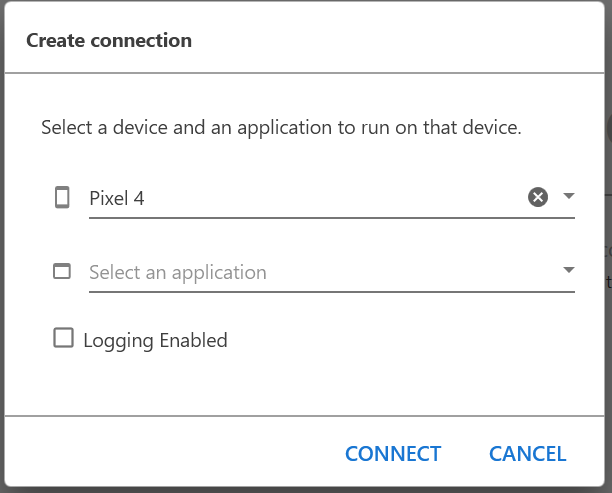
It may take a while to establish a connection due to multiple connection layers and distance to your device farm. Take a sip of your favourite drink and relax while the connection is established…
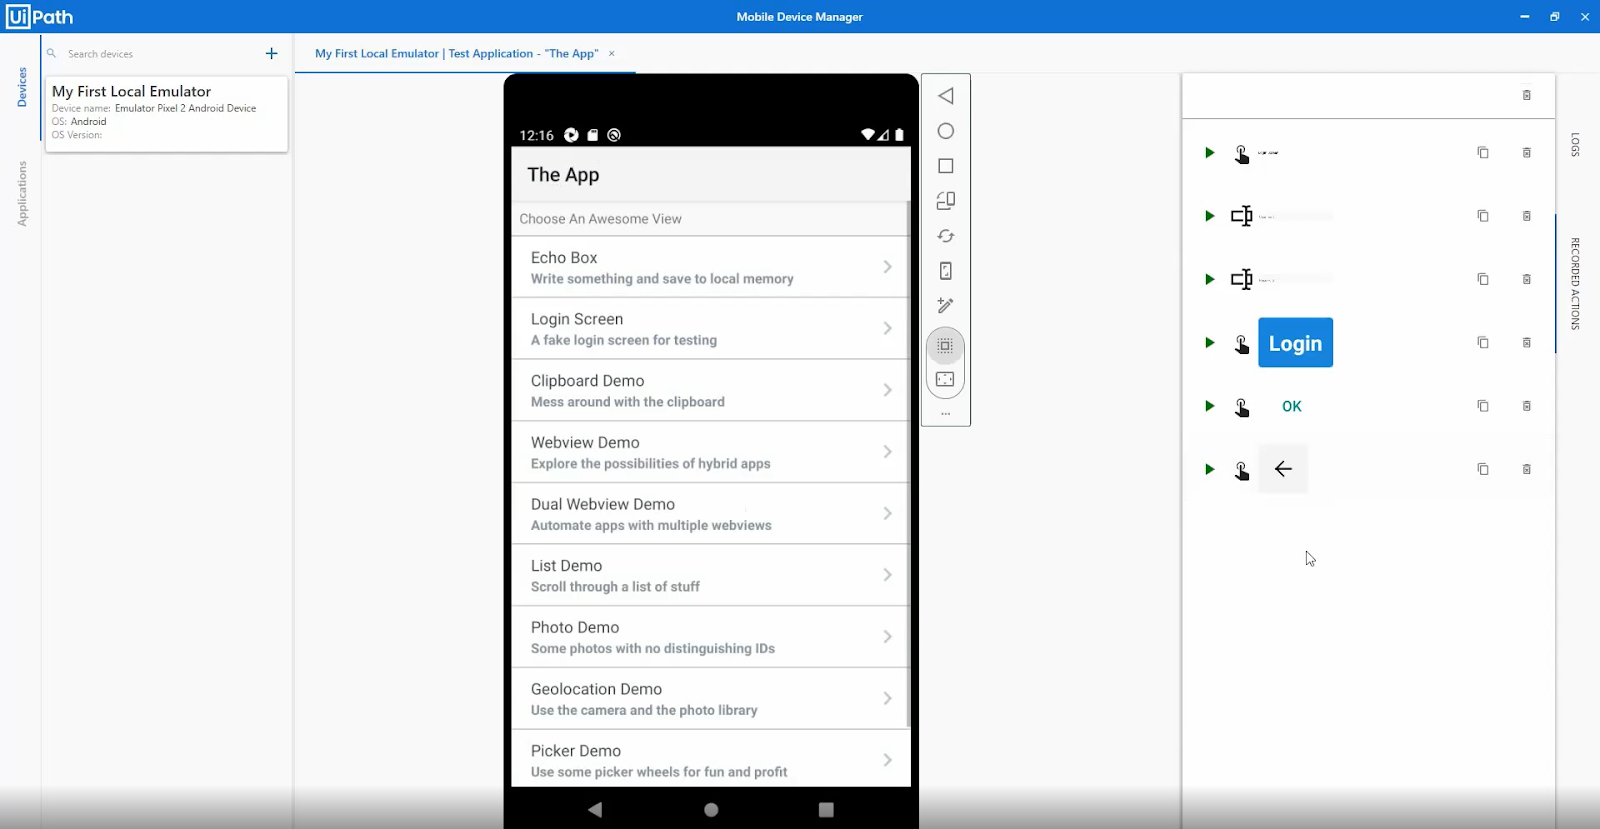
Record Actions
After connecting the device to the MDM, yon will be able to view the screen of the device to record the actions. You can open a Mobile application to record the actions or else a web application.
Record your actions using the interaction bar, right next to your mobile device emulator. Through this, you can indicate your actions on-screen.
Alternatively, you can design your workflow in Studio.
Create and run the Mobile Application:
Open Studio to import your recorded actions and run your mobile automation.
STEP 1: Open Studio and add a Mobile Device Connection activity to your sequence.
STEP 2: Click Select Connection Details and select your device and application.
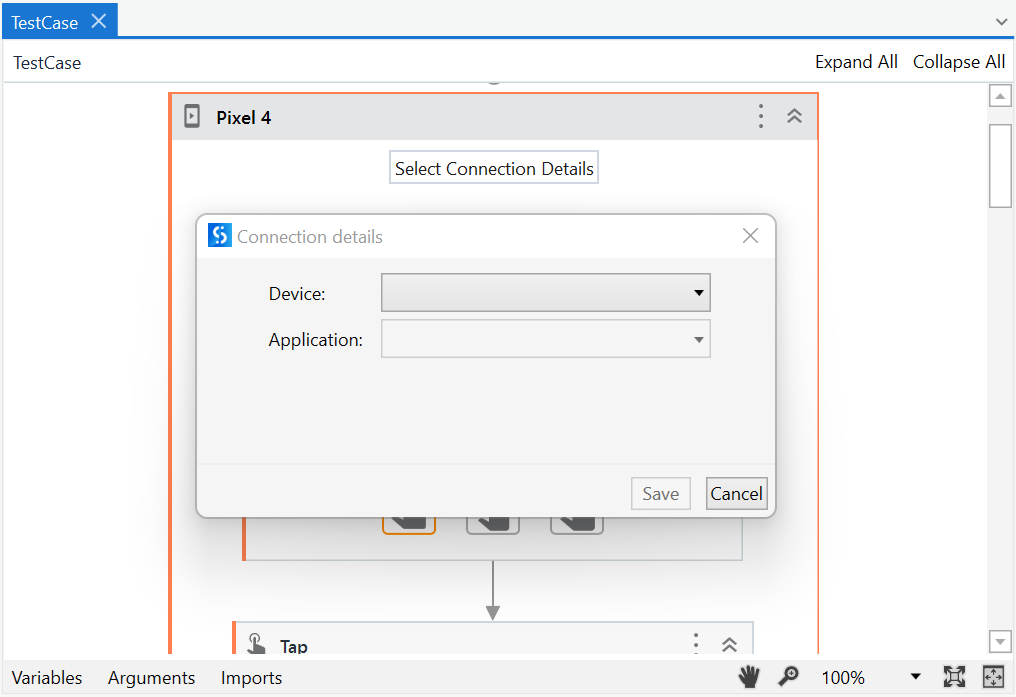
STEP 3: Select Do within the sequence.
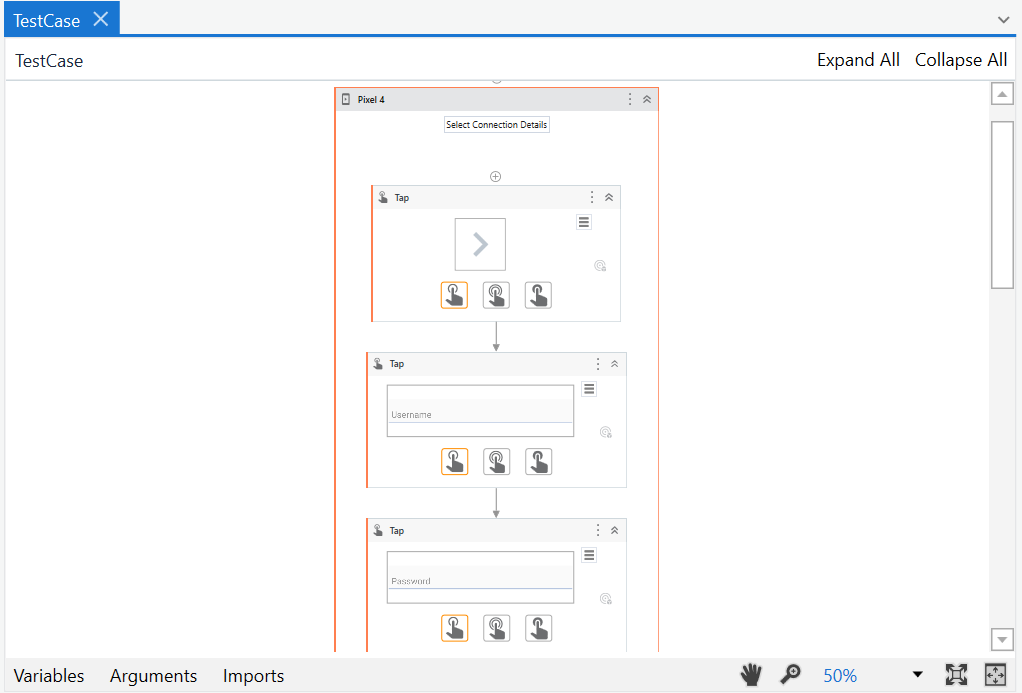
STEP 4: Navigate to Mobile Automation > Import Recorded Actions to add them to the sequence.
STEP 5: Navigate to Debug File > Run File.
Let me tell you guys the difficulties that I faced while creating a Mobile Testing Automation workflow.
- How to Integrate the Appium server to the UiPath Mobile Device manager and Emulator for Mobile Automation
- Connecting the Emulator to the Mobile Device manager Using Appium Server.
- Error in the Appium server while connecting the device
- Screen Scraping in Mobile Automation while the screen has a scrollable Option
- Handling the notifications and toaster messages on the screen
All these difficulties that I faced during the manual process were neatly and easily handled by using the UiPath Community Platform.
With this, we are coming to the end of the blog. UiPath is not just used to automate web and other repetitive processes. Mobile Automation also plays an important role in UiPath Automation and has been widely used by many developers that enables the mobile to perform automation and test the application easier.
Hope you all enjoyed the blog and got the maximum information out of it. Follow us for more blogs like this. Until then keep expecting the best from us as you always do!
Happy Automation!