
Hey there! Welcome to this three-part blog series on implementing google authentication in react native expo apps.
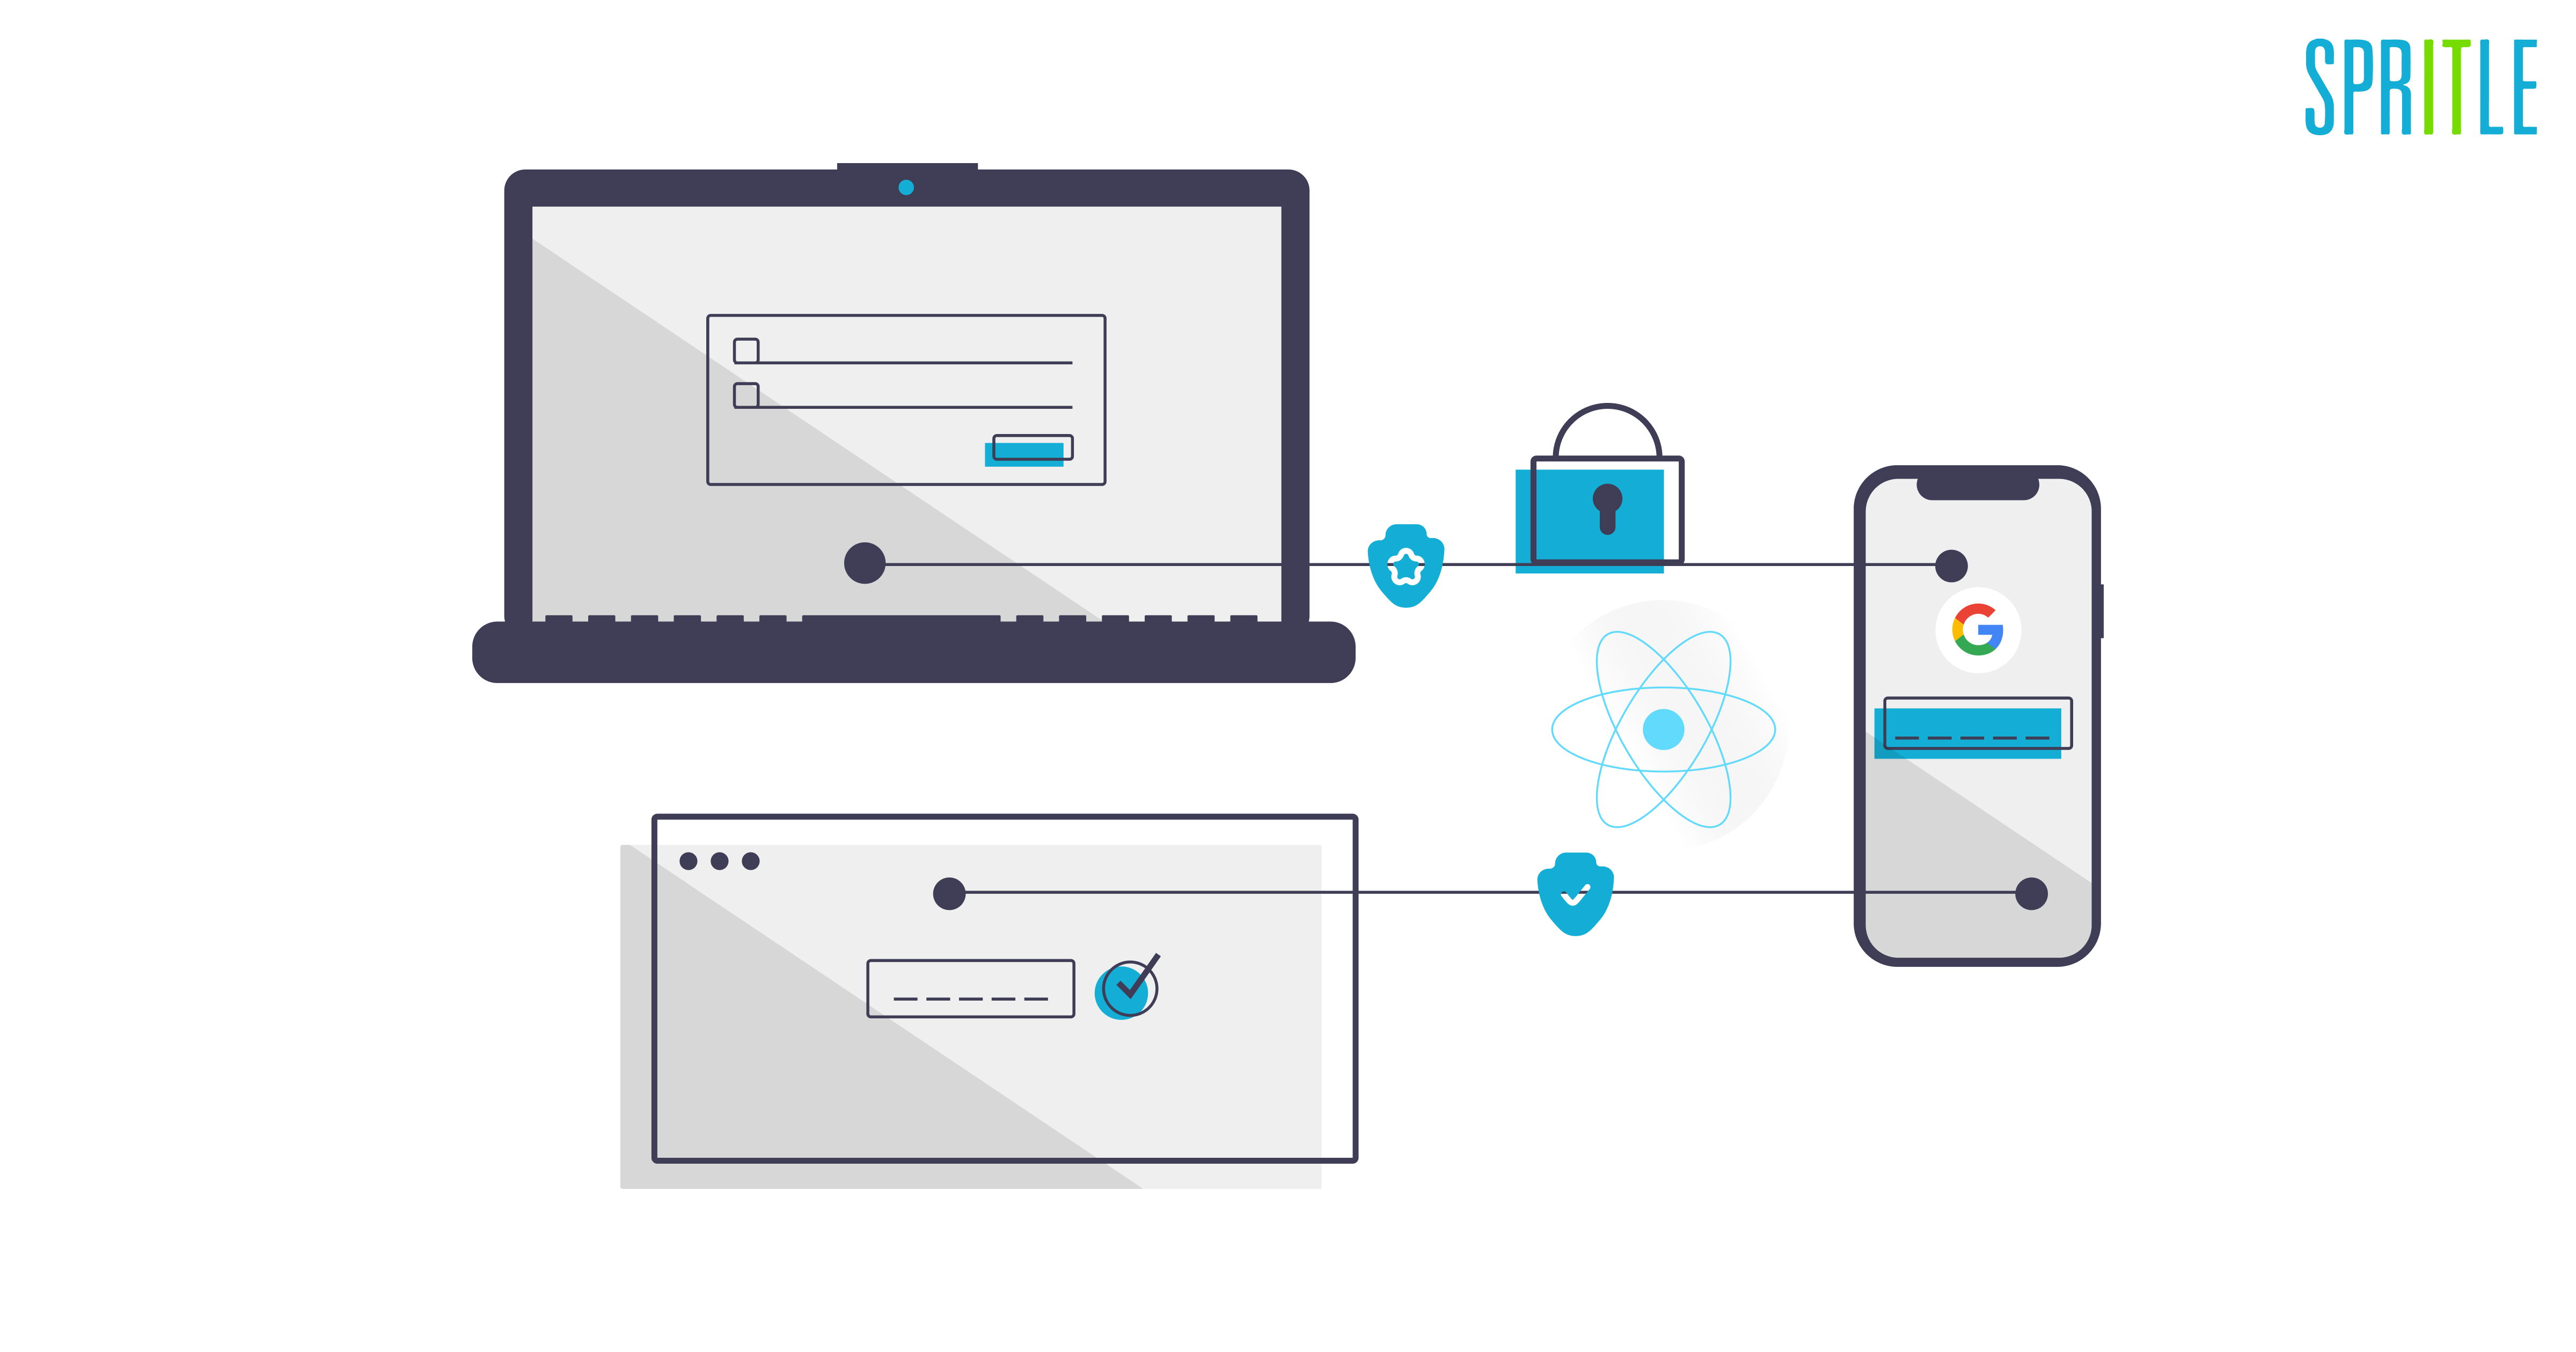
In this first part, we shall learn about what an OAuth2.0 protocol is and go on a walkthrough of the setup required to create your own client ID and secret in the google cloud console application.
I’ll be explaining all the nitty-gritty details required to successfully set up google authentication in your apps both in expo development as well as production apps.
Excited much? Let’s get started!
What is OAuth2.0?
- “OAuth or Open Authorization” – an authorization protocol that allows websites or applications to access resources hosted by other applications like remote APIs, user data, etc.
- OAuth primarily uses Access Tokens (data that represents authorization to access resources on behalf of an end-user). The format of the access token could be JWT (JSON Web Tokens) so that the token issuer can include data in the token itself.
- Uses scopes that help to specify exactly which resources access would be granted.
Components of OAuth2.0
- Resource Owner – a user or system owning the protected resources and can grant access to the same. Eg: Google.
- Resource Server – a server that receives access requests from the client for the user’s resources. It validates the access token from the client and returns the correct resources.
- Client – a system that requires access to the resources owned by the resource owner. To access the resources, the client needs to be in possession of a valid access token. Eg: Our RN application.
- Authorization Server – a server that receives access requests from clients and provides them with a valid access token upon successful authentication and consent by the resource owner. The server provides two endpoints,
- One is the authorization endpoint that handles the authentication and consent of the user (web browser-based pop-up interaction).
- Two is a token endpoint where the token is sent back to the machine that made the request.
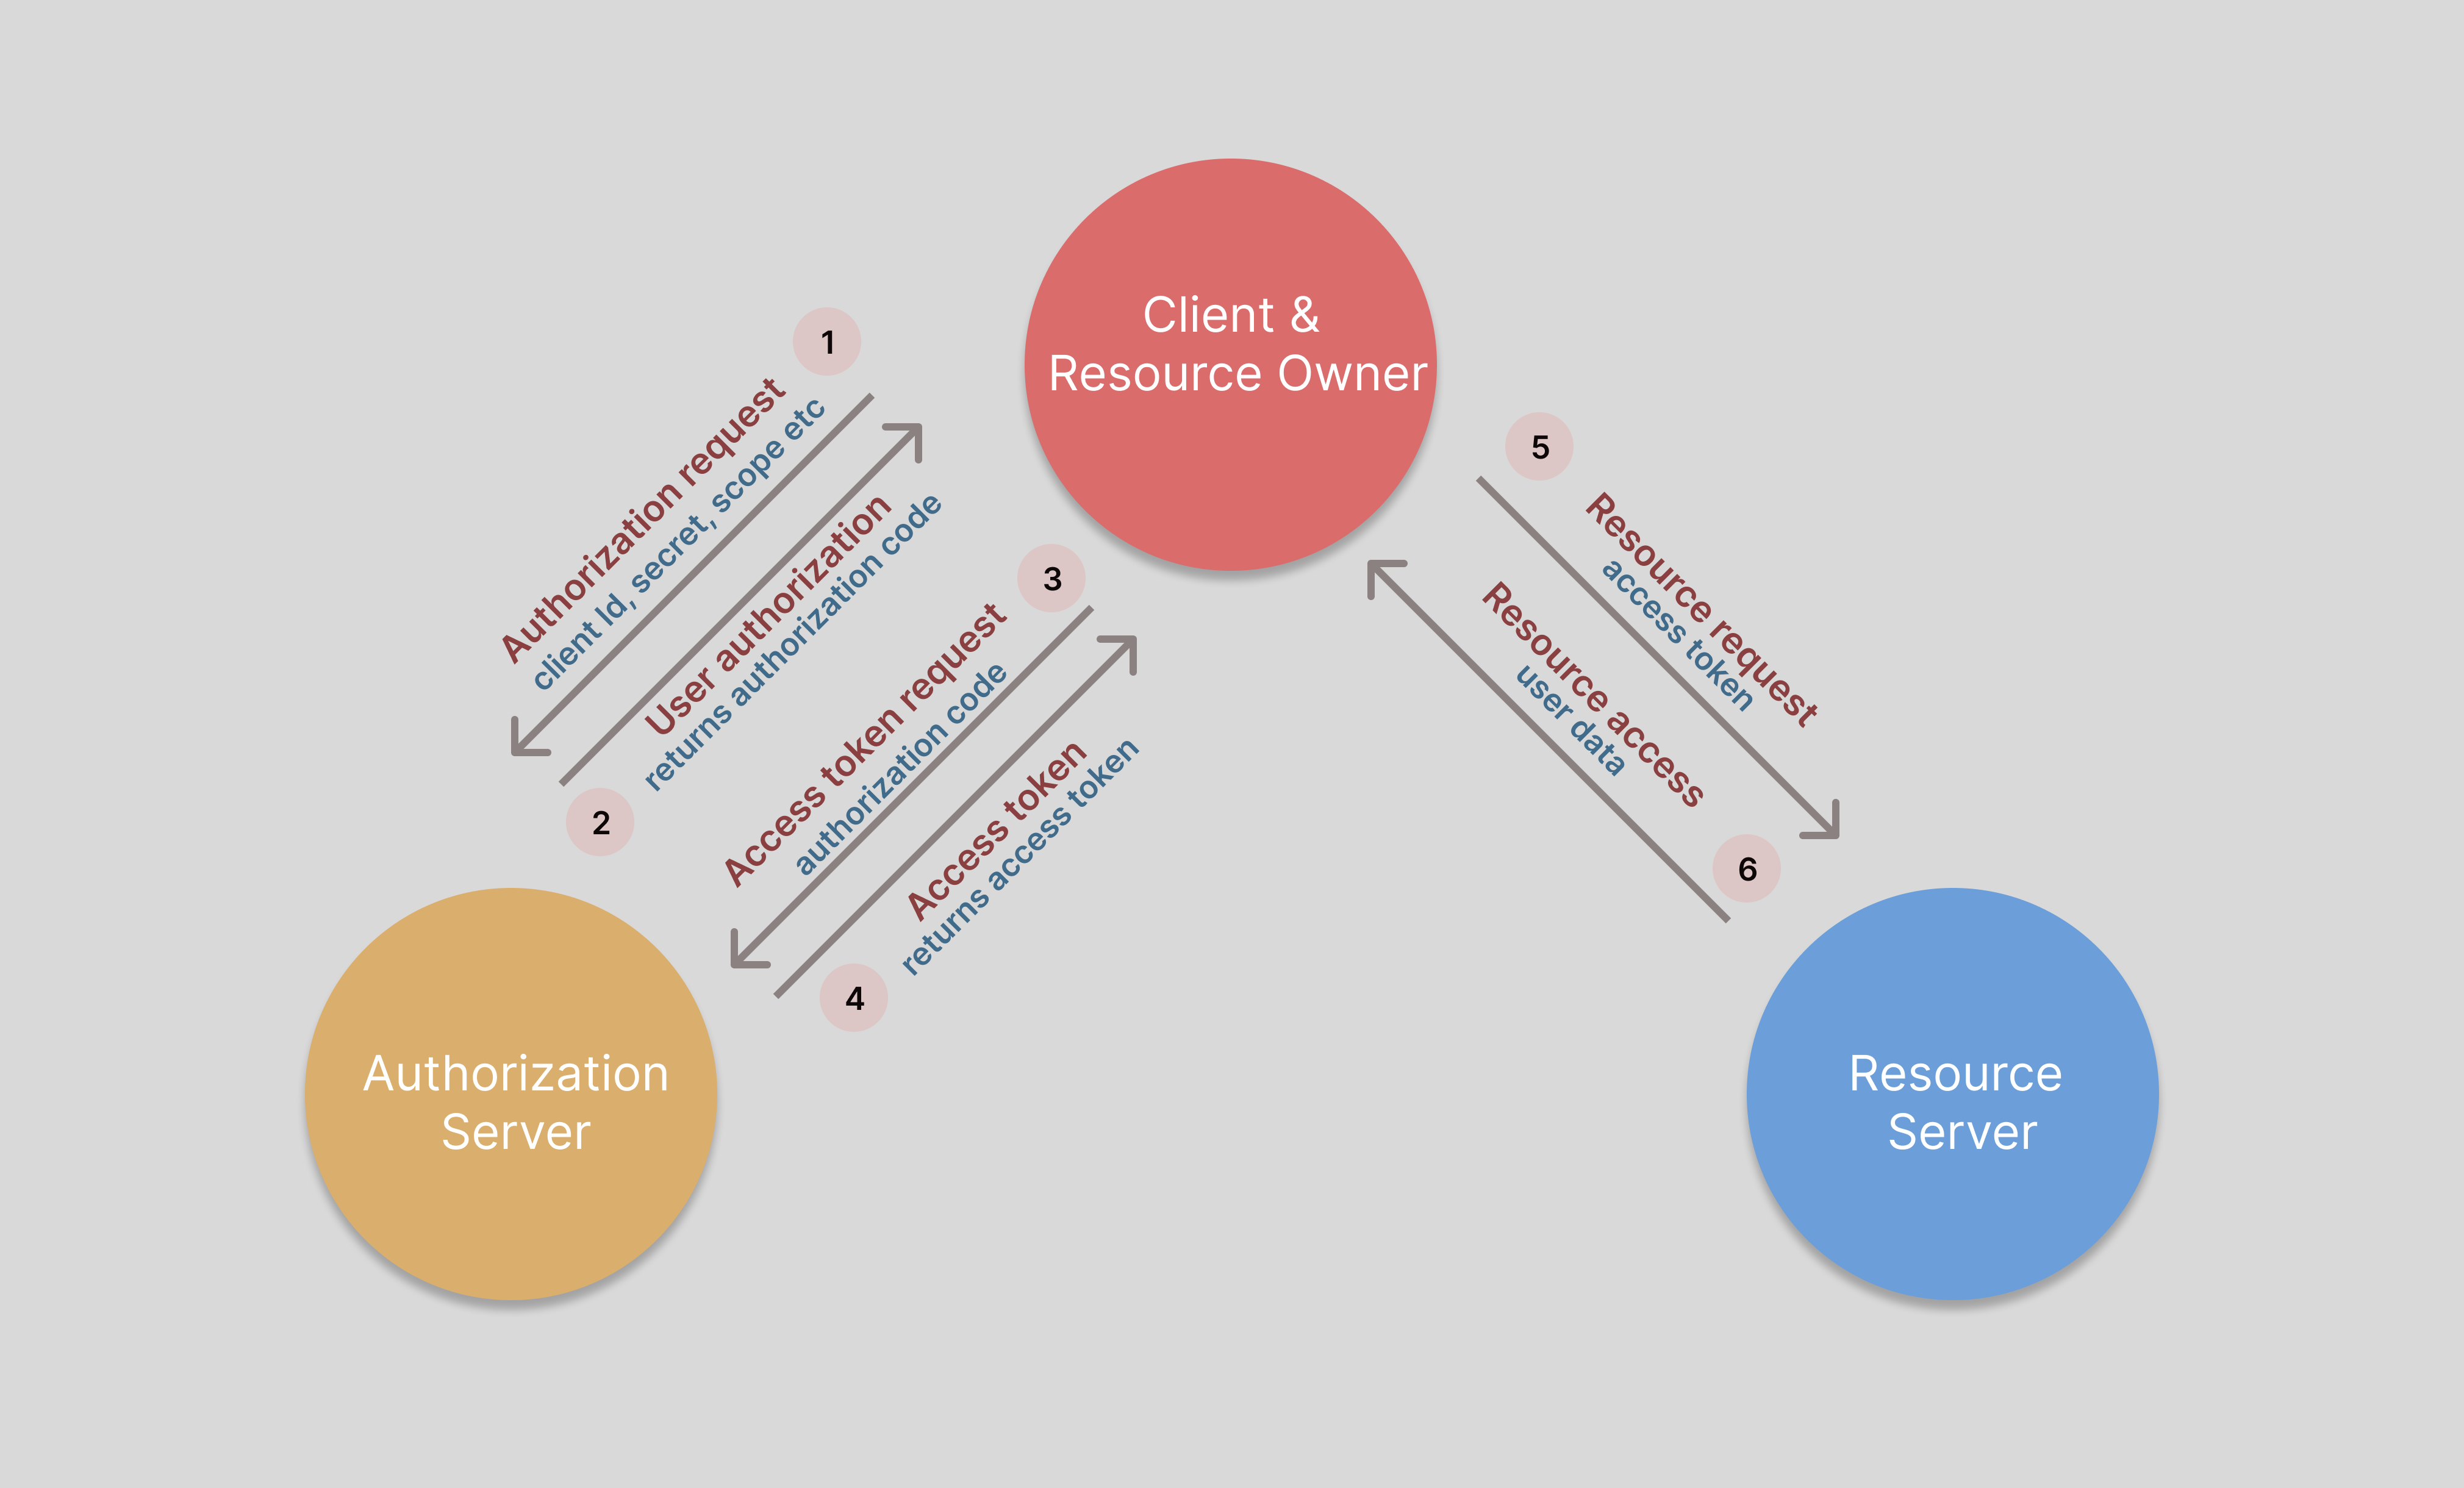
How OAuth2.0 works?
- The client requests authorization from the Authorization server by supplying the client ID and secret as identification, the scopes of access, and a redirect URI to send the Access Token or the Authorization Code to.
- The Authorization server authenticates the client and verifies that the scopes requested are permitted.
- The Resource owner interacts with the Authorization server to grant access to the permitted resources.
- The Authorization server redirects back to the Client with either an Authorization Code or Access Token, depending on the grant type.
Acquiring client ID and secret on Google Cloud console
Before OAuth 2.0 can be used, we (the client) must acquire our own identification in the form of credentials from the Authorization server, which in this case is Google. The credentials include a client id and a client secret.
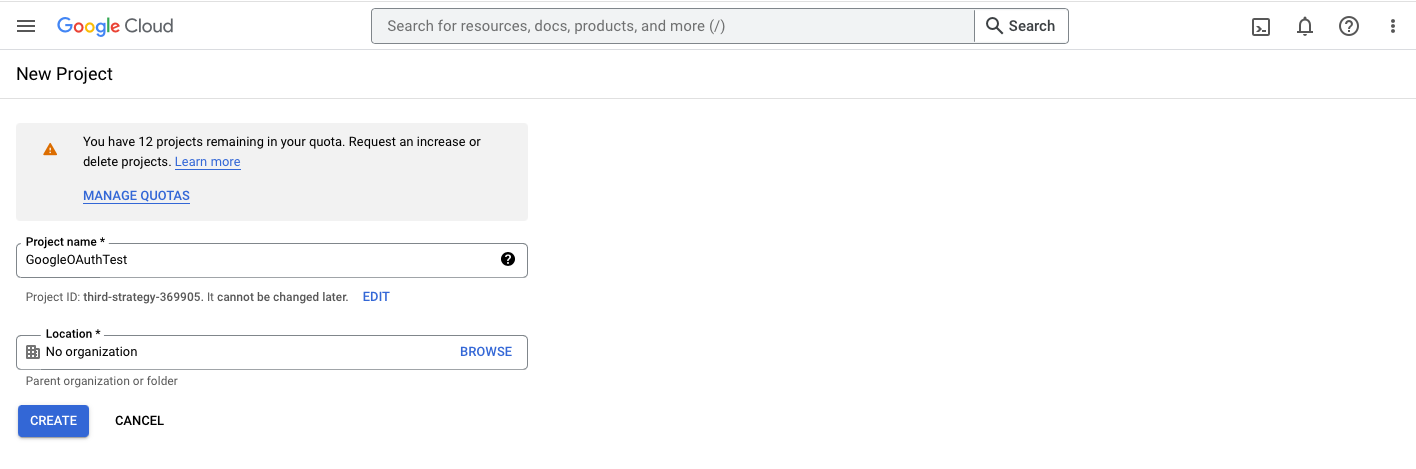
1. Go to Google Cloud Console and sign in with your preferred Gmail credentials.
2. Create a new project by first clicking on the “Select a project” dropdown and then clicking on the “New Project” button on the pop-up. Enter a project name and click on “Create” to successfully create a new project.
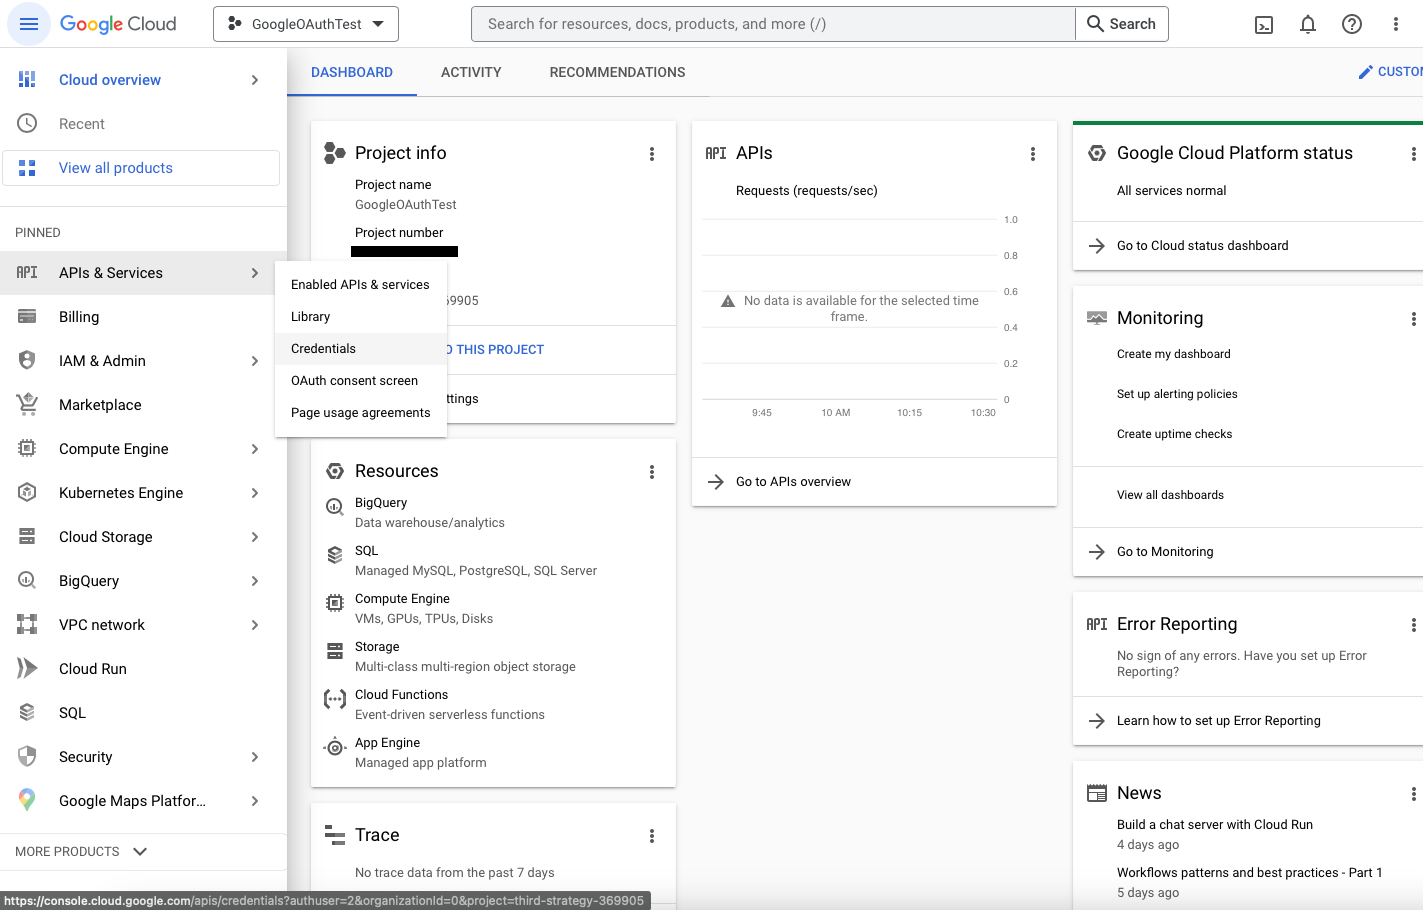
3. Once the project is created, select it which then takes you to the “Cloud Overview” page.
4. In the left side drawer, you can find a menu that says “APIs & Services“, upon hovering you get another dropdown. Click on the “OAuth consent screen” option.
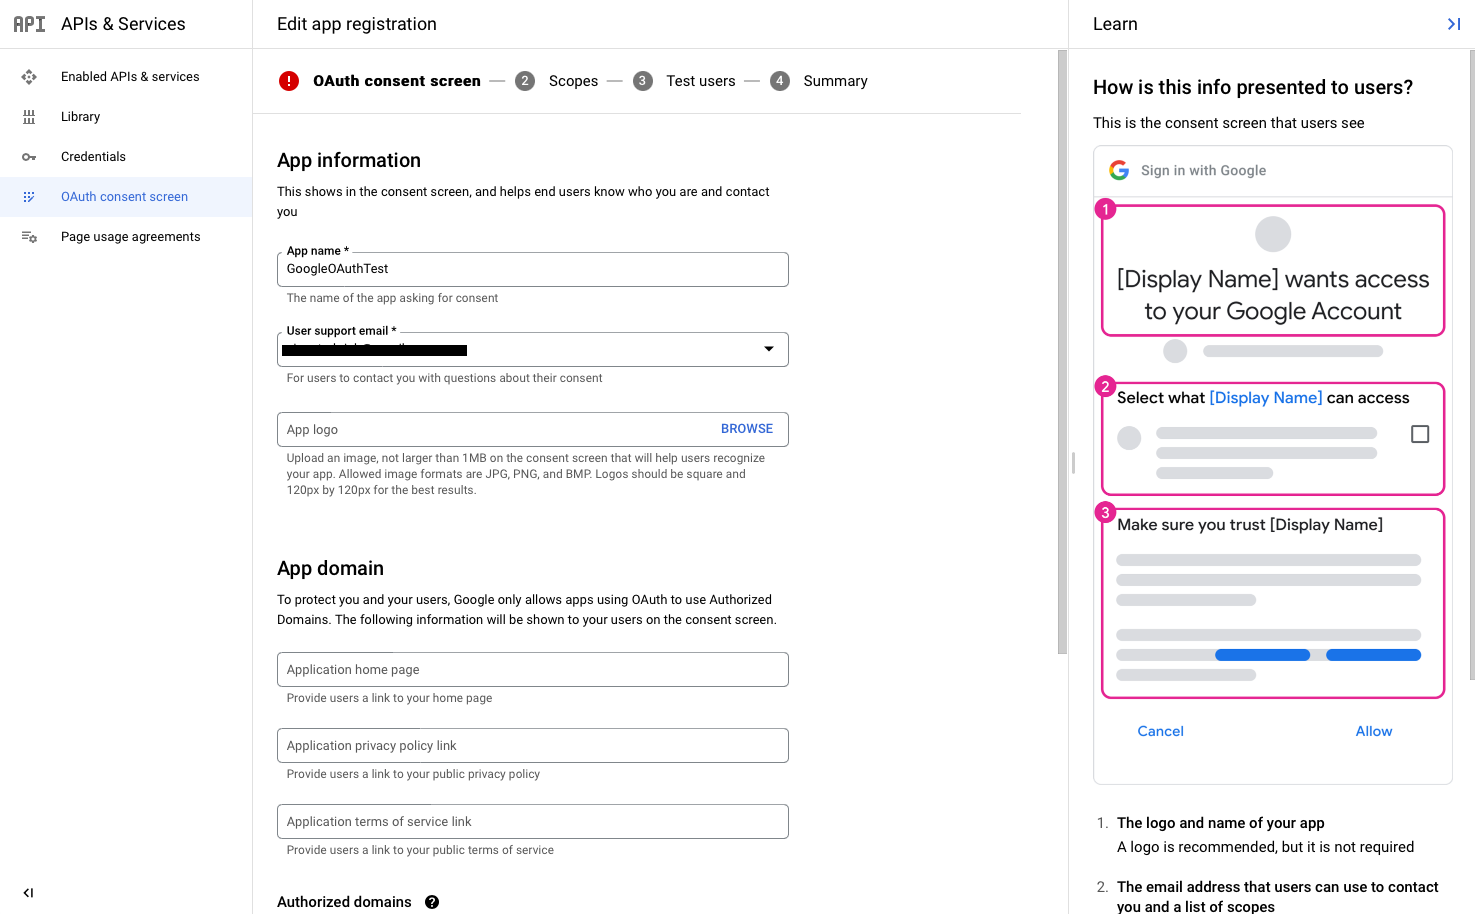
5. Choose the user type as “External” and click “Create”. You’ll be taken to a page to fill out the App Information such as name, support email, logo, and so on.
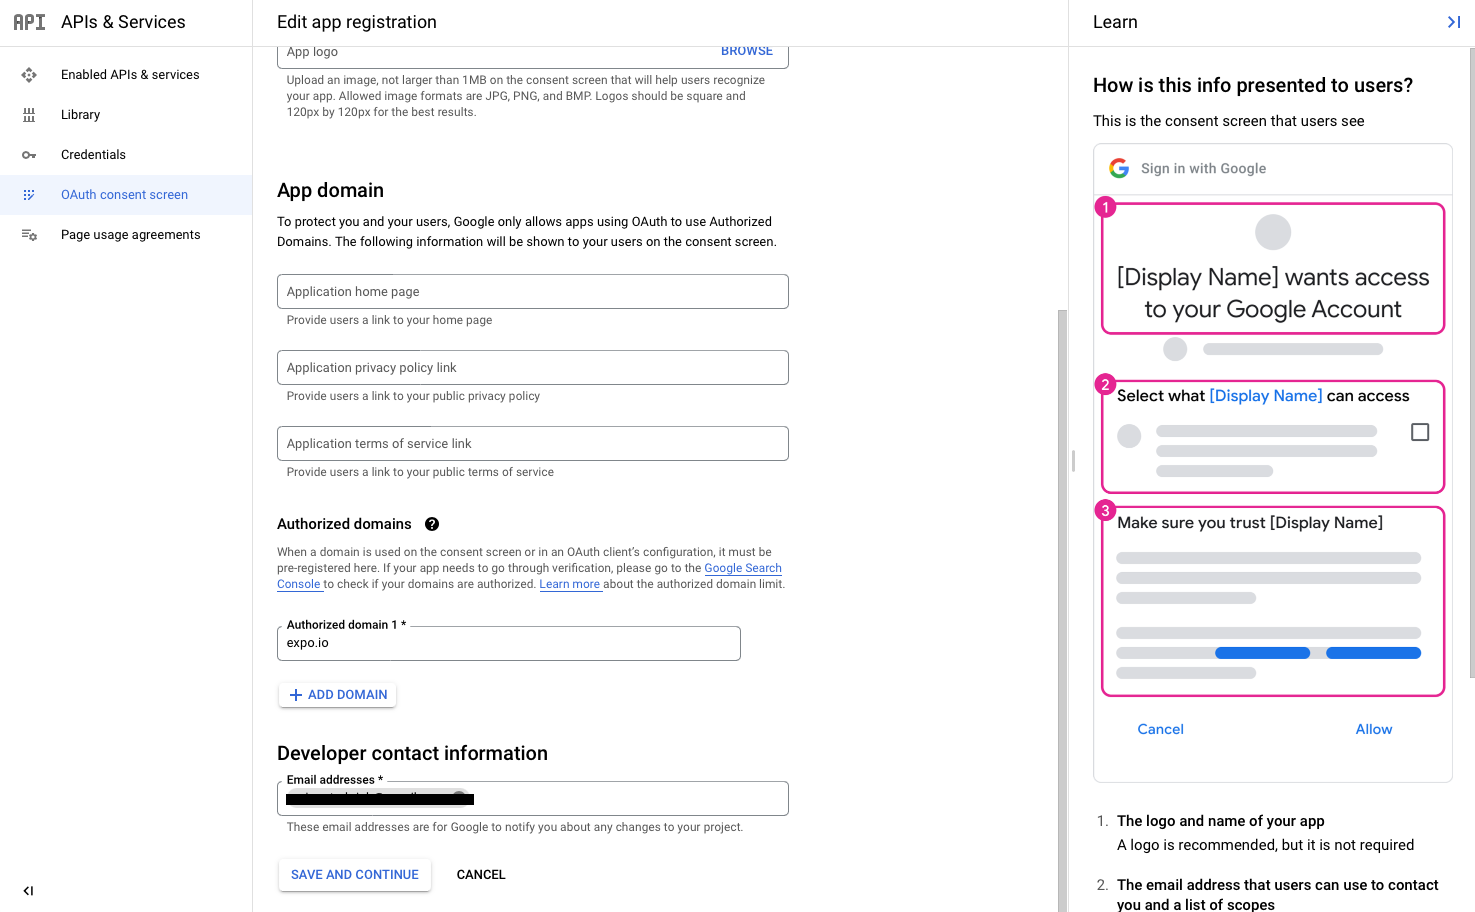
Fill in those details and mention “expo.io” in the Authorised domains list since we would be making requests via expo during development. Click on “Save and Continue“.
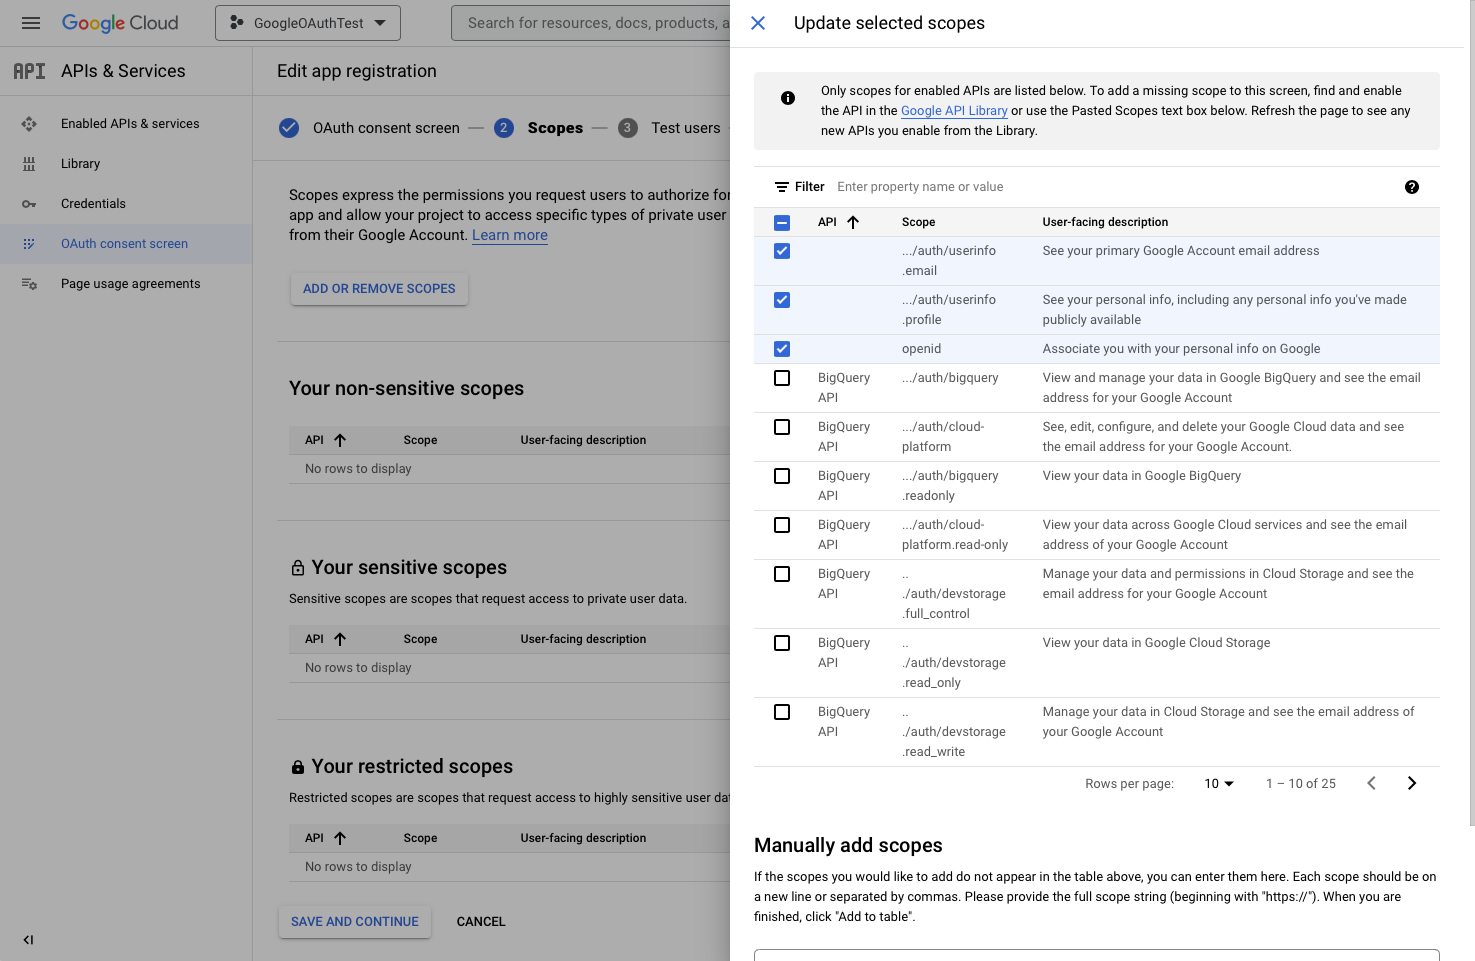
6. Add the scope of access for our application. Click on the “Add or remove scopes” button and then on the first three checkboxes for email, profile information, and OpenID. If you want any other access as well like google photos or cloud storage APIs then you can check those boxes as well.
For our implementation, we would just need the user details. Scroll down and click on the “Update” button. Scroll further down on the main page and click “Save and Continue” again to move on to the next section.
7. Add the emails of test users. In my case, I’m just going to add my own Gmail by clicking on the “Add Users” button. Once you’ve done that click on “Save and Continue” again to move on to the next section.
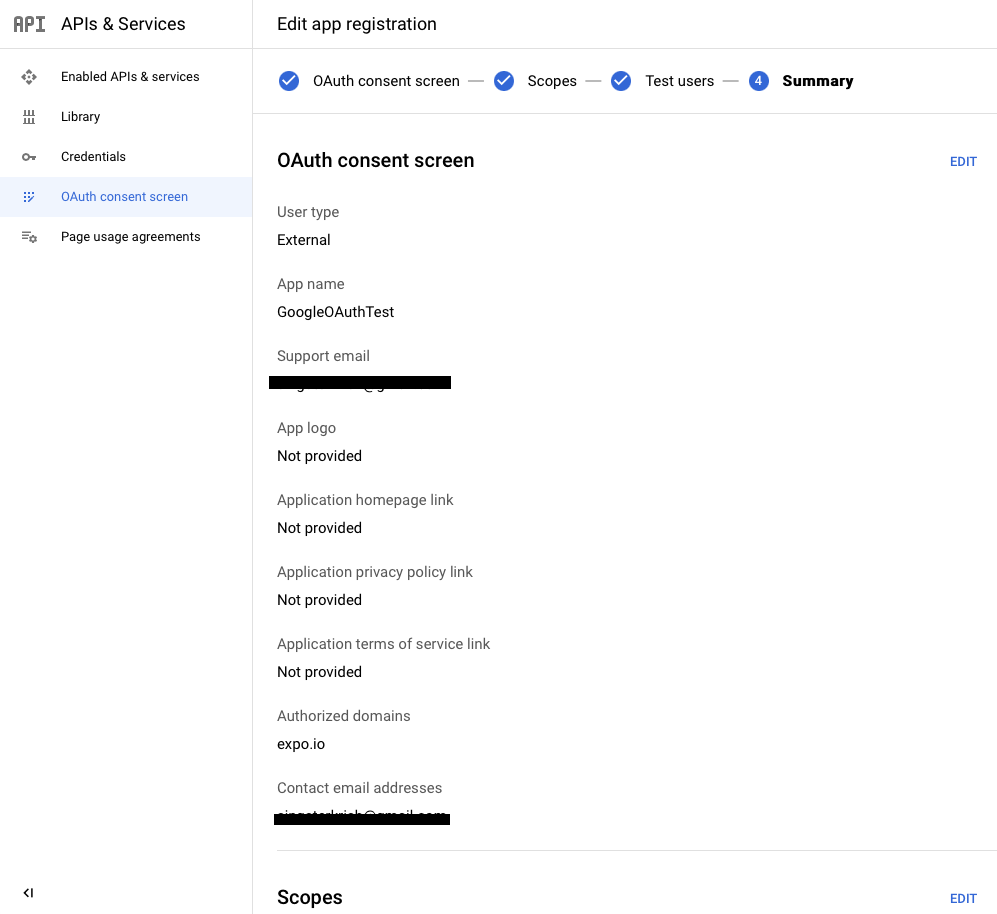
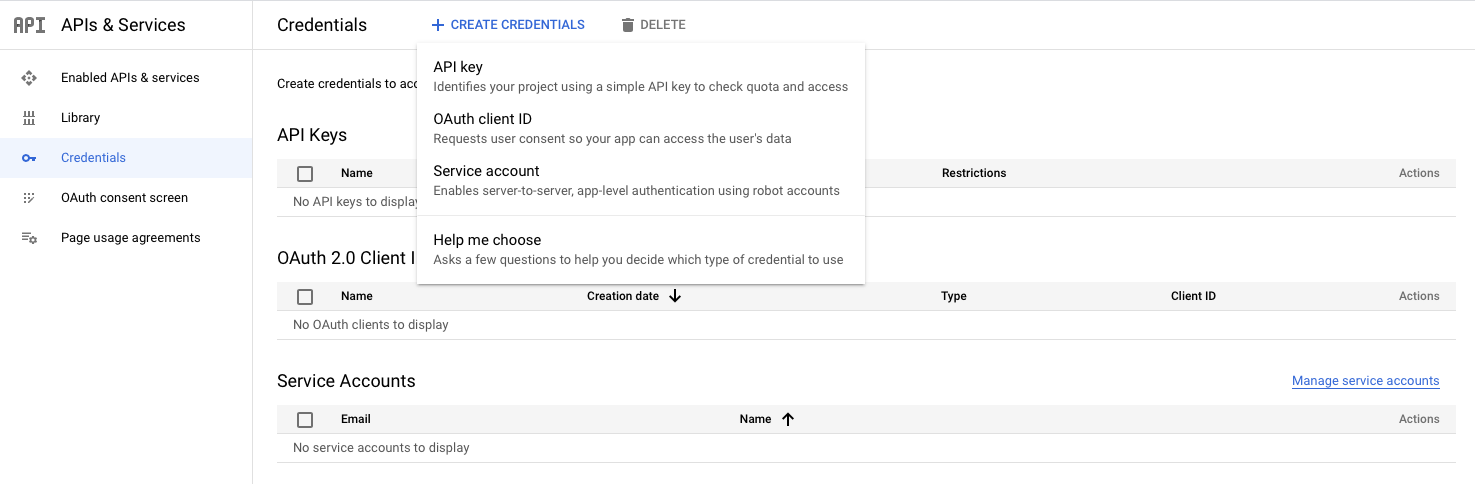
8. You can check the summary of all the information you filled out and then head over to the Credentials sections by clicking on it on the left side drawer.
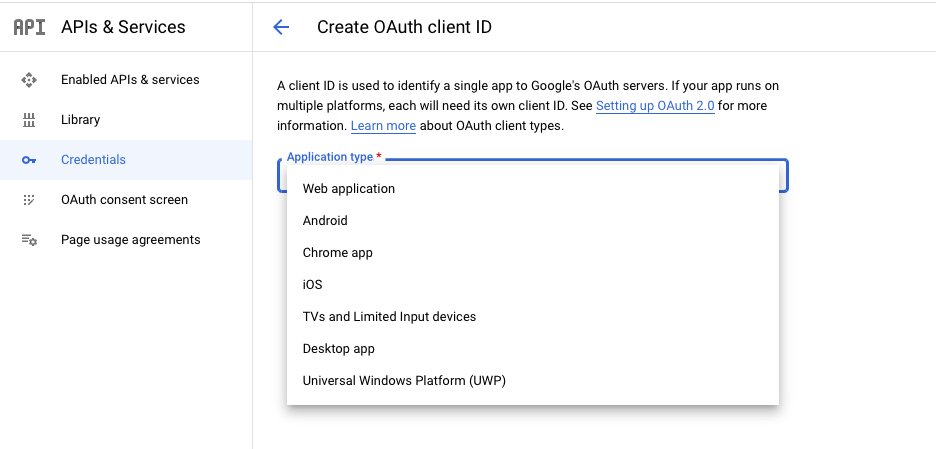
9. This is where we create the OAuth Client ID. Click on the “Create Credentials” button on the top bar and then on “OAuth client ID”. You’ll be asked to choose an application type.
For testing on development with expo via web browser, we select “Web application“.
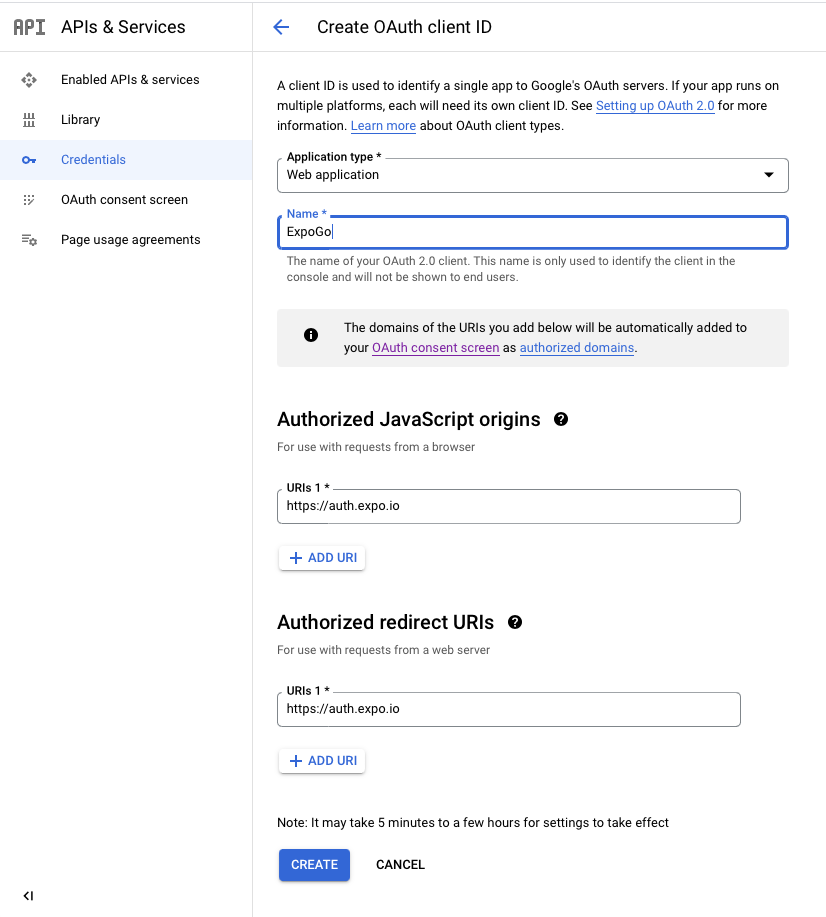
10. Fill in the name as ExpoGo, the Authorised javascript origin URL as “https://auth.expo.io” and the redirect URL as “https://auth.expo.io/@your-username/your-app-slug” where @your-username will be your expo id and your app slug will be present in your app.json.
We’ll retrieve these a bit later, for now just fill both fields with the Authorised javascript URL as mentioned above and click “Create“.
Finally, you will be getting your client ID and client secret information on a pop-up. Save these two for later use within the app.
Now that the entire google cloud console configuration is done, in the second part of this blog series, we shall start with the expo project setup and complete the part of the authentication flow where we receive the authorization code. Using this, in the third part of the blog series, we will fetch the access as well as refresh token and finally get access to the user data.
Hoping to see you there! Cheers!