
As people working in the IT Industry, we always have many routine tasks we do manually that can be automated to make our lives easier. One of the many tasks is sending emails and collecting the relevant data to attach to the email.
We need to do some basic work like collecting the data and putting them across in an excel sheet and then copy-pasting that data in the body of the email. Such a long process right? What if I say we can automate this process and save time?
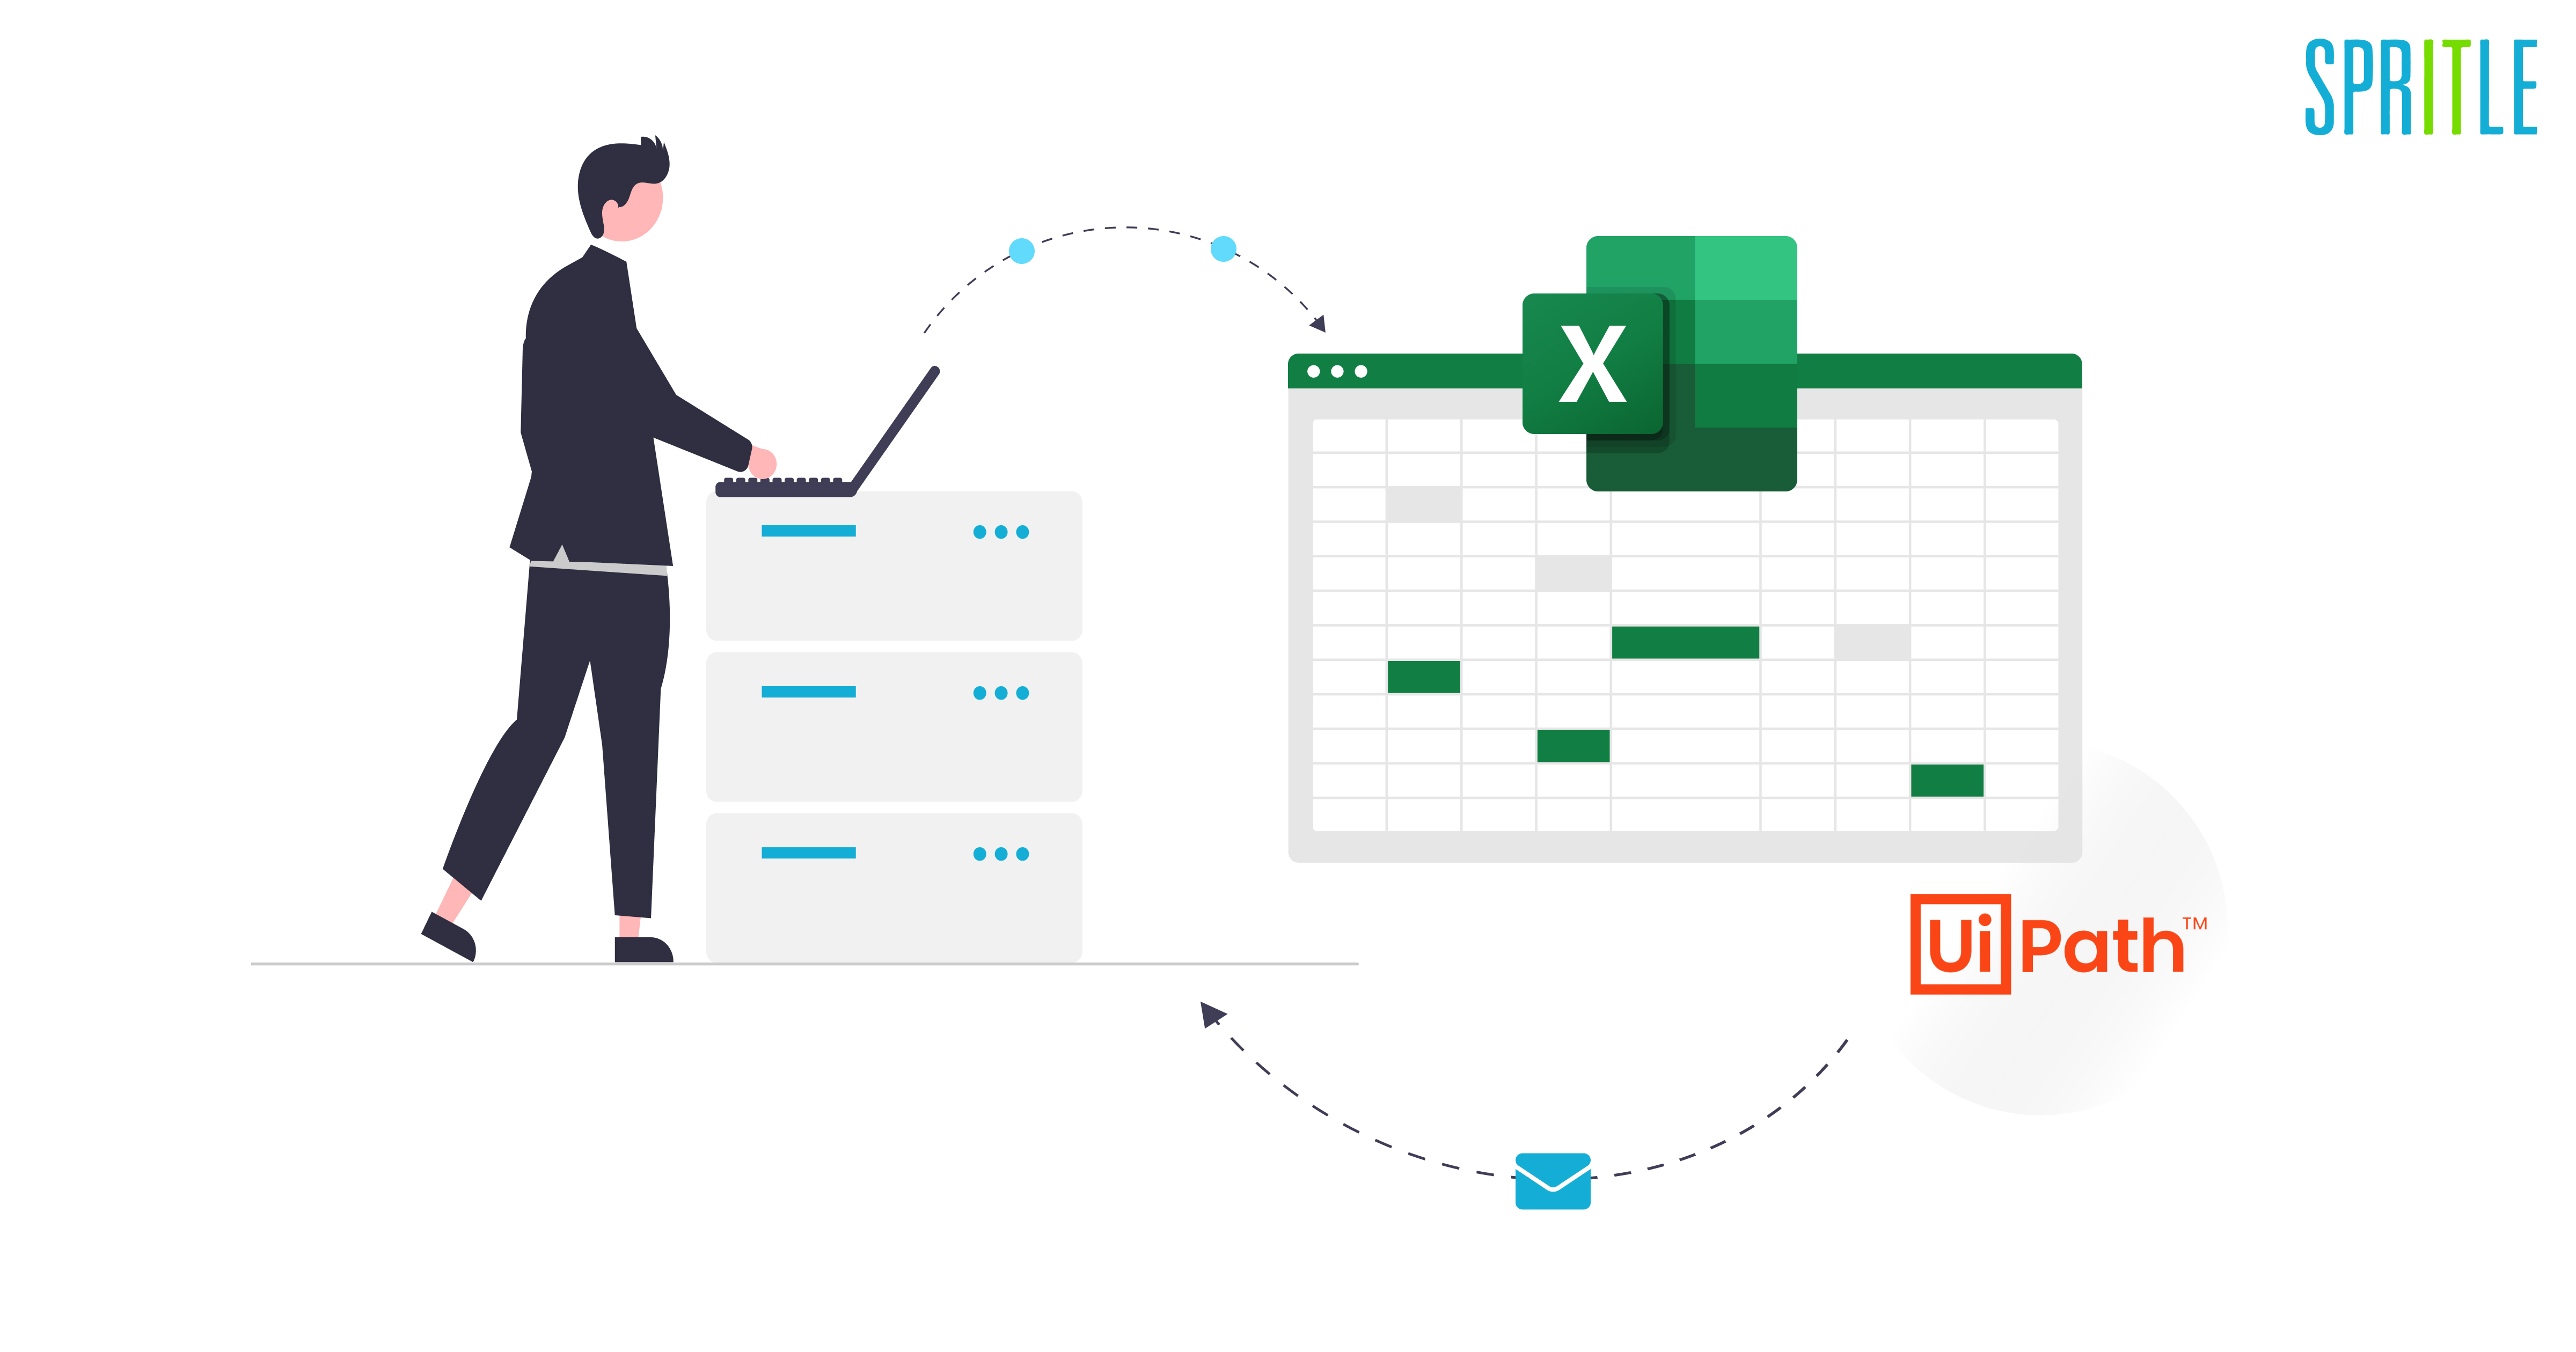
In this blog, we are specifically going to see how to automate the data mailing process from an excel sheet using the UiPath tool. Before getting into the topic let’s see a quick overview of UiPath.
UiPath is a Robotic Process Automation tool that runs end-to-end large-scale automation. UiPath is used by many industries ranging from computer software to financial services, healthcare, banking, telecommunications, and much more.
Excel and Email Automation
As we all know, the automation process reduces human effort and improves performance simultaneously. In that case, Excel Automation brings you countless automation opportunities, regardless of how small or complicated the tasks you are trying to perform.
Email Automation automates the process of sending emails to another user. For that, we just need to provide our login credentials and the user email to which we want to send the mail and that’s it, rest of the work will be done by the automation bot.
How I implemented the Data Mailing process in Uipath Studio
Before getting into the process flow, let’s look into the prerequisites and packages that need to be installed.
- To Generate Report– RBanda.TestReportGenerator.Activities
- To get data from the excel– Excel Automation Activities
- To send the tabular data to the user– Email Automation Activities
Main Workflow
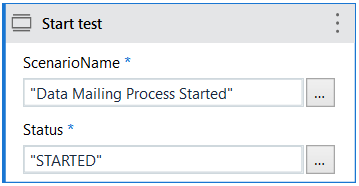
Step 1: The first activity is to start the test from the Test report generation activity. The scenario name and the status have been filled in as shown in the below image.
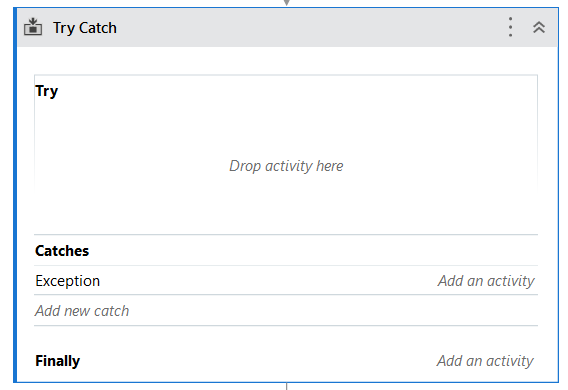
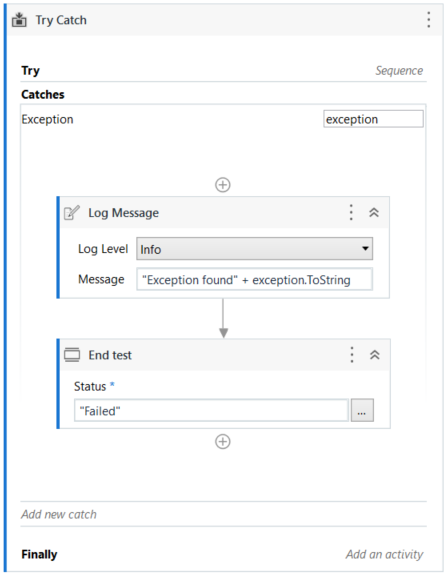
Step 2: TryCatch block has been used for executing the sequence if any exceptions arise.
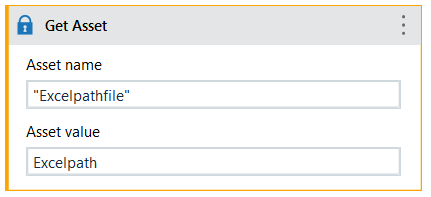
Step 3: Create an asset in the orchestrator and save the path of the excel file which we used to get the user’s data. Use Get Asset activity and call the respective asset name to get the user data.
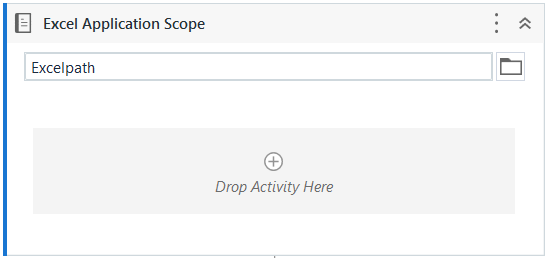
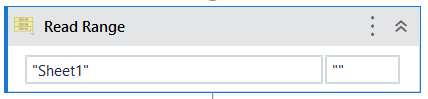
Step 4: In this process, the excel automation activities are used to get the data from excel. We should always do all excel activities under the Excel Application Scope. Enter the variable that is used to store the excel file path. Use the Read Range activity to read the data from the excel file.
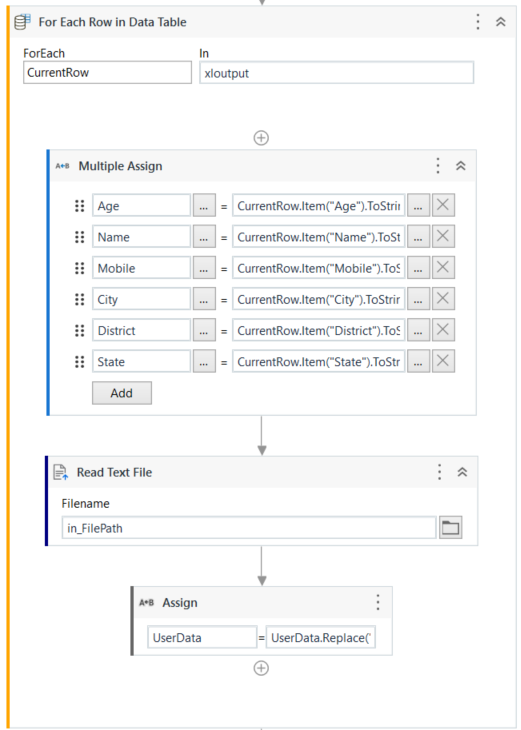
Step 5: Use For Each activity for getting the user data row-wise and assign multiple variables for the data contained in the excel file. We used a text file containing HTML code to send the data in a tabular format on the subject of the mail body. Assign those variables and replace them with respective text contents.
Step 6: For sending the data to the respective Users use Email Automation activity and call the variables to send the mail in a tabular format.

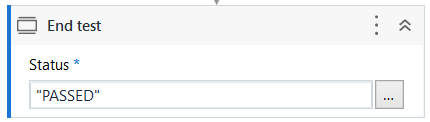
Step 7: The End Test activity is used to report that the flow is passed.
Step 8: Then we go for the TryCatch block and the exceptions are mentioned. If any exception arises it will be logged using the Log Message Activity with the specific exception. The End Test activity is used to report if the case fails.
Step 9: Click on the Debug file and Run from the Robbin tab to execute the automation from the studio. View the Output Pane with the log messages with the time taken for the automation process. Then publish the workflow in the orchestrator for running the process using UiPath Robot.
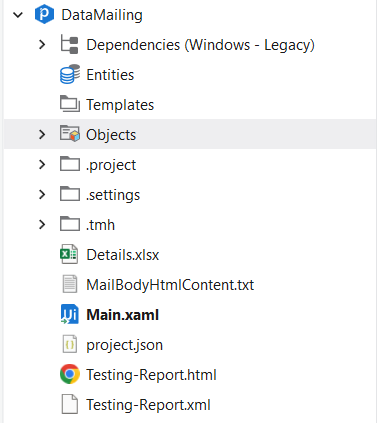
Step 10: View the Project Pane for the report which is created in .html and .xml formats.
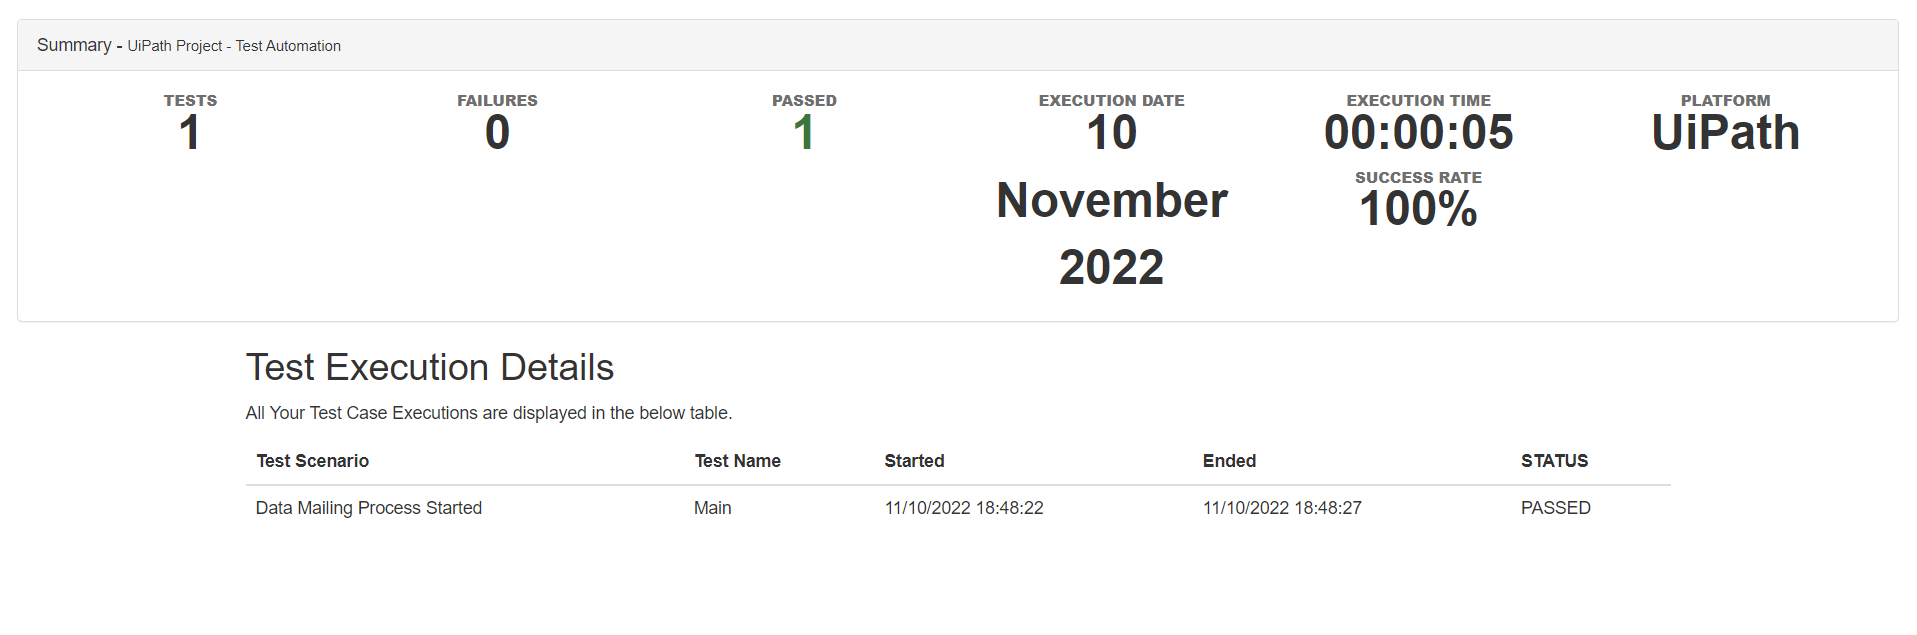
The report in .html format has the details like Success Rate, Date and Time, Platform, and Test status. We can also send this report to other users via mail.
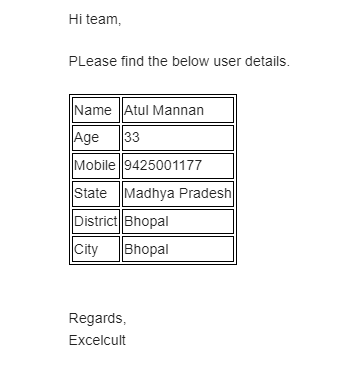
The Output User data in tabular format looks like the below image attached.
This is the complete flow of the data mailing workflow using UiPath Tool. From this blog, I hope you have got an idea of the process workflow and activities that have been used for the data mailing process.
With this sample and basic flow of data mailing, we can build multiple workflows and automate the day-to-day regular manual process which reduces human intervention and acts as an assistant for the end users using UiPath.
See you all in another informative blog like this!