
Hello buddies! After discussing some of the best and hottest aspects of automation testing and low-code development in my previous blogs, I am all back with a brand new one today! If knowing all about low-code development platforms like power apps is one side of the story of being a future-savvy developer, then learning the steps in testing the developed application in the power apps is another. Therefore, let’s explore how no-code automation testing in Power apps gets performed in this blog post!
Automation Testing and Power Apps: Why Are They So Captivating?
So, we all know testing a software application involves several complicated steps. But with automation techniques emerging as one of the best trends of recent times, it’s no wonder that software testing has witnessed some robust leaps and bounds and improved UI customization efficiency.
So, readers! What will happen if automation testing doesn’t require any code or programming languages? Wow! Here I think it’s noteworthy to express my excitement about ‘No code automation testing’ being possible using Power Apps. We all might have excess knowledge about automation testing using different programming languages or external tools but for an emerging trend like ‘no code automation testing?’ Join me to figure out all the steps in no code automation testing using Power apps. Also read: Will low-code development platforms like Power Apps kill a developer’s job?
No Code Automation Testing Using Power Apps: Let’s Dive in!
So, when we slip into developing an application using power apps, the next step is to test it using the same. The steps followed in testing an application using the power app are as follows:
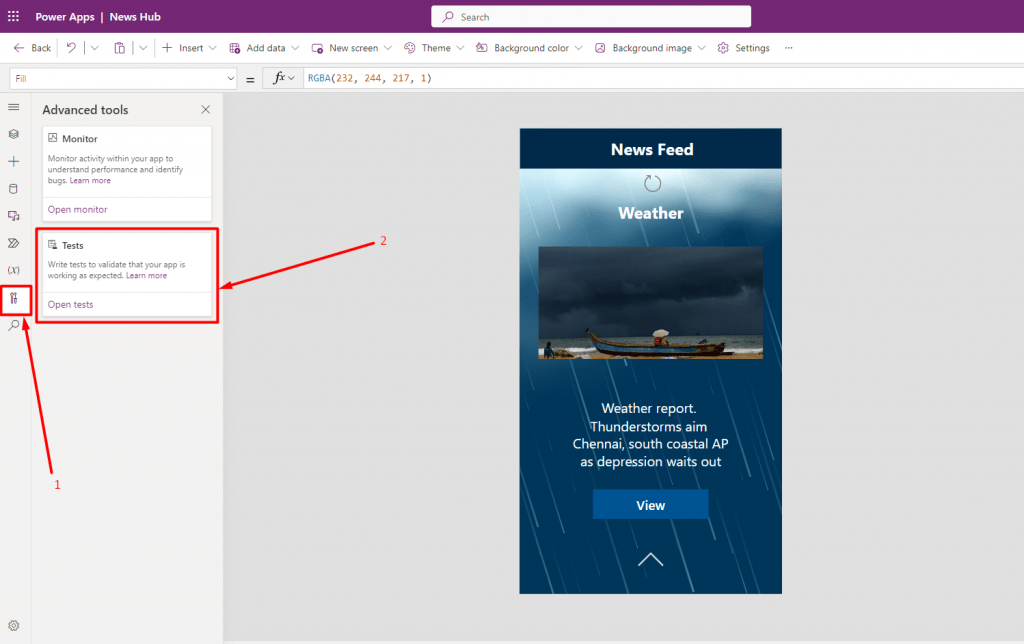
Step 1: Choose the existing application and click on the edit icon.
Click the ‘Advanced Tools’ in the side navigation menu, it will display sub-navigation menus for the ‘Advanced Tools’.
Click the ‘Test’ option.
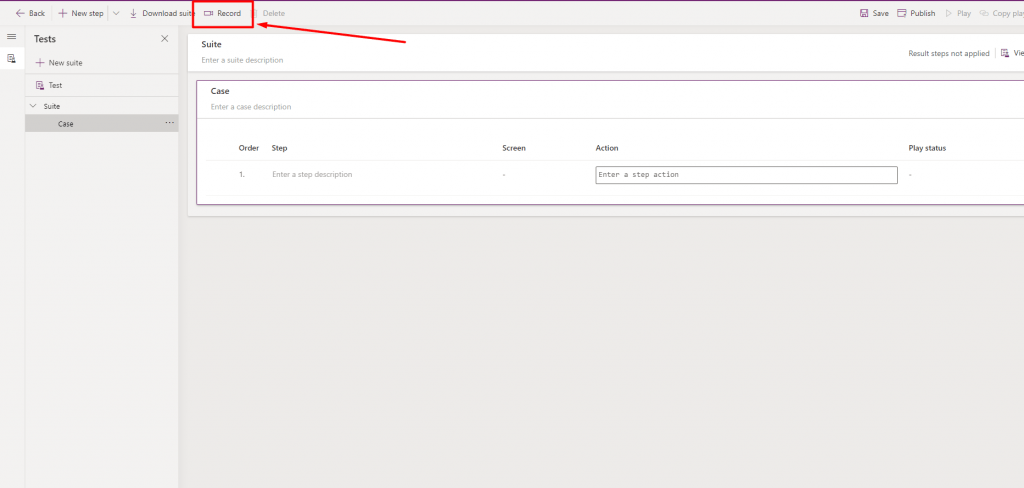
Step 2: A test page will get opened in a new tab. By default, choose the case under the suite dropdown at the left of the page.
Click the ‘Record’ in the title bar of the test studio page.
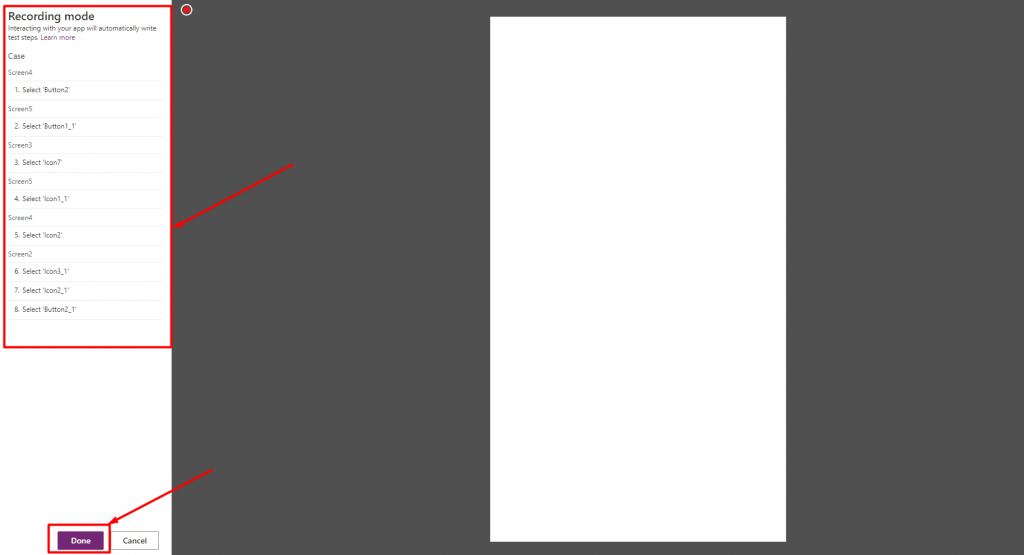
Step 3: Record the functionality of the application by clicking each step. The ‘recorded’ button actions will be displayed at the left of the screen.
Once the recording gets completed, click the ‘Done’ button at the bottom of the action list.
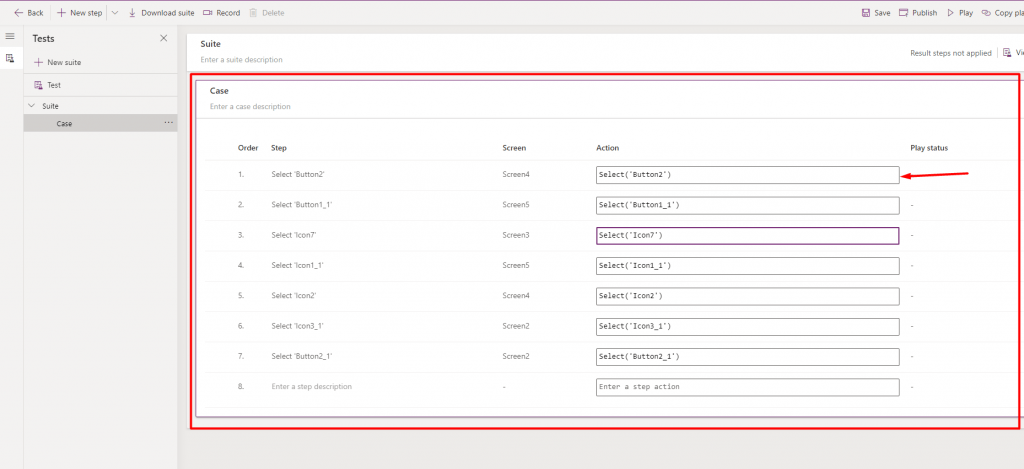
Step 4: On the studio page, the actions recorded will get listed as test scripts
Step 5: The actions can be edited anytime in the ‘Actions’ column of the scripts recorded.
Step 6: Publish the test application so that any member you share the application can access the test.
Click the Publish button again in the confirmation pop-up.
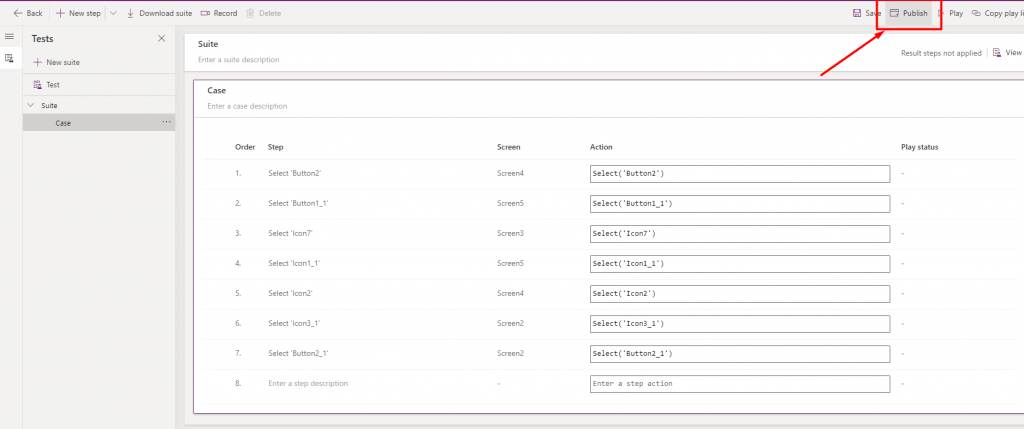
Step 7: Once the application gets published, click the ‘Play’ button at the title bar of the test studio page.
The test script will run according to the recorded test, and the step execution status will be displayed at each and every line of the script at the left of the page.
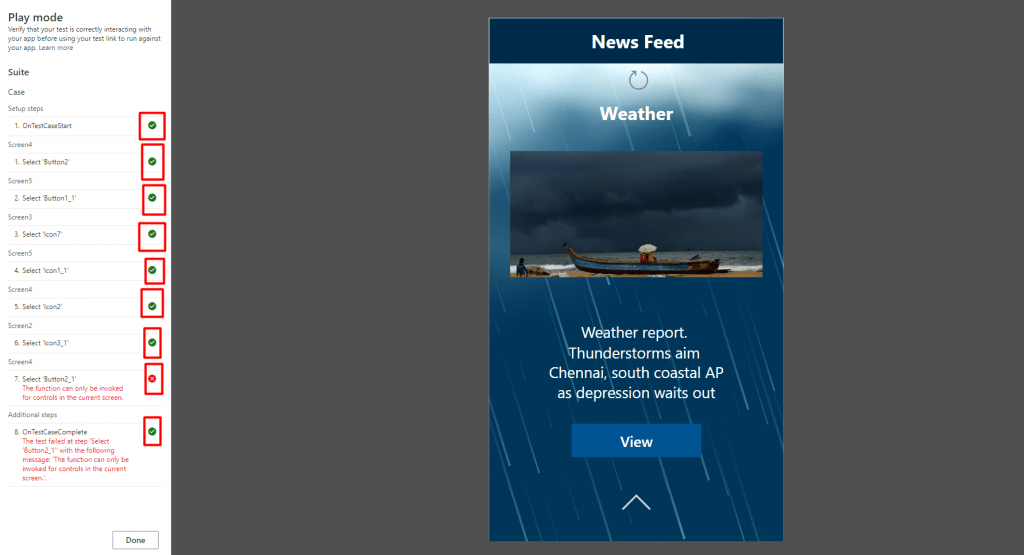
Step 8: Click ‘Done’ when you complete the execution.
Step 9: You can move the action scripts up or down, the insertion of actions in between the scripts, and the deletion of actions.

Step 10) Click the download in the title bar to download the file in the .yaml format. It could be edited in visual studio to re-script the test.
Here I add the demo of the automation test in Power Apps.
Conclusion
So, I hope with this demo video on automation testing in power apps shared here, you will find some insights into ensuring the quality of the application from a Quality Analyst’s perspective. That said, it could be any format of development, but power apps make application testing more efficient.